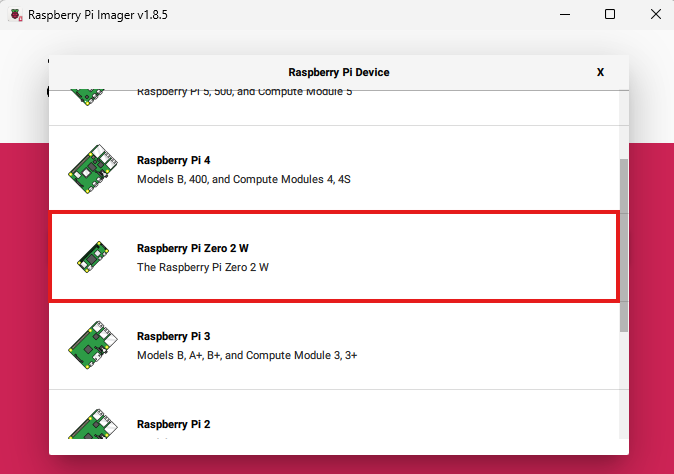
In this exaple we will be using the raspbeyy pi zero 2 w to install klipper on anycubic kobra 2 neo 3D printer
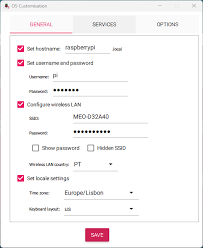
This guide will walk you through the process of installing Raspberry Pi OS Lite (32-bit) on a Raspberry Pi Zero 2 W using Raspberry Pi Imager. Additionally, we will configure SSH and Wi-Fi for headless setup (no need for a monitor, keyboard, or mouse).
Step 1: Download and Install Raspberry Pi Imager
- Download Raspberry Pi Imager from the official website:
- 👉 https://www.raspberrypi.com/software/
- Install Raspberry Pi Imager on your computer:
- Windows: Double-click the downloaded
.exefile and follow the installation instructions. - macOS: Open the
.dmgfile and move Raspberry Pi Imager to the Applications folder. - Linux: Use the
.debpackage or install viasudo apt install rpi-imager.
Step 2: Prepare the MicroSD Card
- Insert a MicroSD card (at least 8GB, recommended 16GB or higher) into your computer using a card reader.
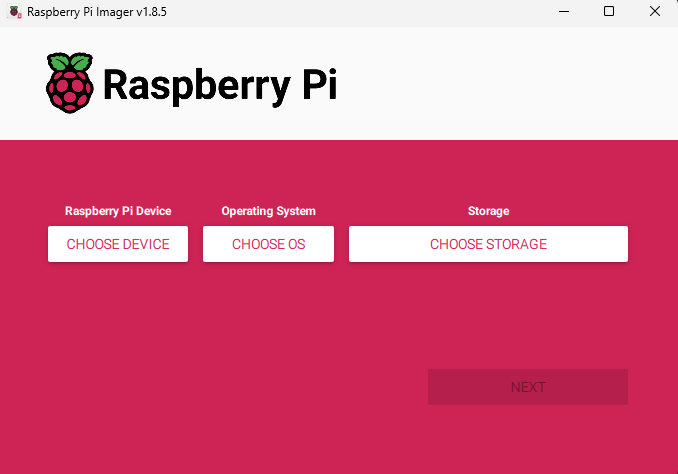
- Launch Raspberry Pi Imager.
Step 3: Select Raspberry Pi OS Lite (32-bit)
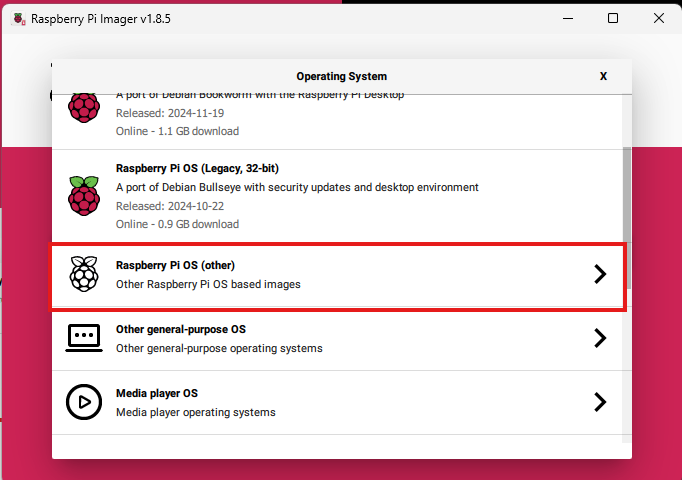
- Click “Choose OS” → Scroll down and select “Raspberry Pi OS (other)”.
- Select “Raspberry Pi OS Lite (32-bit)” (a minimal, non-GUI version).

Step 4: Select Storage
- Click “Choose Storage” and select the MicroSD card from the list.
- Ensure you select the correct drive to avoid overwriting other data.