- Back up your WordPress database.
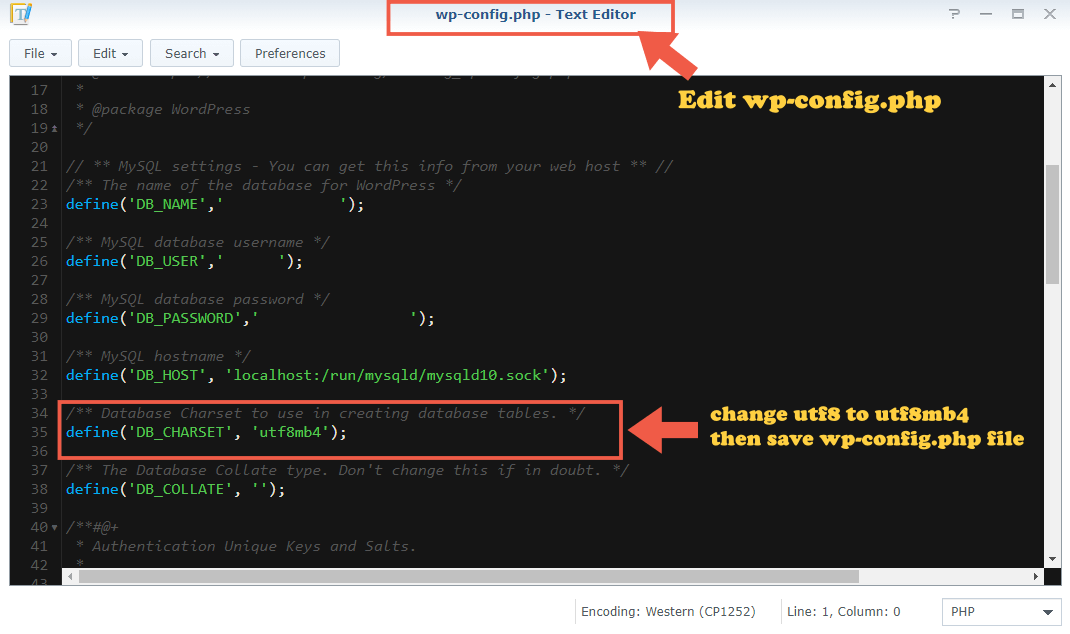
- Go to your WordPress folder and open your wp-config.php file using Text Editor. Find this line: define(‘DB_CHARSET’, ‘utf8′); Change the utf8 text to utf8mb4 then save the file. If utf8mb4 is already set in your wp-config.php continue with the next step. Follow the instructions in the image below.
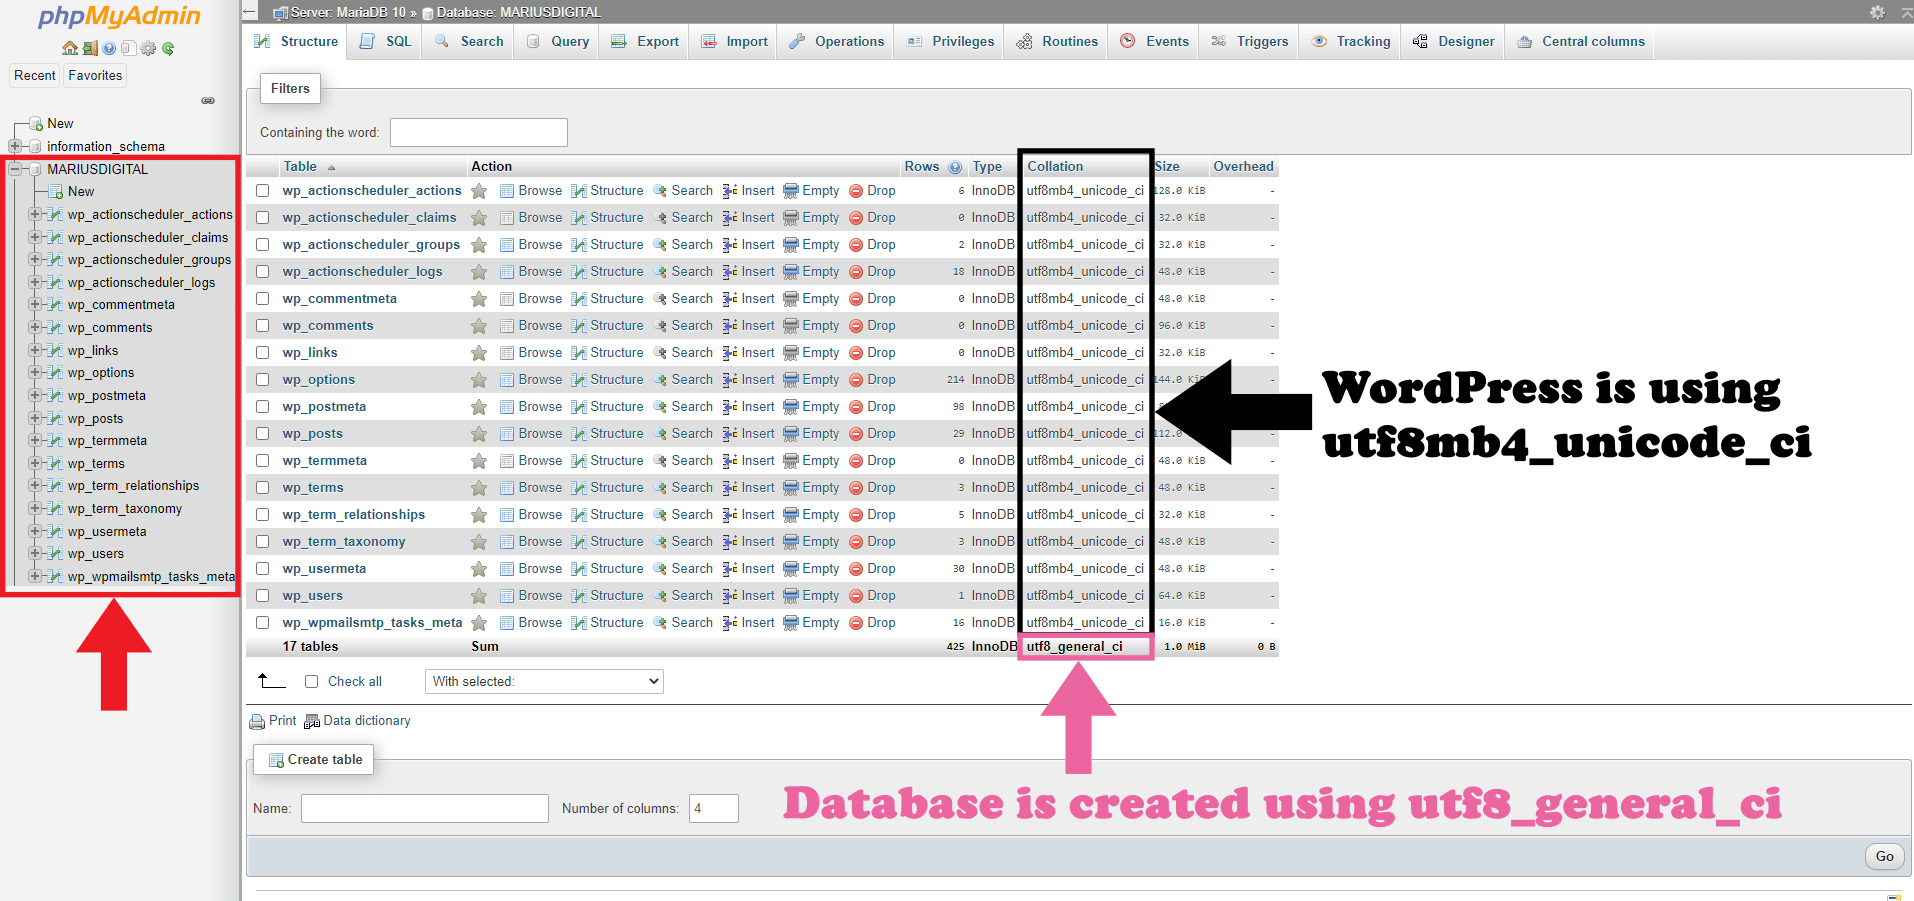
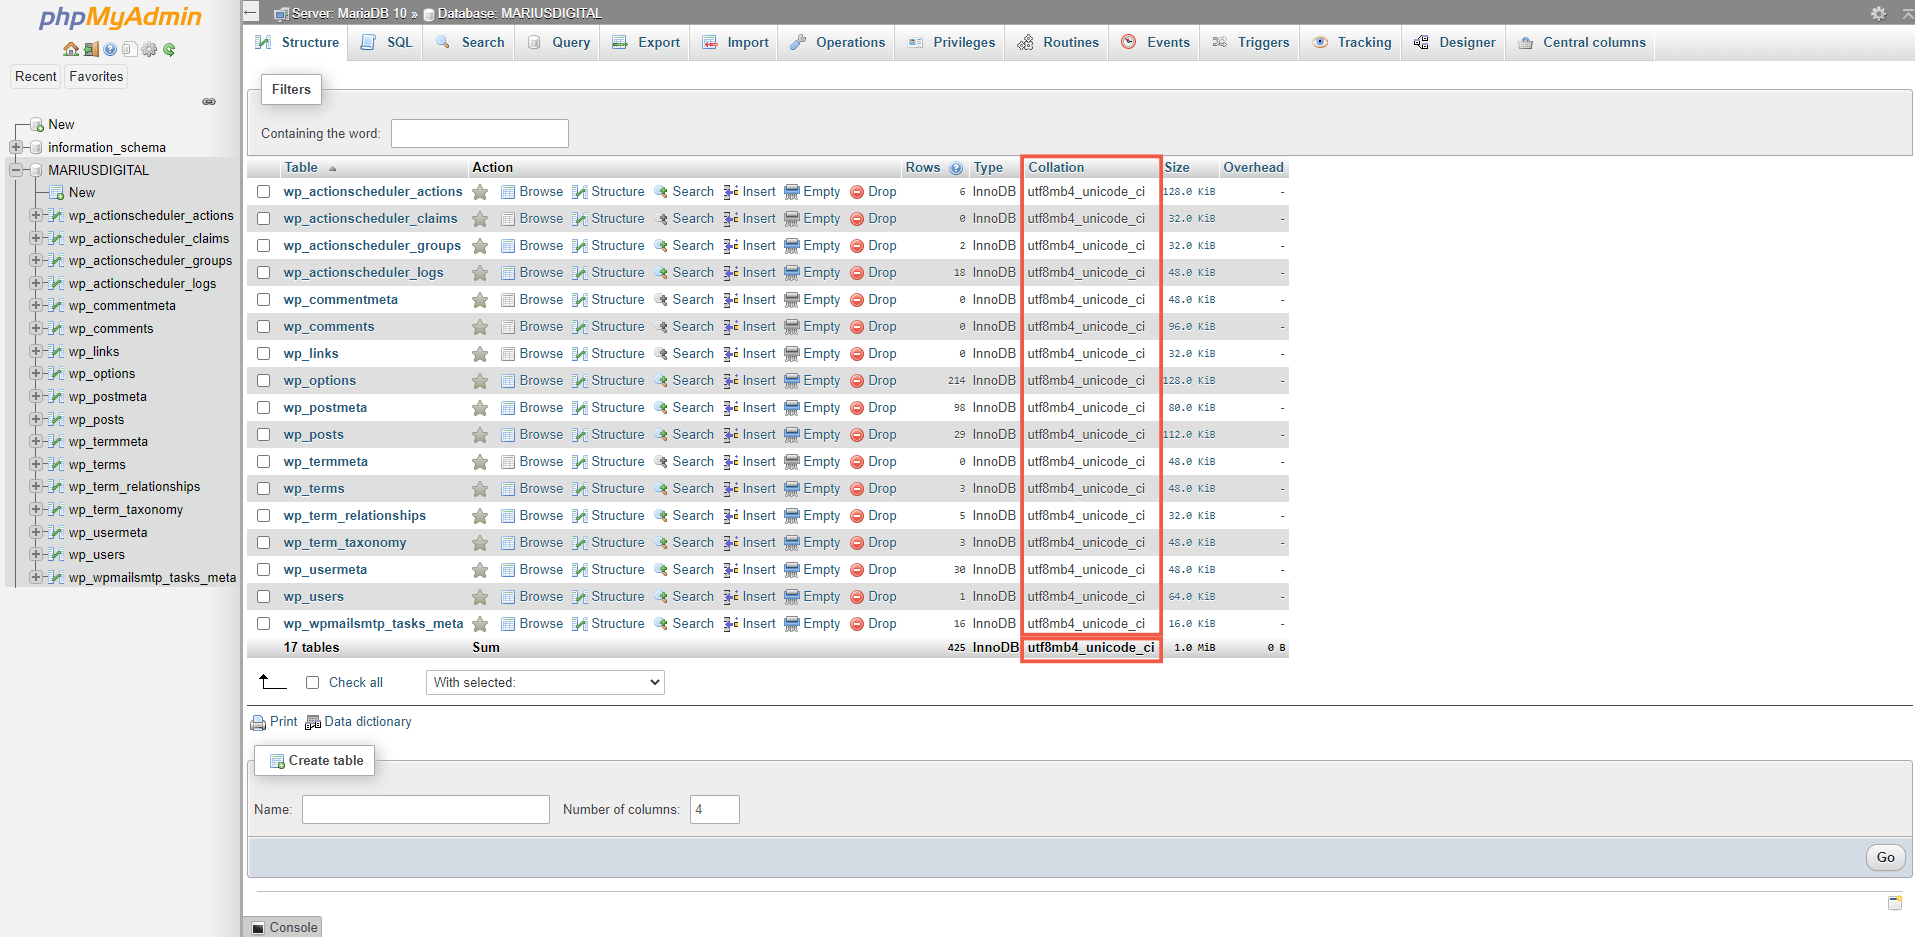
3. Log into your phpMyAdmin using your MariaDB 10 root password. Select your database and check if the latest Collation is set to utf8_general_ci. As you can see in the image below, WordPress correctly uses utf8mb4_unicode_ci but the database was created some time ago using utf8_general_ci Collation. To correct this issue just follow the next STEP. Follow the instructions in the image below.
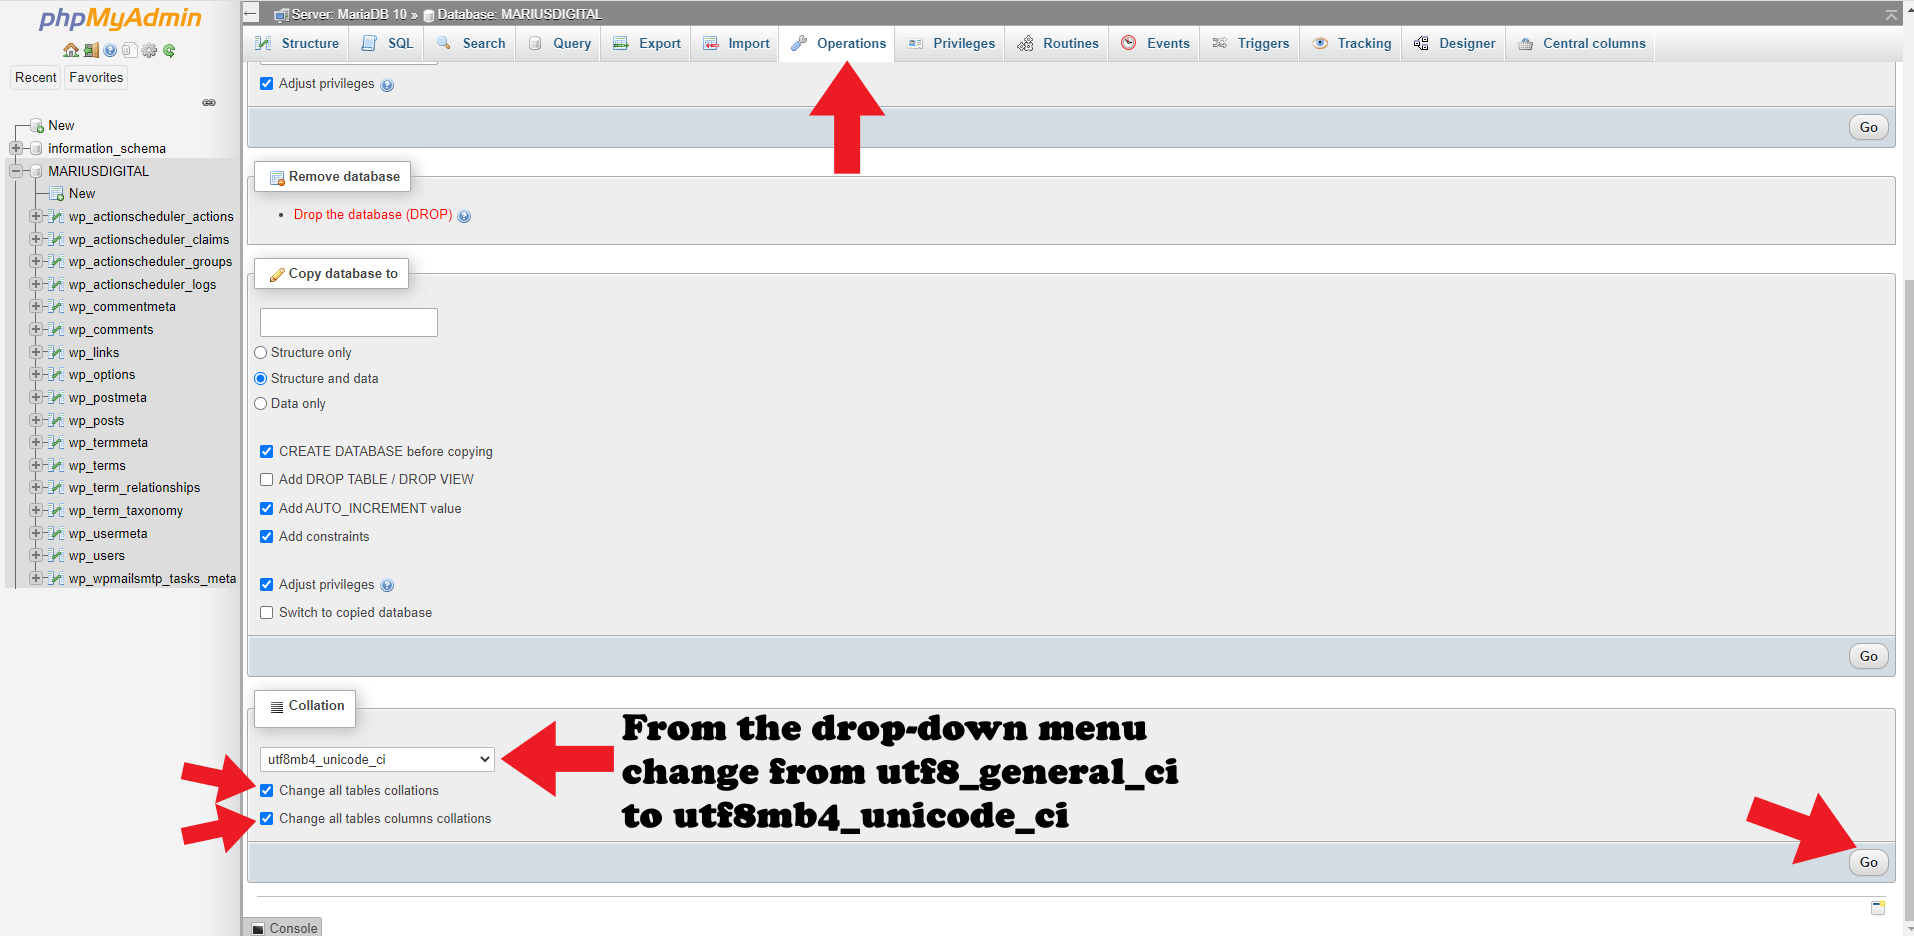
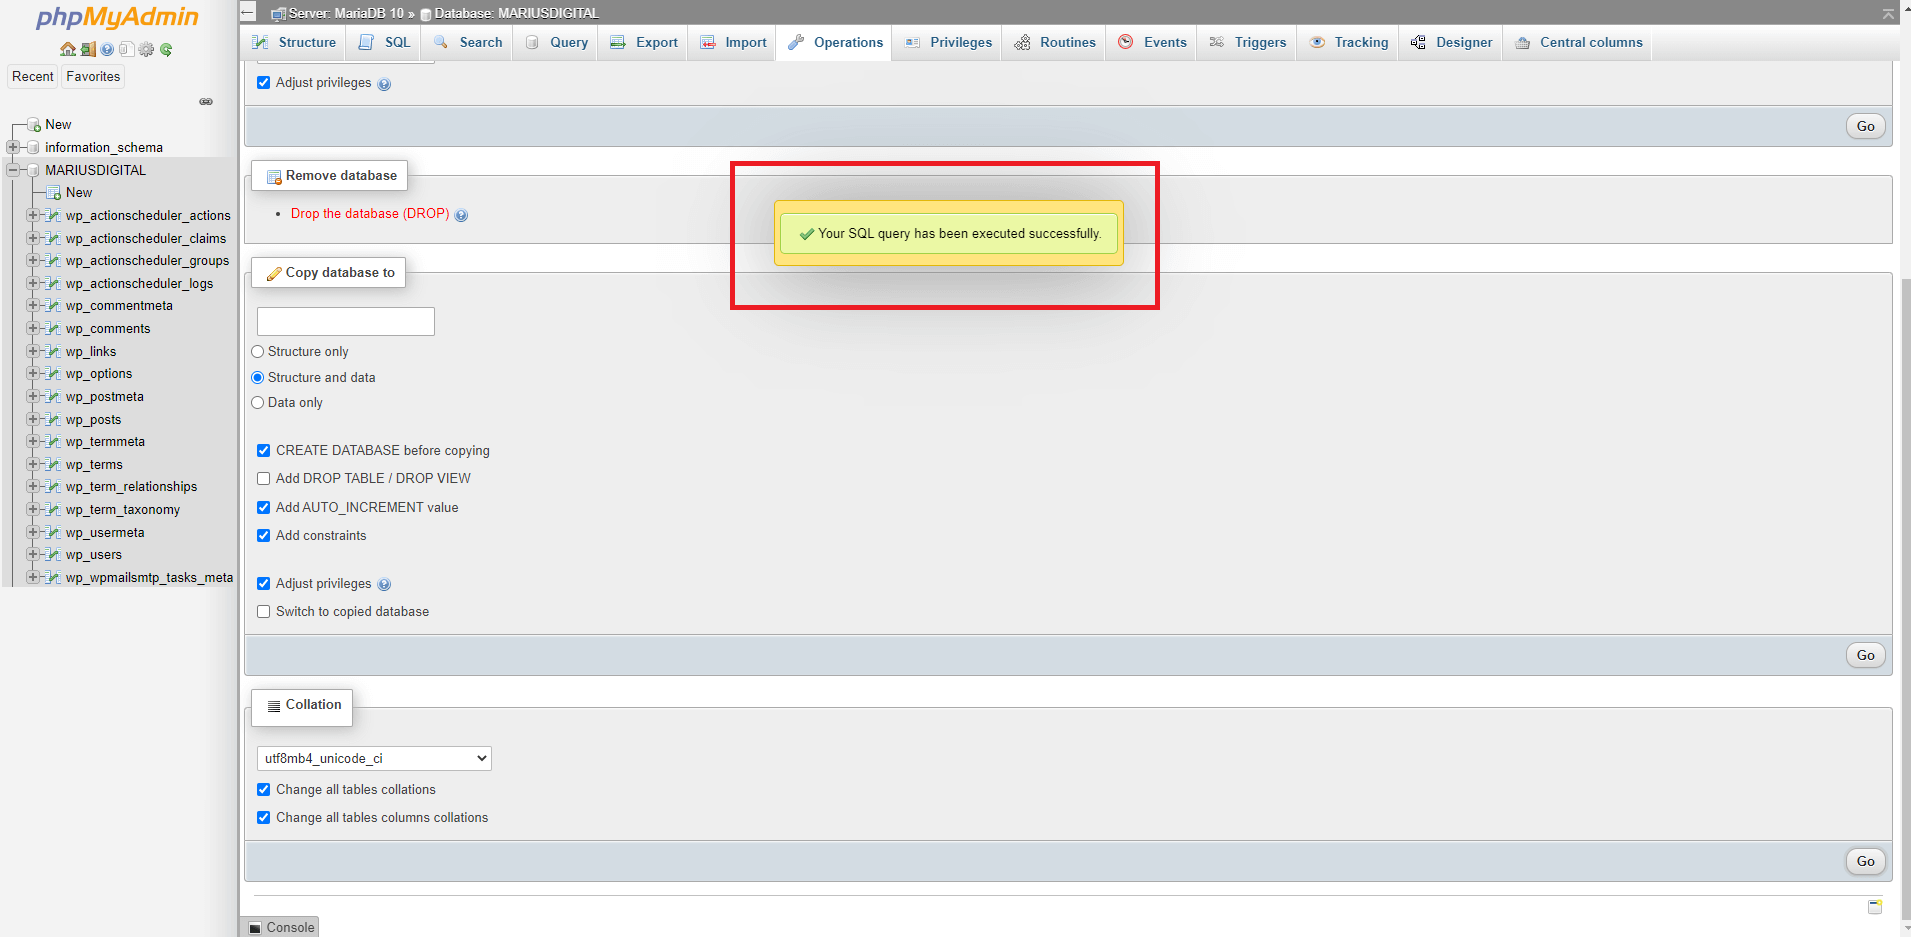
4. In phpMyAdmin select your WordPress database, then click the Operations tab. Scroll down the page a little bit until you find the Collation option. From the drop-down menu select utf8mb4_unicode_ci instead of utf8_general_ci and check Change all tables collations and Change all tables columns collations, then click Go. Follow the instructions in the image below.
5. If everything goes well, you will see the following message: Your SQL query has been executed successfully. Follow the instructions in the image below.
6. If you go back to your database, you can see that the database has been correctly changed from utf8_general_ci to utf8mb4_unicode_ci which is the same collation used by WordPress. Follow the instructions in the image below.
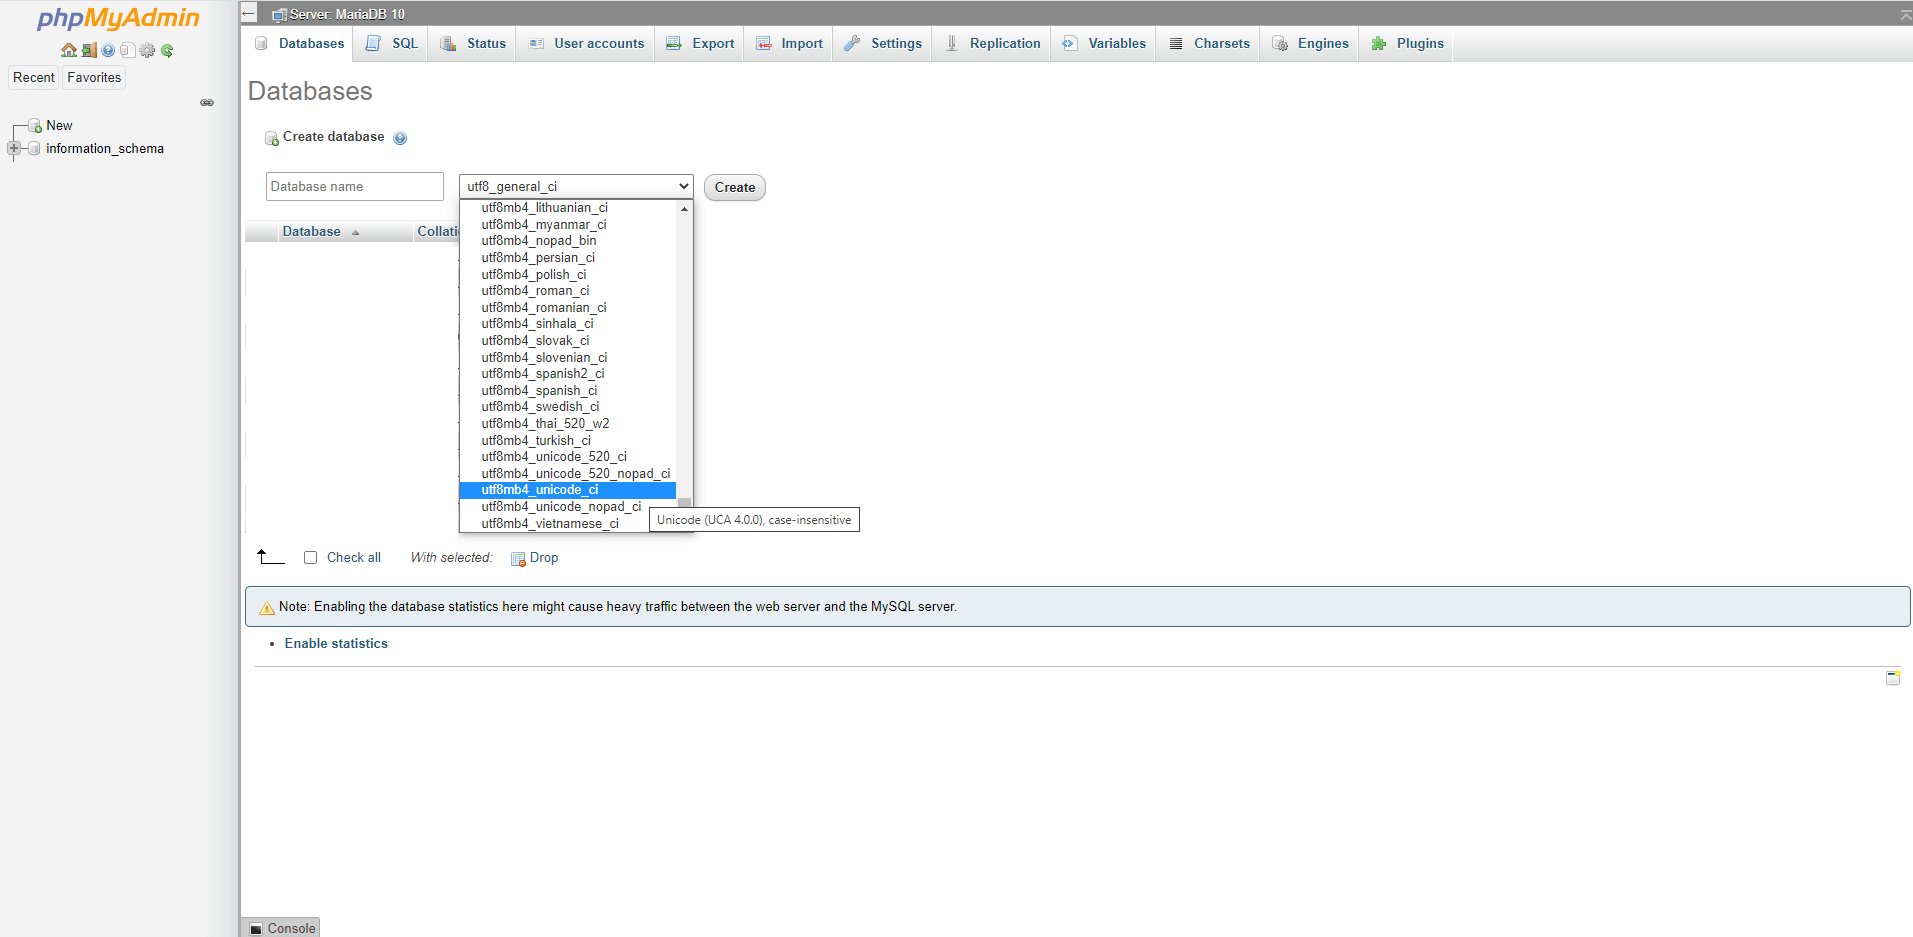
7. The next time you want to create a database using phpMyAdmin to be used exclusively with WordPress, remember to create it by choosing utf8mb4_unicode_ci from the drop-down menu instead of the first option utf8_general_ci just to avoid changing it later like I did with mariushosting. Follow the instructions in the image below.