Using the Matrix Item Assistant
The Matrix Item Assistant provides a step-by-step process for creating matrix items without having to create item options beforehand.
- Go to Lists > Accounting > Items > New.
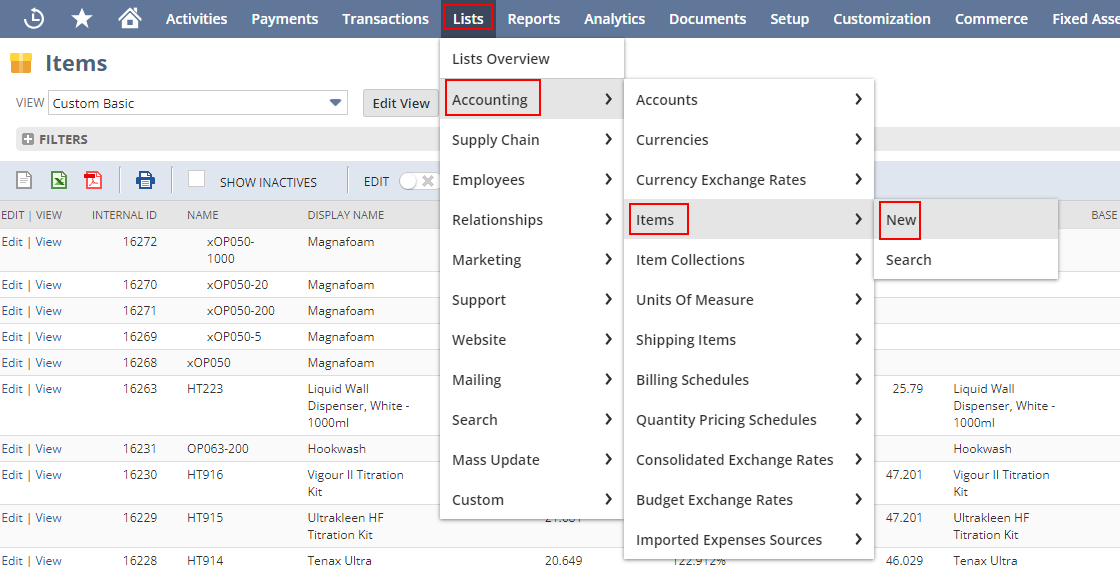
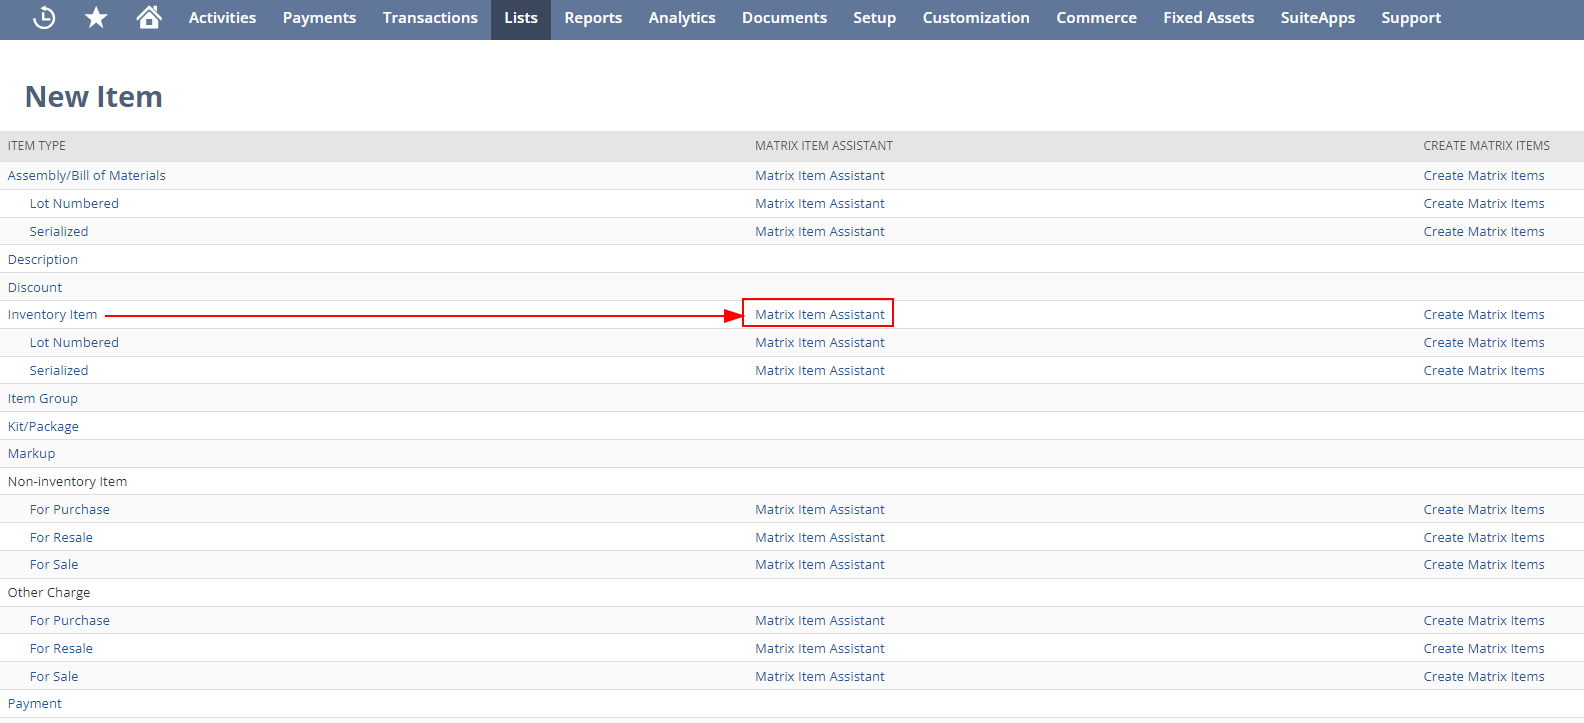
- Click the Matrix Item Assistant next to the type of matrix item you want to create.
The first time you use the Matrix Item Assistant, a welcome popup window opens providing an overview of the assistant. If you do not want to see this popup window again, check the Don’t show this next time box.
- The Matrix Item Assistant divides the creation of matrix items into four steps.
Step 1: Set Up Item Basics
Step 2: Create Item Property Lists
Step 3: Choose Property Combinations
Step 4: Choose and Create Items
Step 1: Set Up Item Basics
- Enter the basic item information for this matrix item.
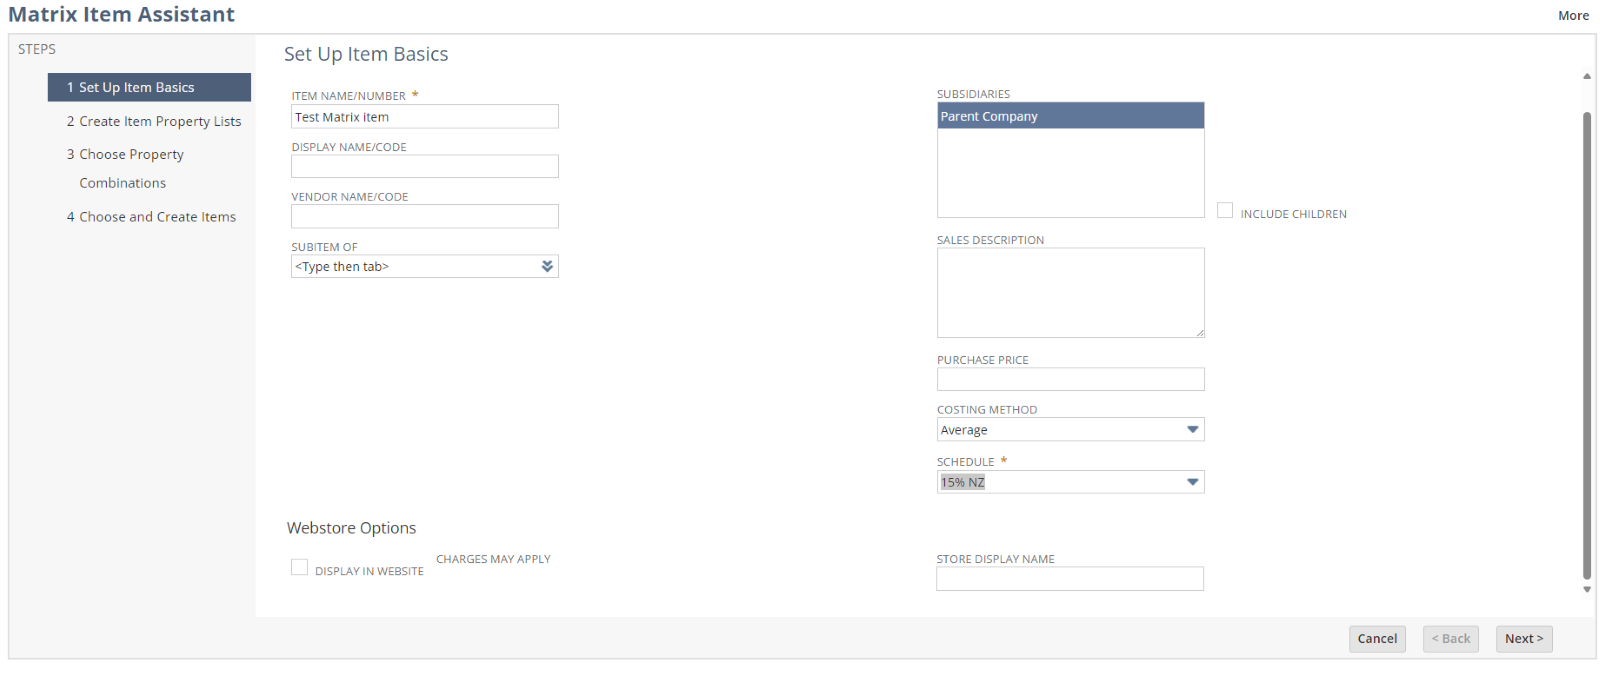
For information about a specific field, click the field name.
These settings apply to all child items in this matrix. For example, if you check the Display in Web Site box, all items in the matrix appear in your website.
- Click Next.
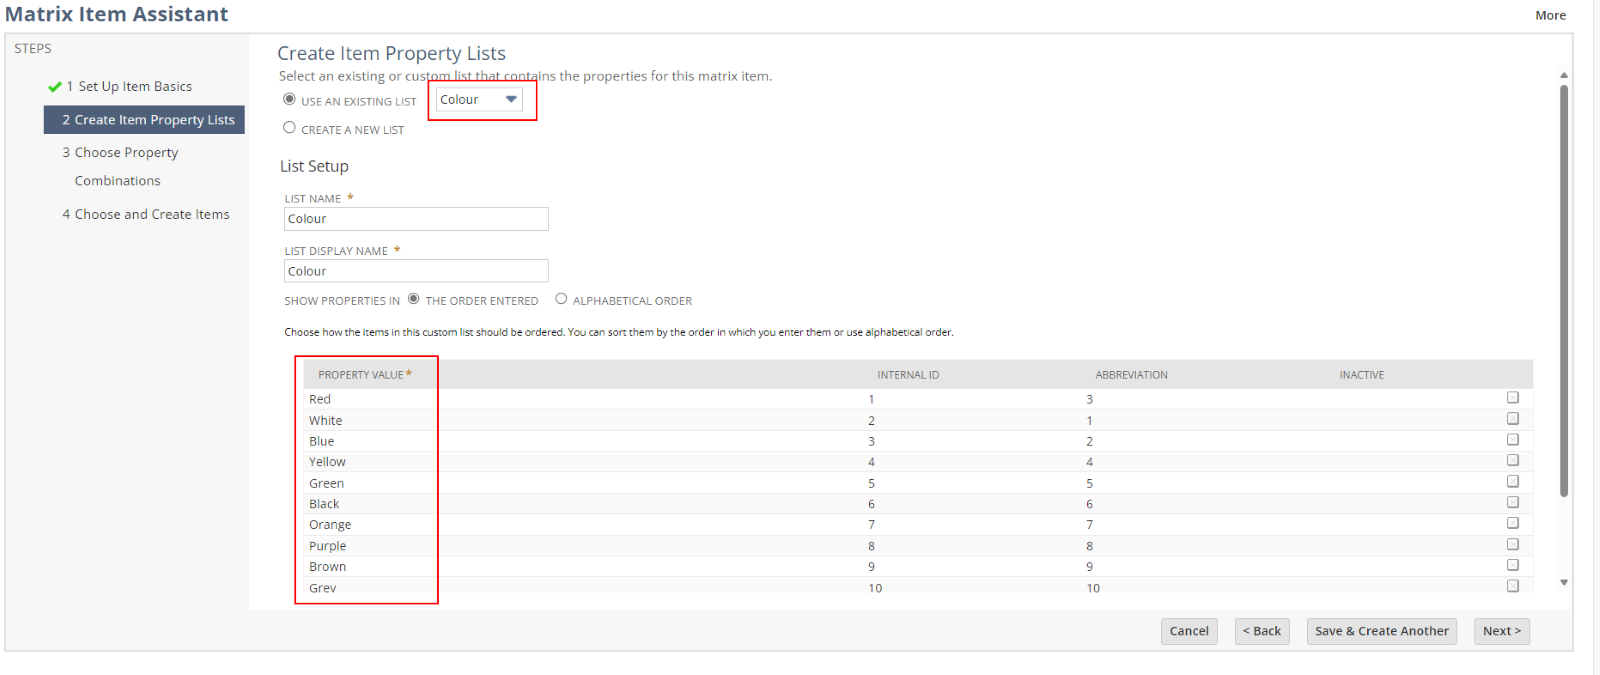
Step 2: Create Item Property Lists
- Choose one of the following:
- Use an existing list – to use a custom list you have already created for this matrix item.
Select a custom list from the list.
- Create a new list – to create a new list of option properties on this page.
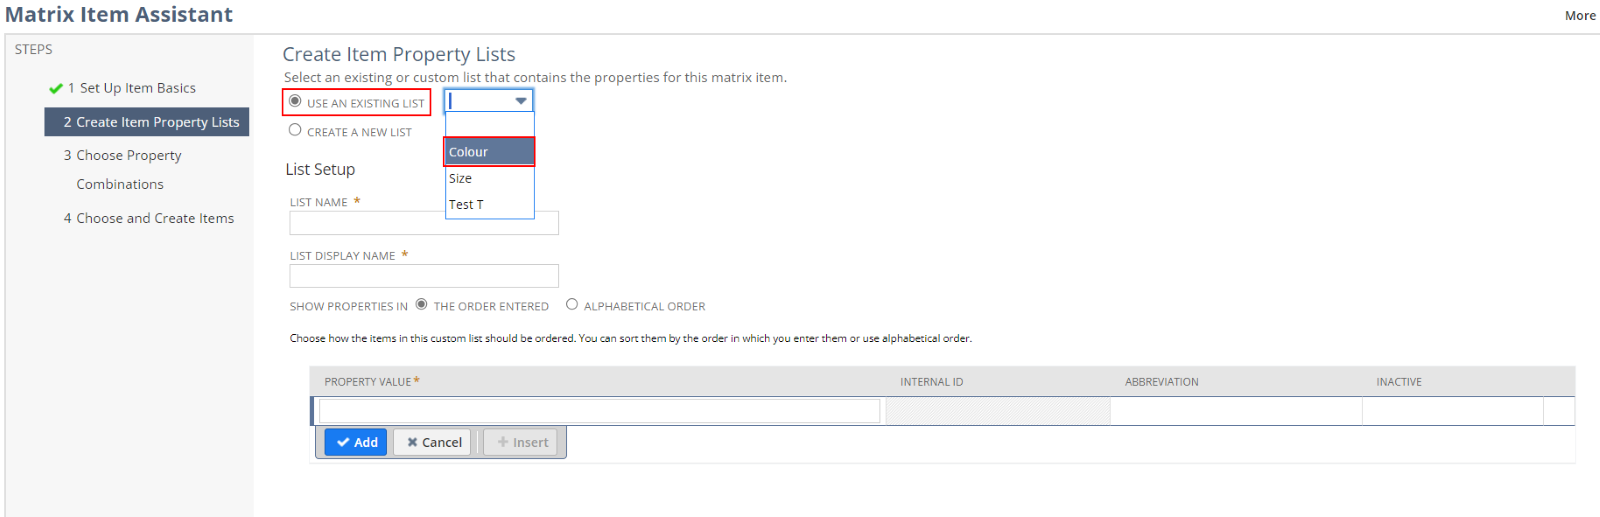
- If you create a new list, enter a List Name to display internally to your company.
The List Name should refer to the item you are creating the options for.
- Enter the List Display Name to display to customers on your website.
The List Display Name should describe the item the customer is looking at. For example, if you were creating a matrix item for t-shirts, the List Name might be tshirt_size, and the List Display Name might be Size.
- Choose a Show Properties option for displaying these items on your website:
- The Order Entered
- Alphabetical Order
- In the Property Value field, enter a property for this list.
For example, in a list of t-shirt colors, you might enter Green.
- Enter an Abbreviation for the property value.
- Click Add.
- Repeat these steps for each option in the list.
- After you finish your list, do one of the following:
- Click Save & Create Another to include another set of options for this item.
If you are creating another list, follow the same steps as above.
- Click Next if you are finished with your lists of options for this item.
Step 3: Choose Property Combinations
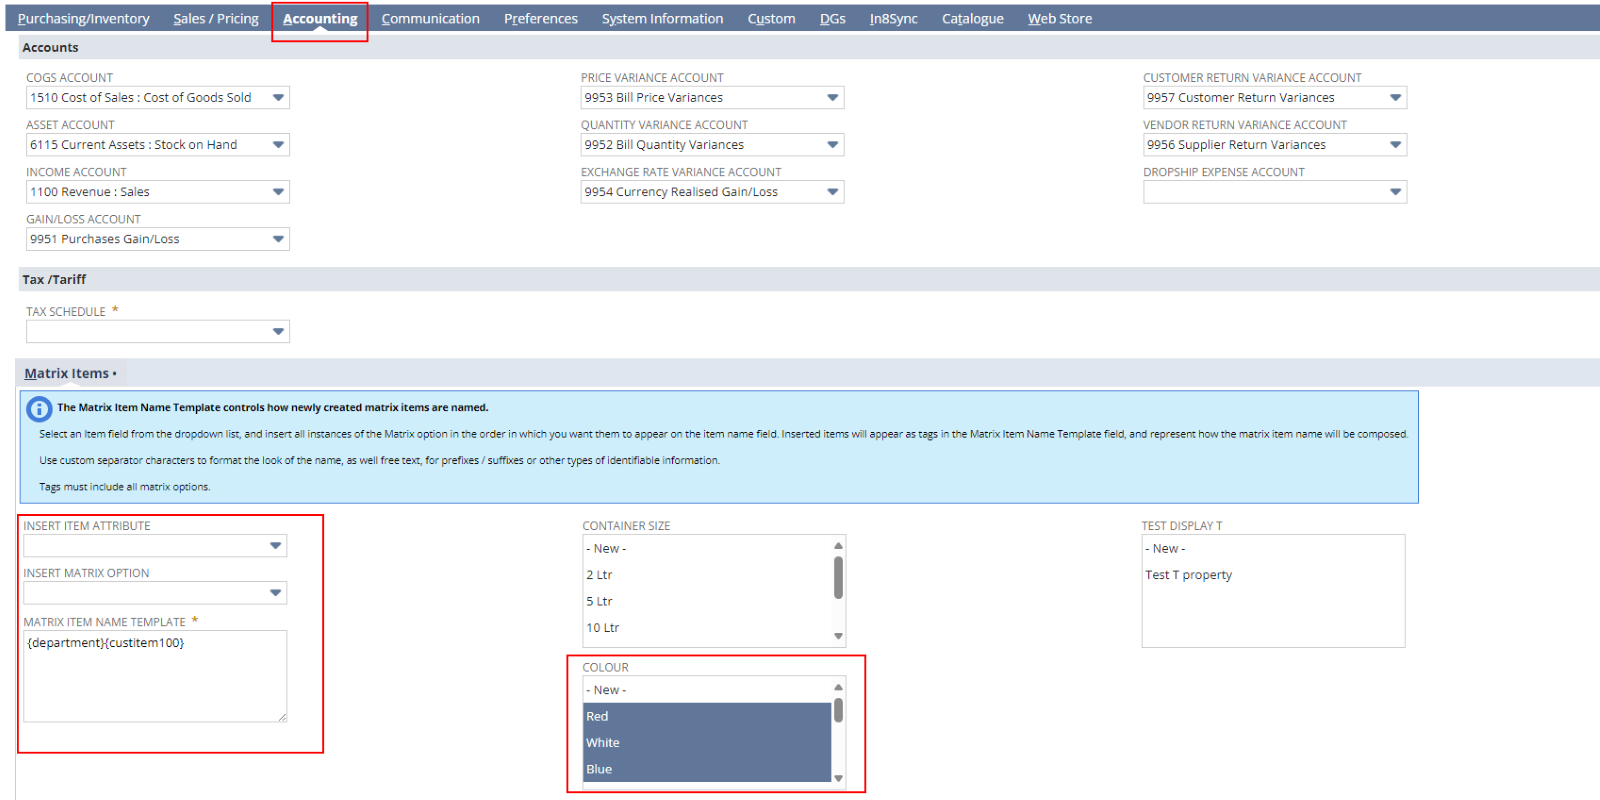
- You can set a new matrix item name format in the order you want the information to appear on the product name. To do so, select an item from the Insert Item Attribute list.
- Select an item from the Insert Matrix Option.
Tags are automatically inserted in the Matrix Item Name Template field. You can use separators to format the look of the product name and separate the displayed options. For more information, see Using the Matrix Item Name Template.
- Select properties from each list to include in the matrix for the item you are creating.
Press and hold CTRL to select more than one property in each field.
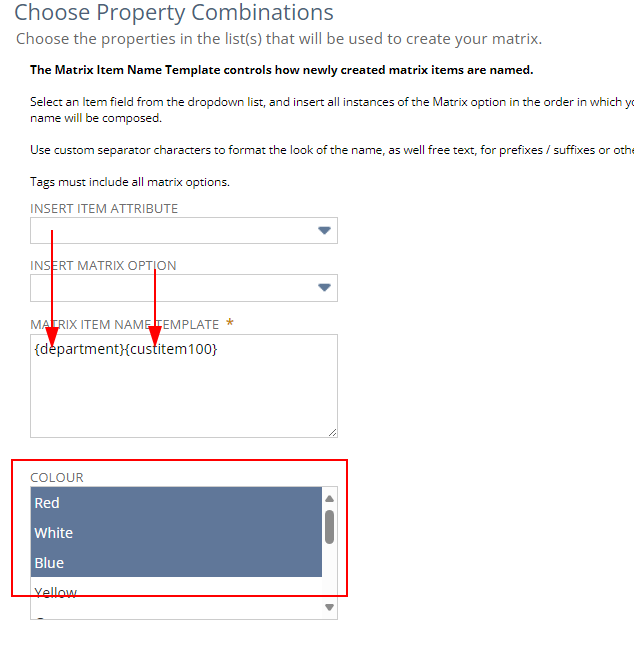
- Click Next.
Step 4: Choose and Create Items
- Clear the box next to any property combination you do not want to create a matrix item for.

- Click Next.
Your item matrix is created and each combination is available on transactions.
Creating a Matrix Item Manually
If you choose not to use the Matrix Item Assistant, you can create matrix items manually.
Before you can create a matrix item manually, create custom lists and custom item fields for your matrix item options. If you are using a commerce web store, you should also set up a custom transaction item option.
After you set up your custom fields for matrix options, you can create your item matrix.
To create an item matrix:
- Go to Lists > Accounting > Items > New.
- Click Create Matrix Items next to the type of item matrix you want to create.

Matrix items are available for inventory, non-inventory, other charges, assembly items and service items.
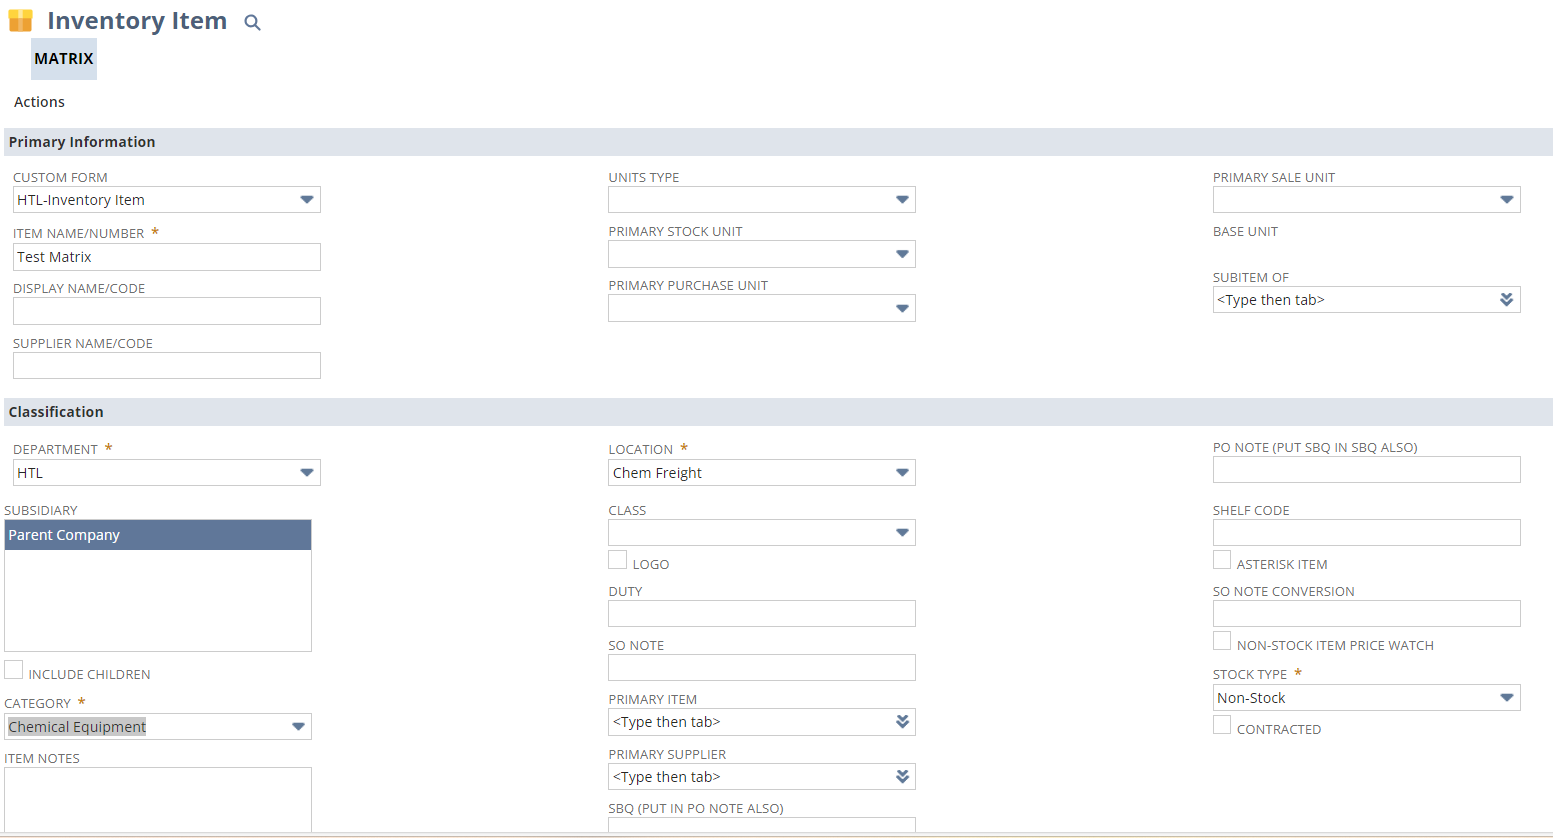
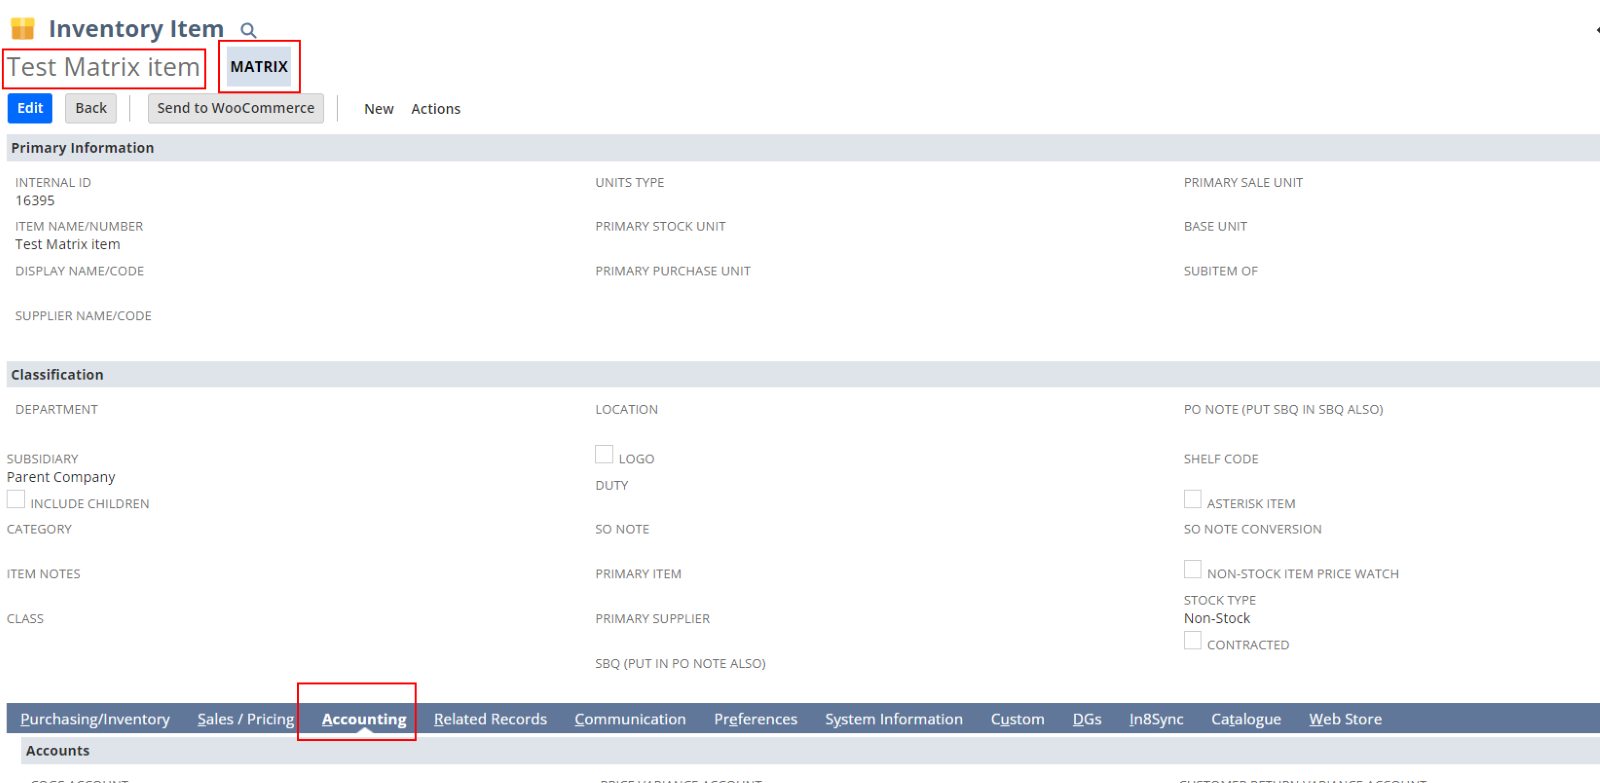
- Click the Matrix subtab.
- For each list, select the options available for this item.
To select multiple options, press and hold the Ctrl key and click multiple options.
- When you finish selecting options, click Create Matrix.
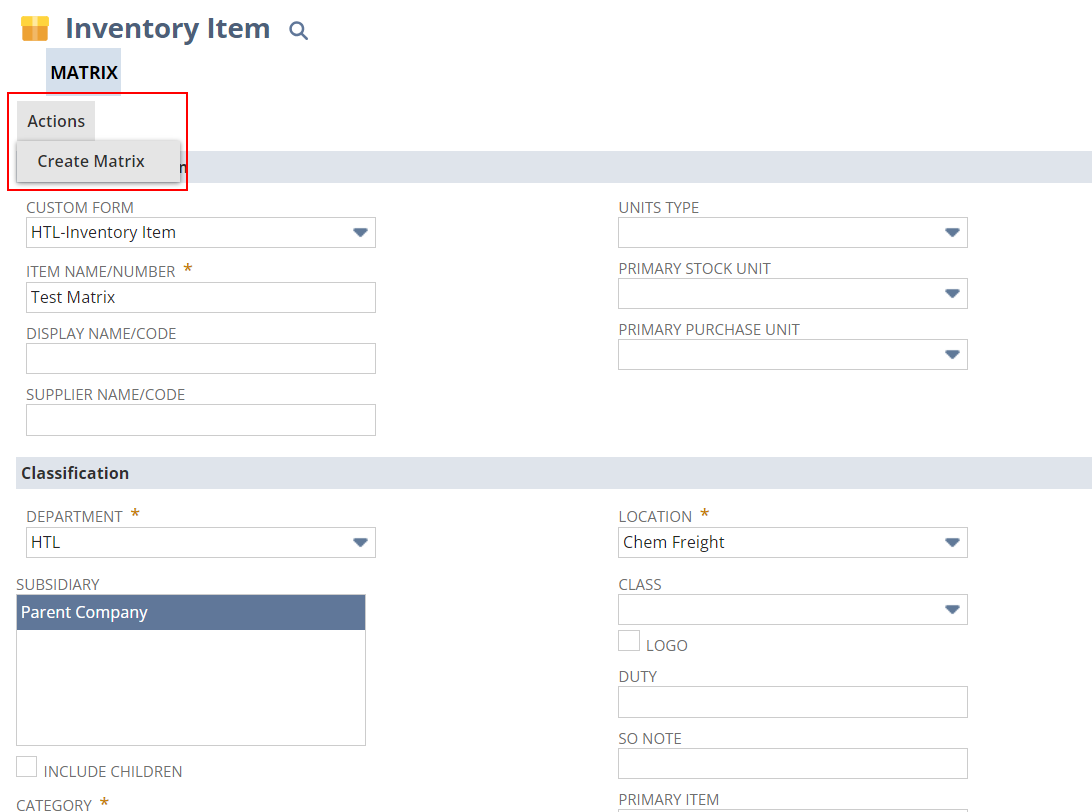
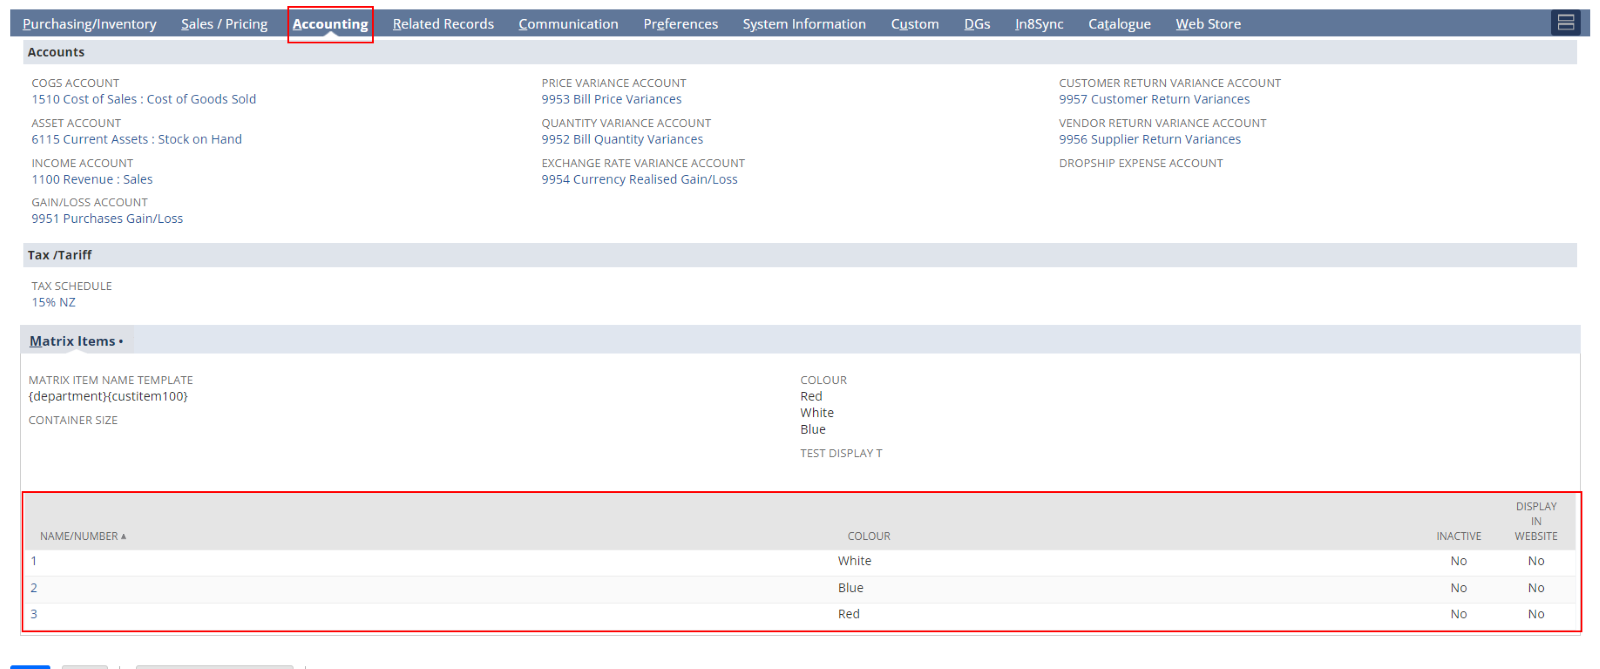
A list of the possible item combinations appears.
- In the Include column, clear the boxes next to any item you do not want to include in this item matrix.
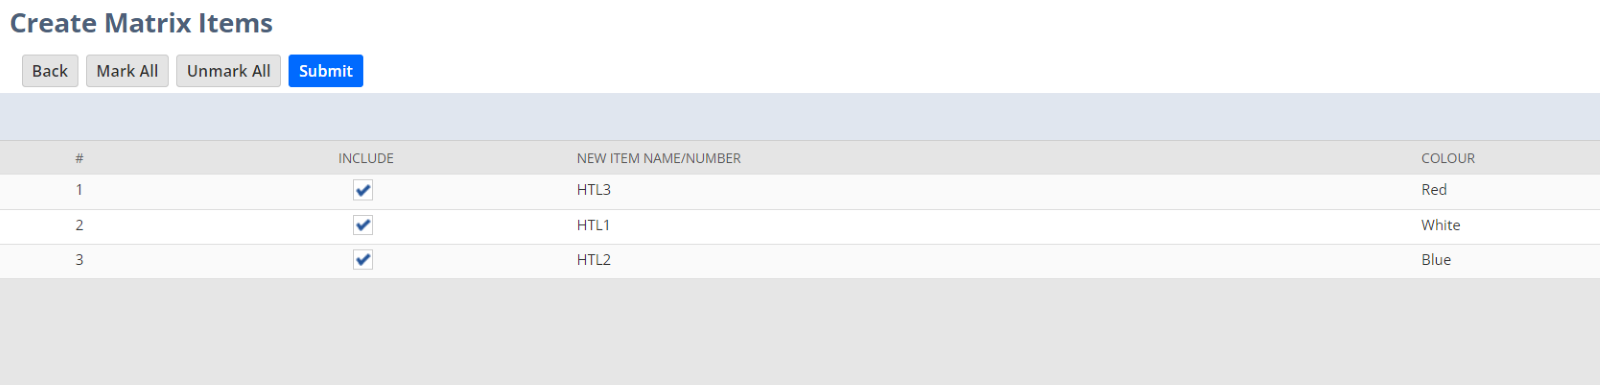
- Click Submit.
Your item matrix is created and each combination is available on transactions.
When you create a new matrix item, all the settings on the item record are applied to all child items in your matrix. For example, if you check the Display in the Web Site box on the item record, all matrix items are available on your website.