- Go to Commerce > Site Builder > Content Management > Categories.
- You can also create new categories using the Web Site Content Manager at Commerce > Site Builder > Content Management > Content Manager. In the New header, click Category. Or you can use the Import Assistant to import site category data into NetSuite from CSV file contents.
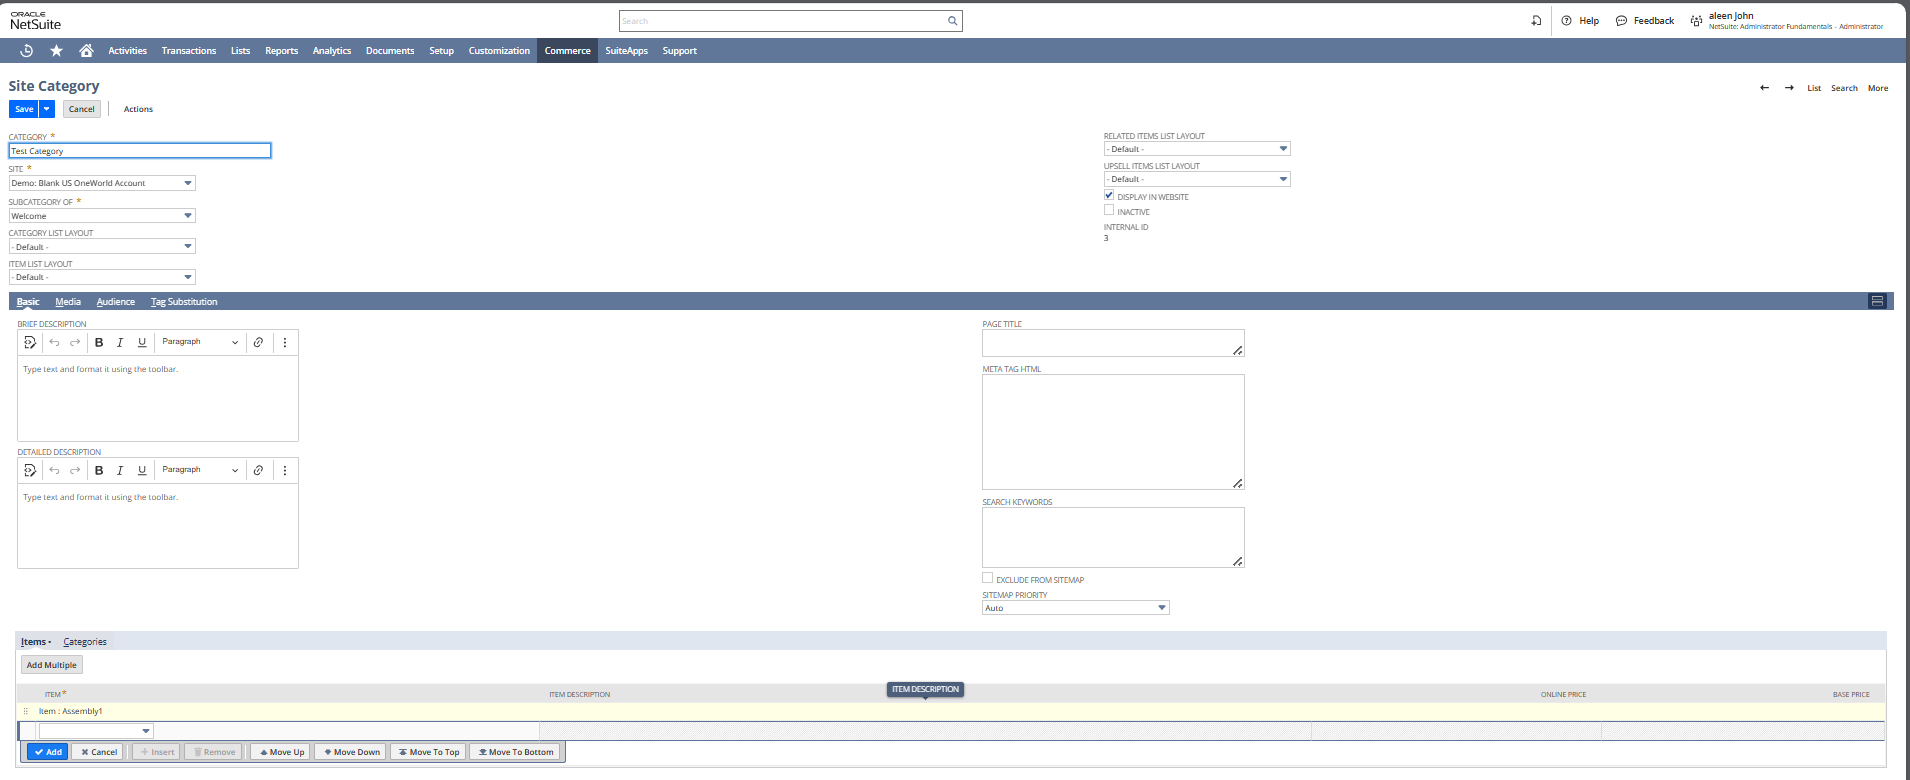
- On the Site Category page, enter a name in the Category field.
- Select the site where you want the category to display.
- In the Subcategory of field, choose a tab or parent category from the list.
- In the Category List Layout field, select a layout for the list of subcategories you place in this category. Category layouts allow you to customize your site by presenting your categories and category lists in the design of your choice.
- In the Item List Layout field, select a layout for the list of items you place in this category.
- In the Related Items List Layout field, select a layout for your related items list. Use related items to cross-sell items that complement each other. For more information, see Related Items.
- Check the Display in Web Site box to display this category to everyone who visits your site.
- Click Save to make the category available on your website.
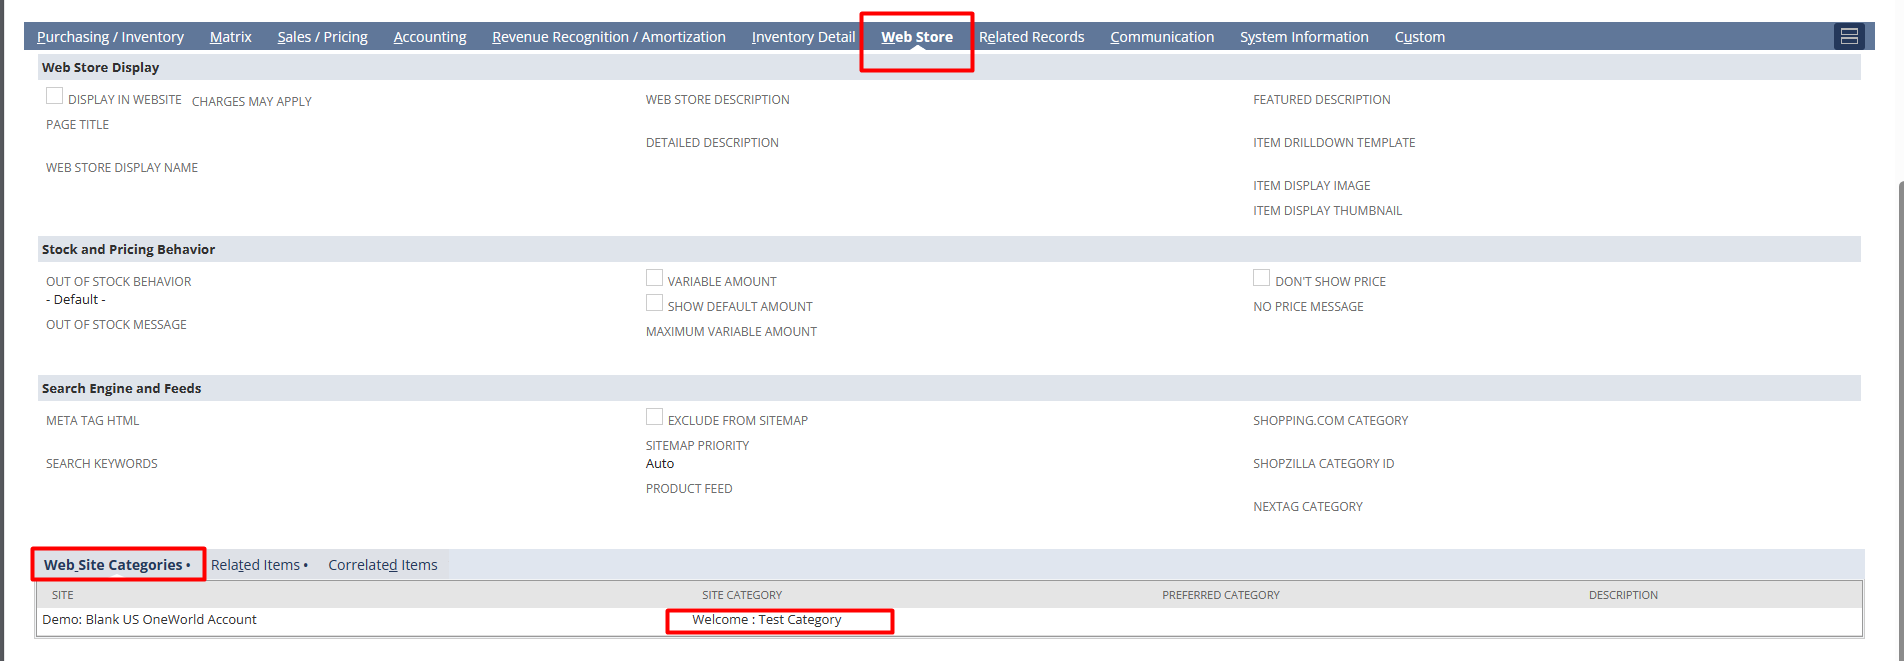
In the Item record this can be viewed under the webstore subtab: