Customizing the roadmap view in Jira allows you to tailor the display of information to meet your project needs and enhance visibility for stakeholders. Here’s a step-by-step guide on how to customize the roadmap view effectively:
1. Accessing the Roadmap
- Open Your Project:
- Log in to Jira and navigate to the specific project we want to customize.
- Select the Roadmap Tab:
- Click on the Roadmap tab in the top navigation bar.

2. Customizing the Roadmap View
Once we were in the roadmap view, we can customize it in several ways:
A. Configure Roadmap Settings
- Access Settings:
- Look for the Settings icon (usually represented by a gear icon) on the roadmap screen.
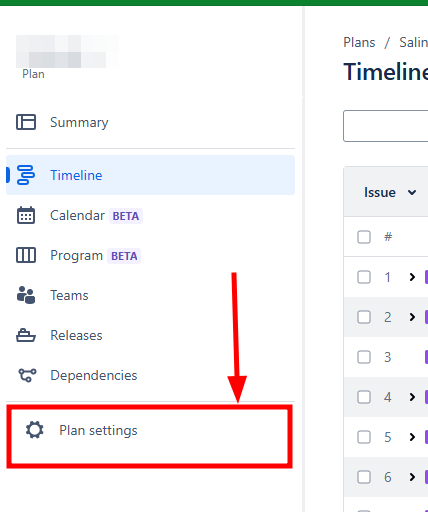
- Click on it to access customization options.
B. Set Time Frame
- Adjust the Timeline:
- We can set the timeline for the roadmap to display specific periods (e.g., weeks, months, quarters).
- Use the calendar controls to select the desired date range.
C. Filter Epics and Issues
- Use Filters:
- We can filter which epics or issues appear on the roadmap based on criteria like status, assignee, or priority.
- Look for a filter option or drop-down menu to select the relevant filters.

D. Display Options
- Select Display Options:
- Choose how we want to visualize the information:
- Show Only Selected Epics: To focus on specific epics.
- Group by: We can group epics by assignee, team, or another custom field.
E. Edit Epic Details
- Customize Epic Information:
- Click on an epic to open its details.
- We can edit the epic name, description, timeline, and other relevant details directly from the roadmap view.
F. Adjust Columns
- Column Settings:
- Some roadmap views allow we to add or remove columns based on custom fields or attributes that are important for your project.
- Configure these settings in the roadmap options.
3. Save Your Customizations
- After making our adjustments, make sure to save any changes or customizations you’ve applied to ensure they persist for future use.
4. Share the Custom Roadmap
- Exporting or Sharing:
- Depending on our needs, we can export the roadmap or share it with team members or stakeholders.
- Use the Share or Export options typically found in the settings or menu.
5. Regular Review and Adjustments
- Continuous Improvement:
- Regularly review the roadmap and make necessary adjustments to keep it relevant as project priorities or timelines change.
6. Using Advanced Features (if available)
- If you have Advanced Roadmaps enabled (available in Jira Software Premium):
- Use the additional features like planning across multiple teams, creating scenarios, and setting dependencies for a more comprehensive roadmap view.