Installing Klipper on Anycubic Kobra 2 Neo Using Raspberry Pi Zero 2 W
Enhancing your Anycubic Kobra 2 Neo 3D printer with Klipper firmware can significantly improve its performance and capabilities. This guide will walk you through the installation process using a Raspberry Pi Zero 2 W as the host. Important Note: Before proceeding, ensure you have a backup of your printer’s original firmware and settings. Modifying firmware can void warranties and carries inherent risks. Proceed with caution and at your own risk.
Prerequisites
- Hardware:
- Anycubic Kobra 2 Neo 3D Printer
- Raspberry Pi Zero 2 W
- MicroSD card (8GB or larger)
- Micro-USB power supply
- USB OTG cable)
- Software:
- Klipper firmware
- KIAUH (Klipper Installation and Update Helper)
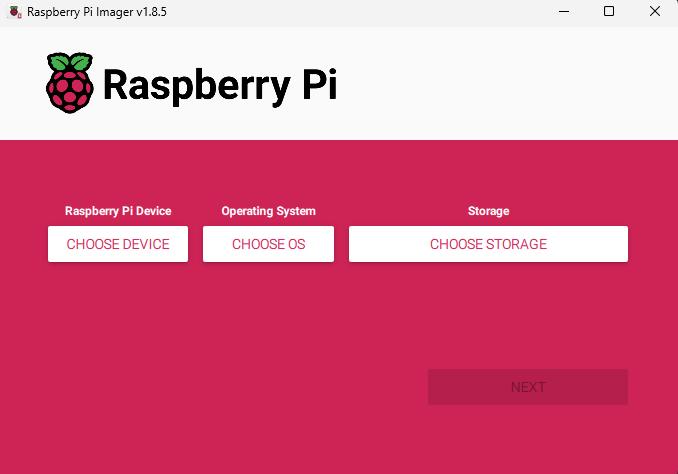
Step 1: Prepare the Raspberry Pi
Step 2: Install KIAUH script
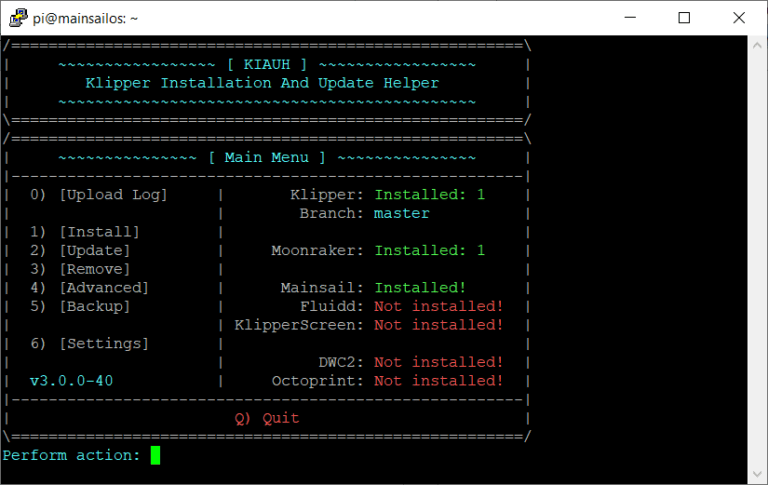
Step 3: Install Klipper, Moonraker, and Mainsail/Fluid using KIAUH Script
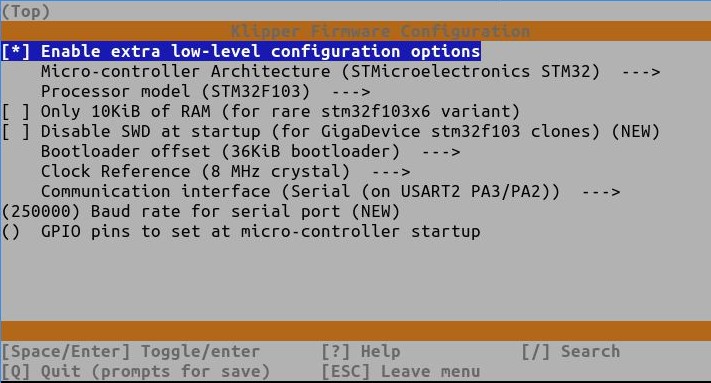
Step 4: Configure Klipper for Kobra 2 Neo
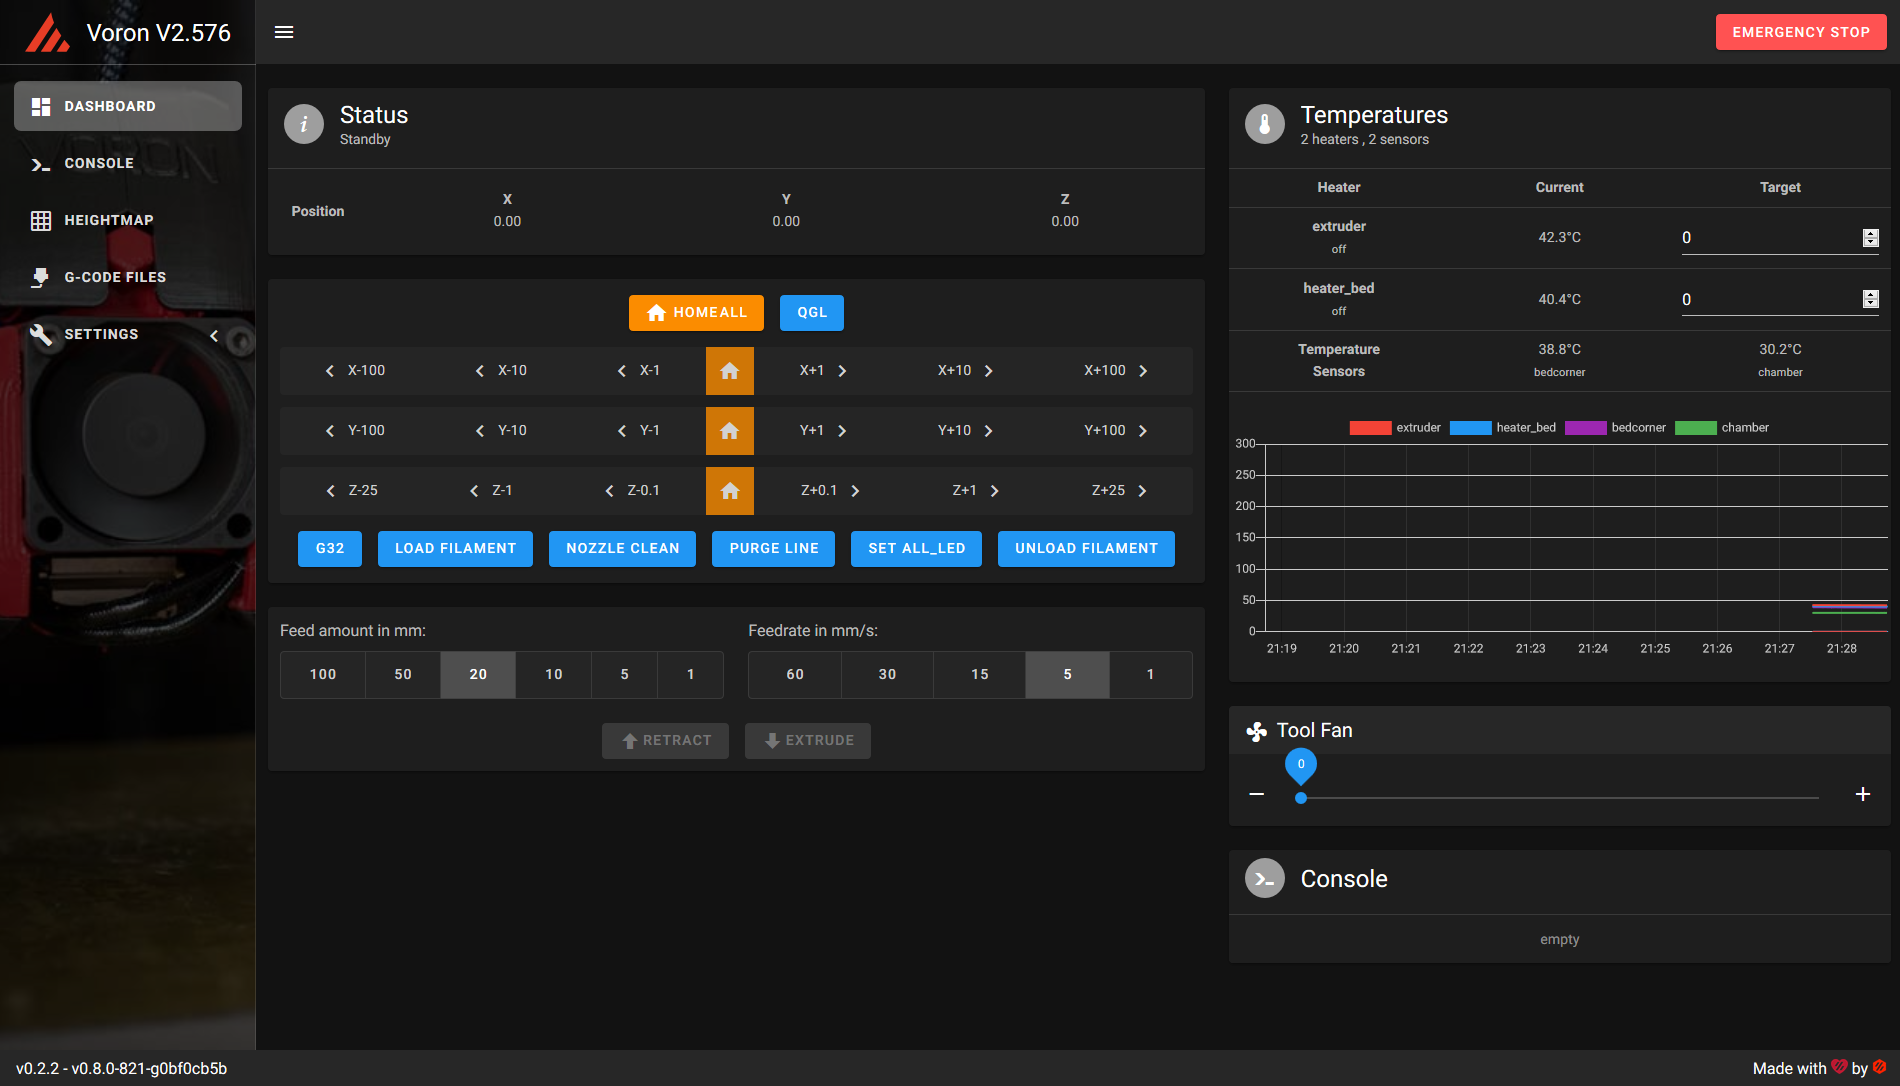
Step 5: Configure printer.cfg for Kobra 2 Neo

Step 6: Tuning Klipper for Kobra 2 Neo

The following articles will provide a detailed discussion of each step.