Overview and Instructions
Field Groups in NetSuite are used to organize fields visually by grouping them under labeled sections. When you create a single-column Field Group, it can also be used strategically to add vertical spacing between fields.
Step-by-Step Guide:
1. Navigate to the Form Customization Page:
– Go to: Customization > Forms > Entry Forms (or Transaction Forms).
– Click Customize or Edit on the form you want to modify.
2. Create a New Field Group:
– Go to the Field Groups subtab.
– Click New Field Group.
– Set:
– Label: Spacer or Section Break
– Number of Columns: 1
– Save the group
3. Assign Fields to the Field Group:
– Go to the Fields subtab.
– For each field, set the Field Group to the one you created.
– This stacks the fields vertically.
4. Add Visual Spacing (Optional):
– Create a custom field:
– Type: Free-Form Text
– Label: Leave blank or use “Spacer Field”
– Display Type: Inline Text
– Default Value: Leave blank
– Store Value: Unchecked
– Assign this field to the Spacer Field Group
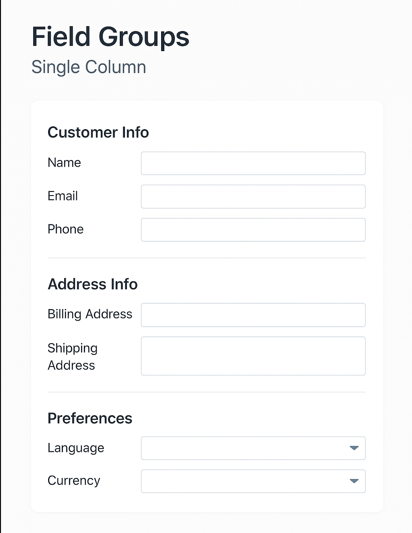
Example Layout:
| Field Group | Fields Inside |
|—————–|—————————————|
| Customer Info | Name, Email, Phone |
| Spacer | (Empty inline text field) |
| Address Info | Billing Address, Shipping Address |
| Spacer | (Empty inline text field) |
| Preferences | Language, Currency |
This layout improves readability and user experience without scripting.