Where to Find It
Design Workspace → Solid Tab → Create → Thread
Or in the toolbar:
Create → Thread
How to Use the Thread Tool
1. Start the Command
- Go to Create → Thread.
- Select the cylindrical face (for external threads) or hole face (for internal threads).
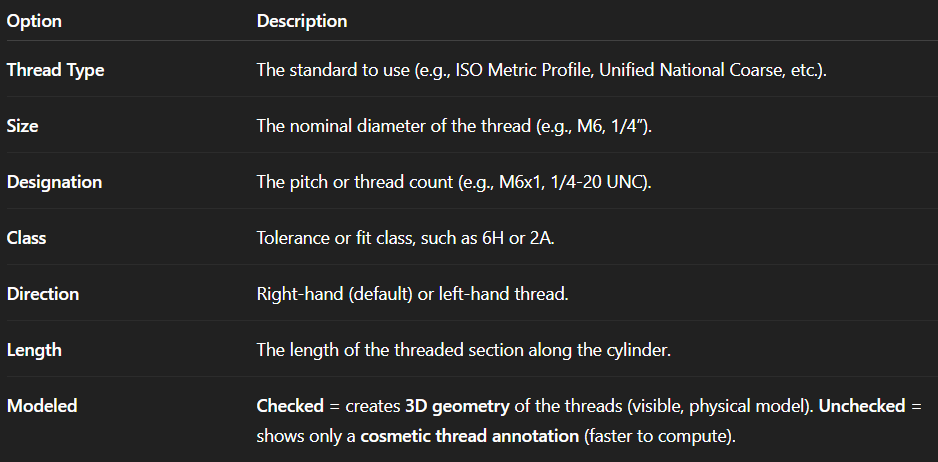
2. Set the Options
3. Positioning
- You can reverse the direction of the thread by toggling the arrow in the preview.
- Use thread length handles to adjust how much of the cylinder is threaded.
4. Confirm
Click ✅ OK to apply.
Notes & Tips
- Model vs Cosmetic Threads:
- Modeled threads look realistic but increase file size and compute time.
- Cosmetic threads are better for most designs (especially if the model will be 3D printed with a threaded insert or tap).
- For 3D Printing:
- Use modeled threads.
- Increase clearance/tolerance (slightly larger for external threads, smaller for internal).
- Consider using the “Thread Modeler” add-in for fine control (if not already built-in).
- For Machining or Drawing:
- Use cosmetic threads, and Fusion 360 will include them in technical drawings.