Positionning the Reference Bones
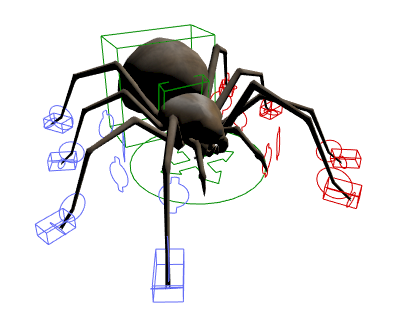
The reference bones are the guides used to align the final rig bones position and rotations. Whether your character is not supported by the Smart function (not a biped) or if you simply need to edit the reference bones position, here is how to:
- Adjust the bones positions so that they fit the character proportions.
Check the full video tutorials brought to you by the amazing CGDive:
Written guidelines for humans below:
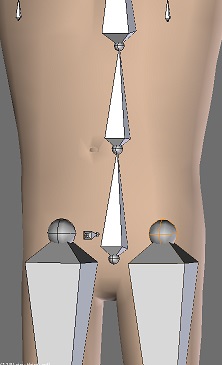
- The foot_heel and foot_bank bones (the three little bones under the foot) should match the heel back position and the foot width. The foot_heel_ref bone direction is used to align the feet rotation on the final rig, make sure to set it properly.

IK Chains
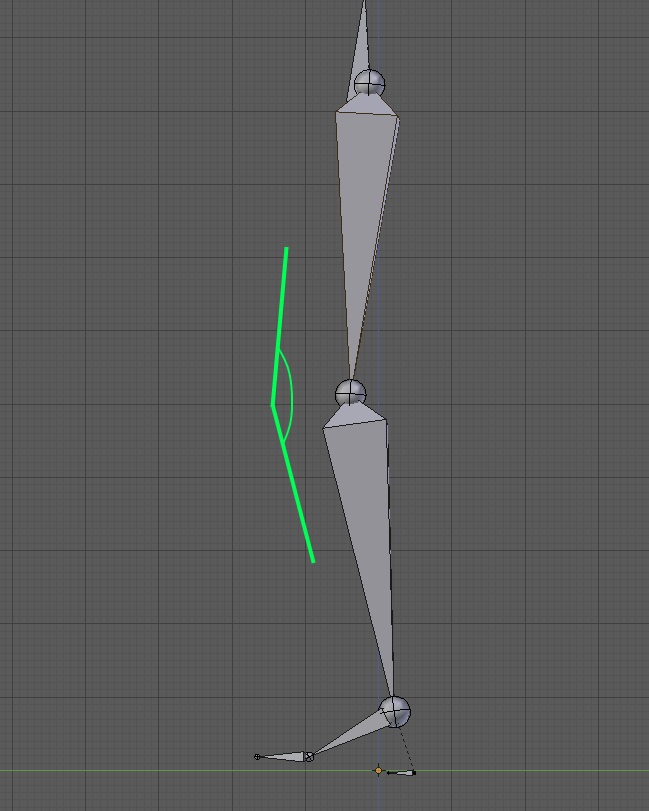
- In option, the IK pole direction can be drawn as a line to visualize its position in the final rig:

- Remember to keep a slight angle between the arms/legs bones. It’s very important for the IK chains to work properly. They MUST NEVER be straight, otherwise the IK direction may be inverted.
IK Chains Auto Roll
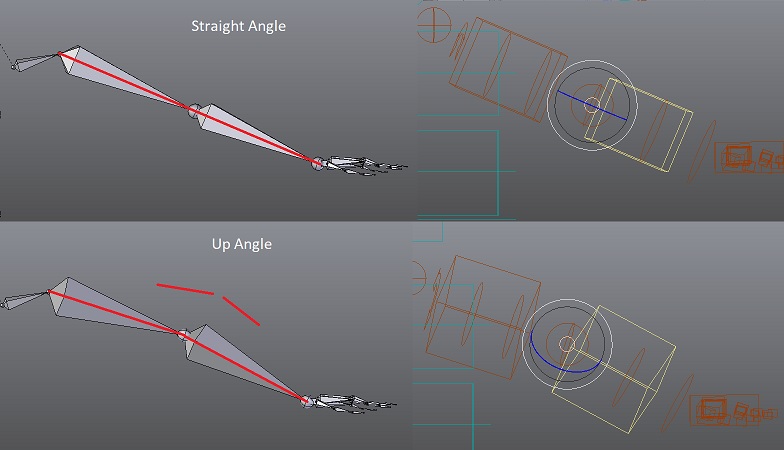
IK chains roll can’t be manually adjusted by default, it’s calculated when clicking Match to Rig for consistent axes orientation. However the manual mode can be triggered if you prefer to freely set the arms or legs bones roll manually
If Auto IK Roll is enabled, changing the bones alignment as shown below will change the roll. Here the arm is shown from the front view, it can be straight from this point of view, but must keep a slight angle backward (check from the top view):
Spine
- The root_ref bone tip should be centered at the bellybutton height, spine_01 at the bottom of the chest, spine_02 should reach the neck base.
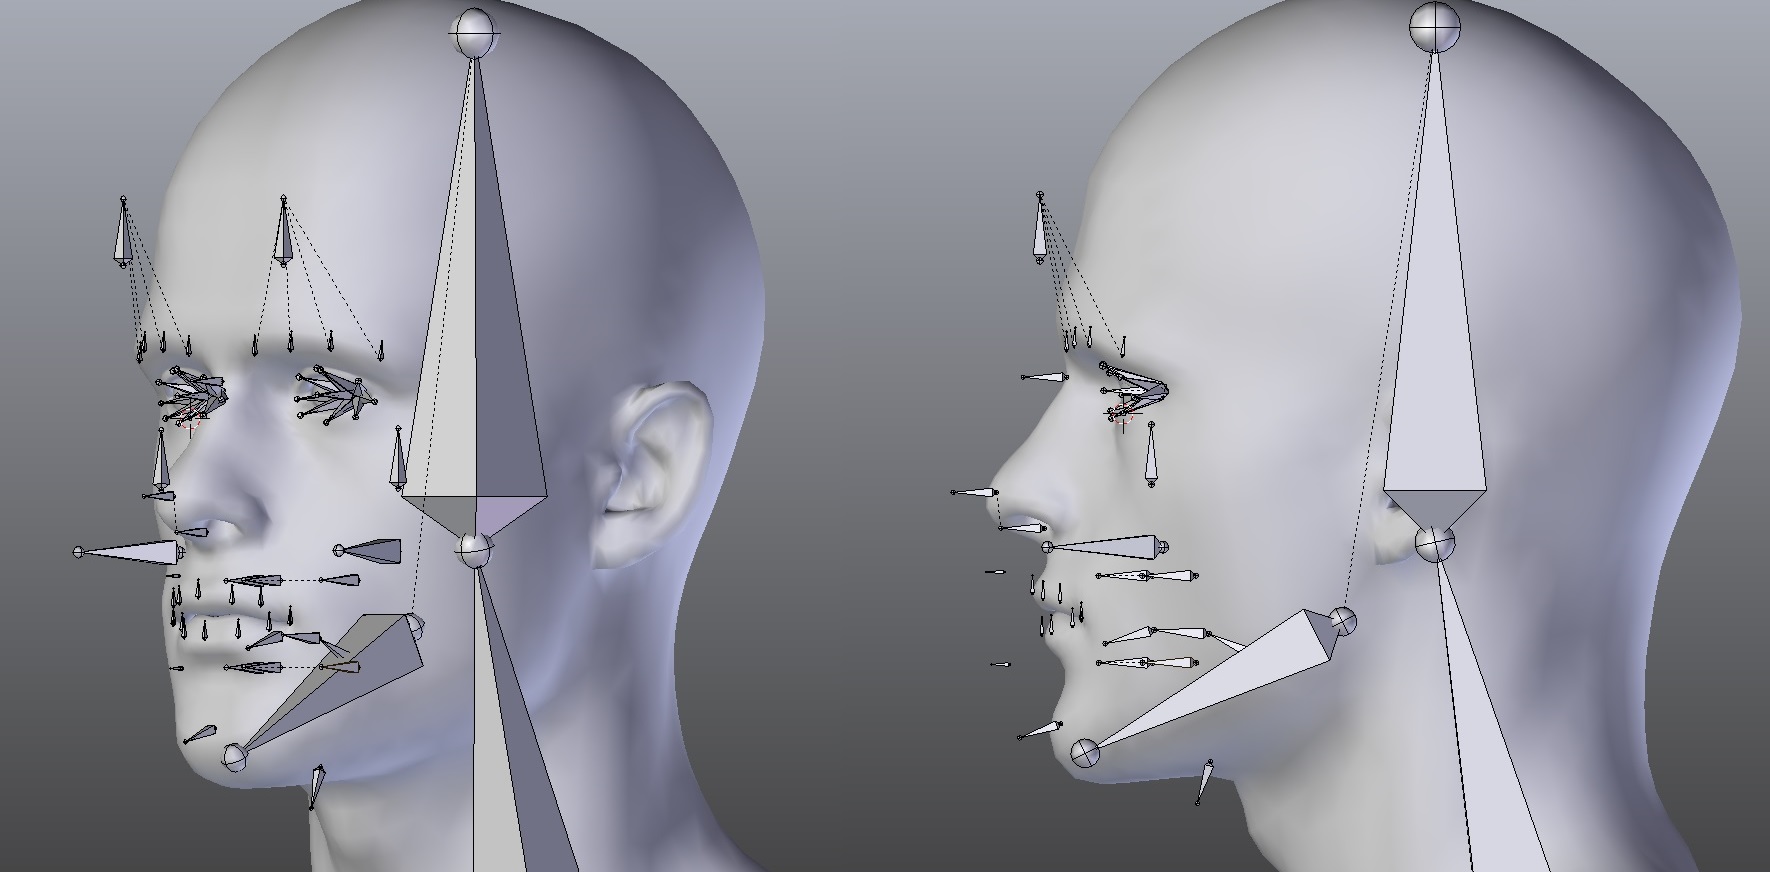
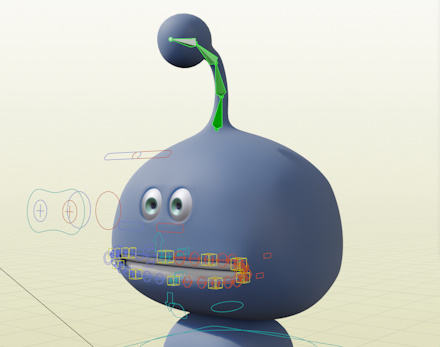
Facial
- The facial bones should be positionned as the following:
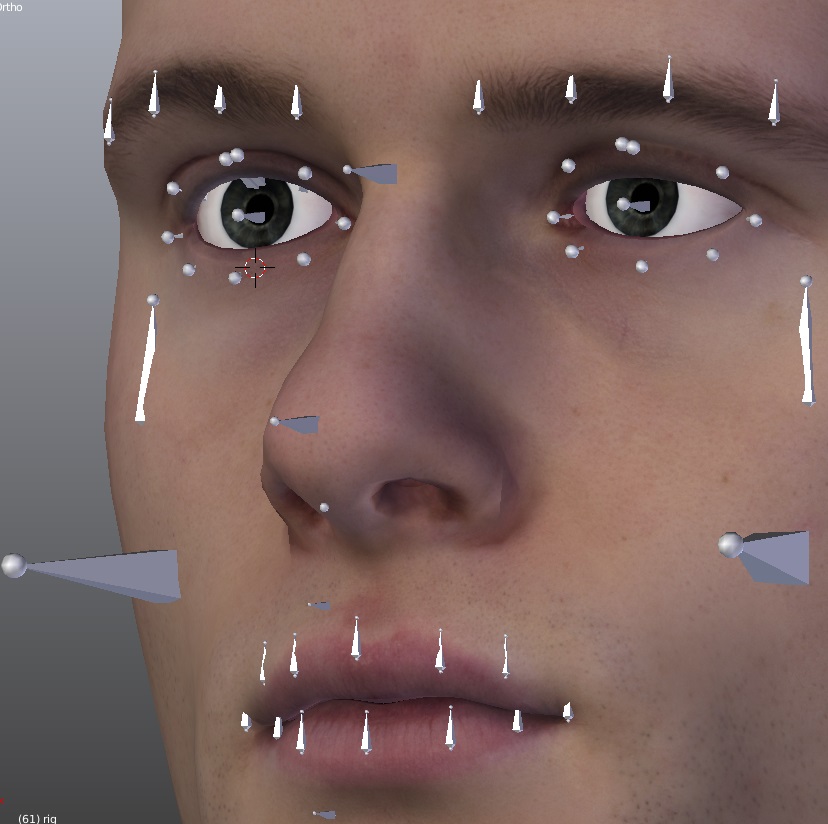
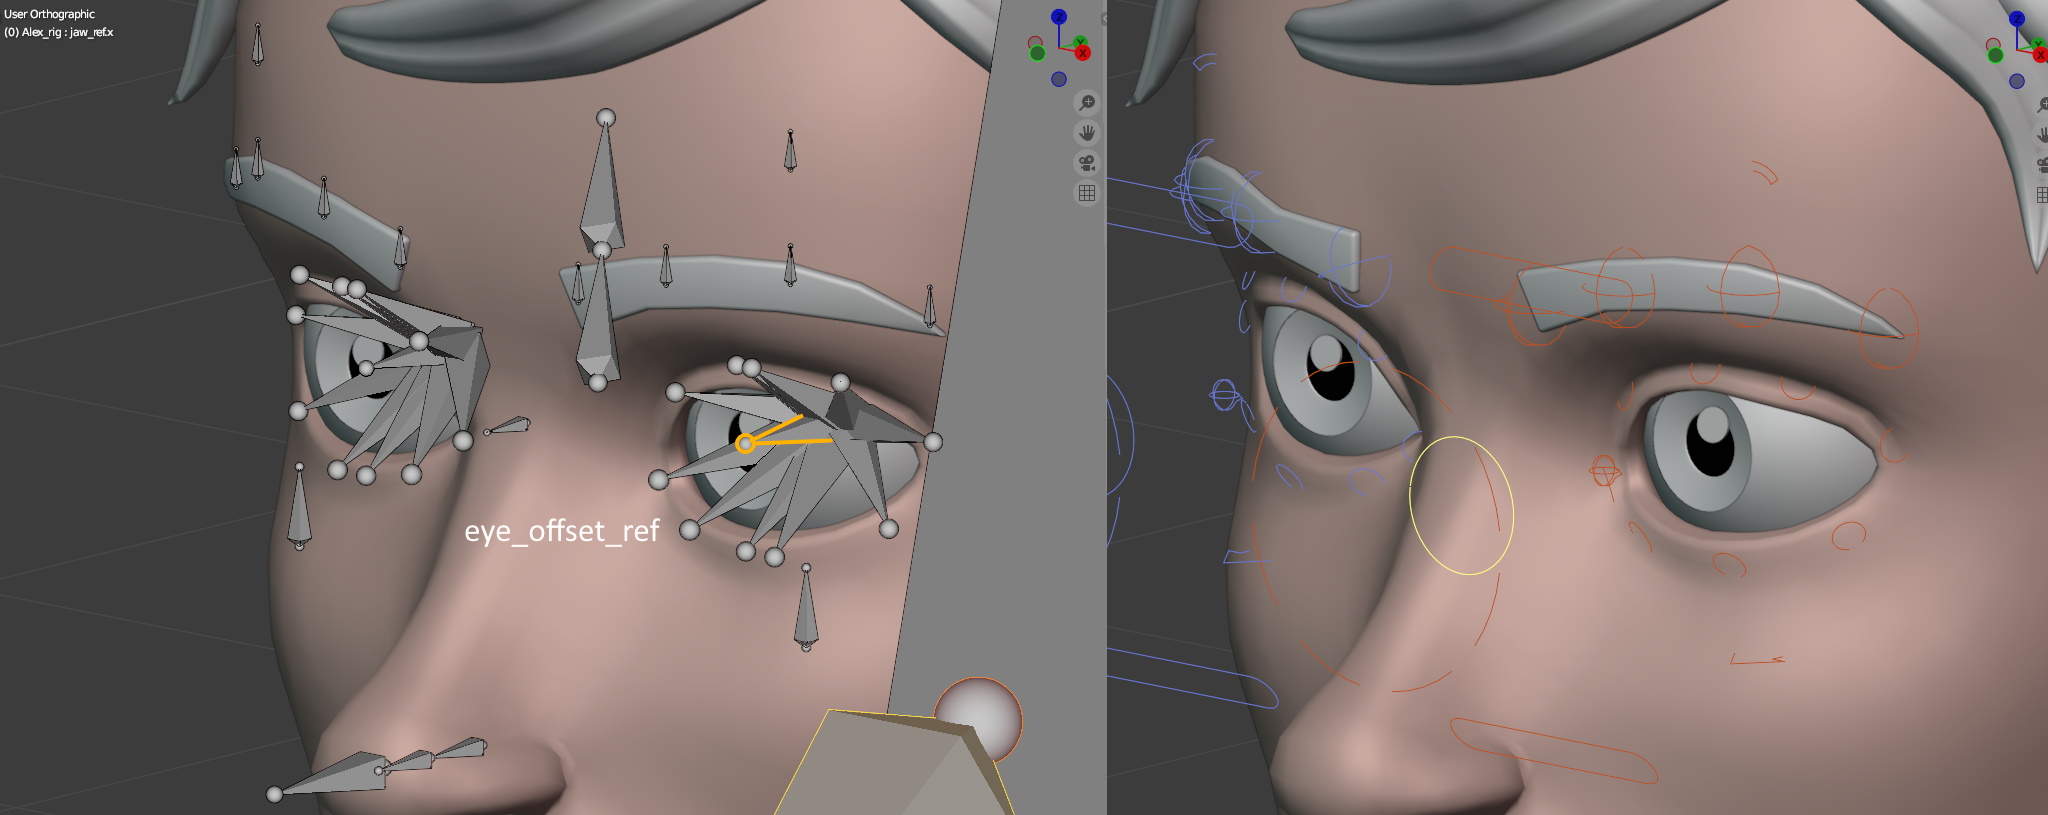
- The head (origin) of the eyelids and eyes bones should be located at the center of the eyeball while the tail component should reach the eyeglobe/eyelids mesh surface.
The eye_offset_ref bone is used to align the global eyes direction:
The main upper and lower eyelids controllers are defined by the eyelid_top/bot_ref bones:
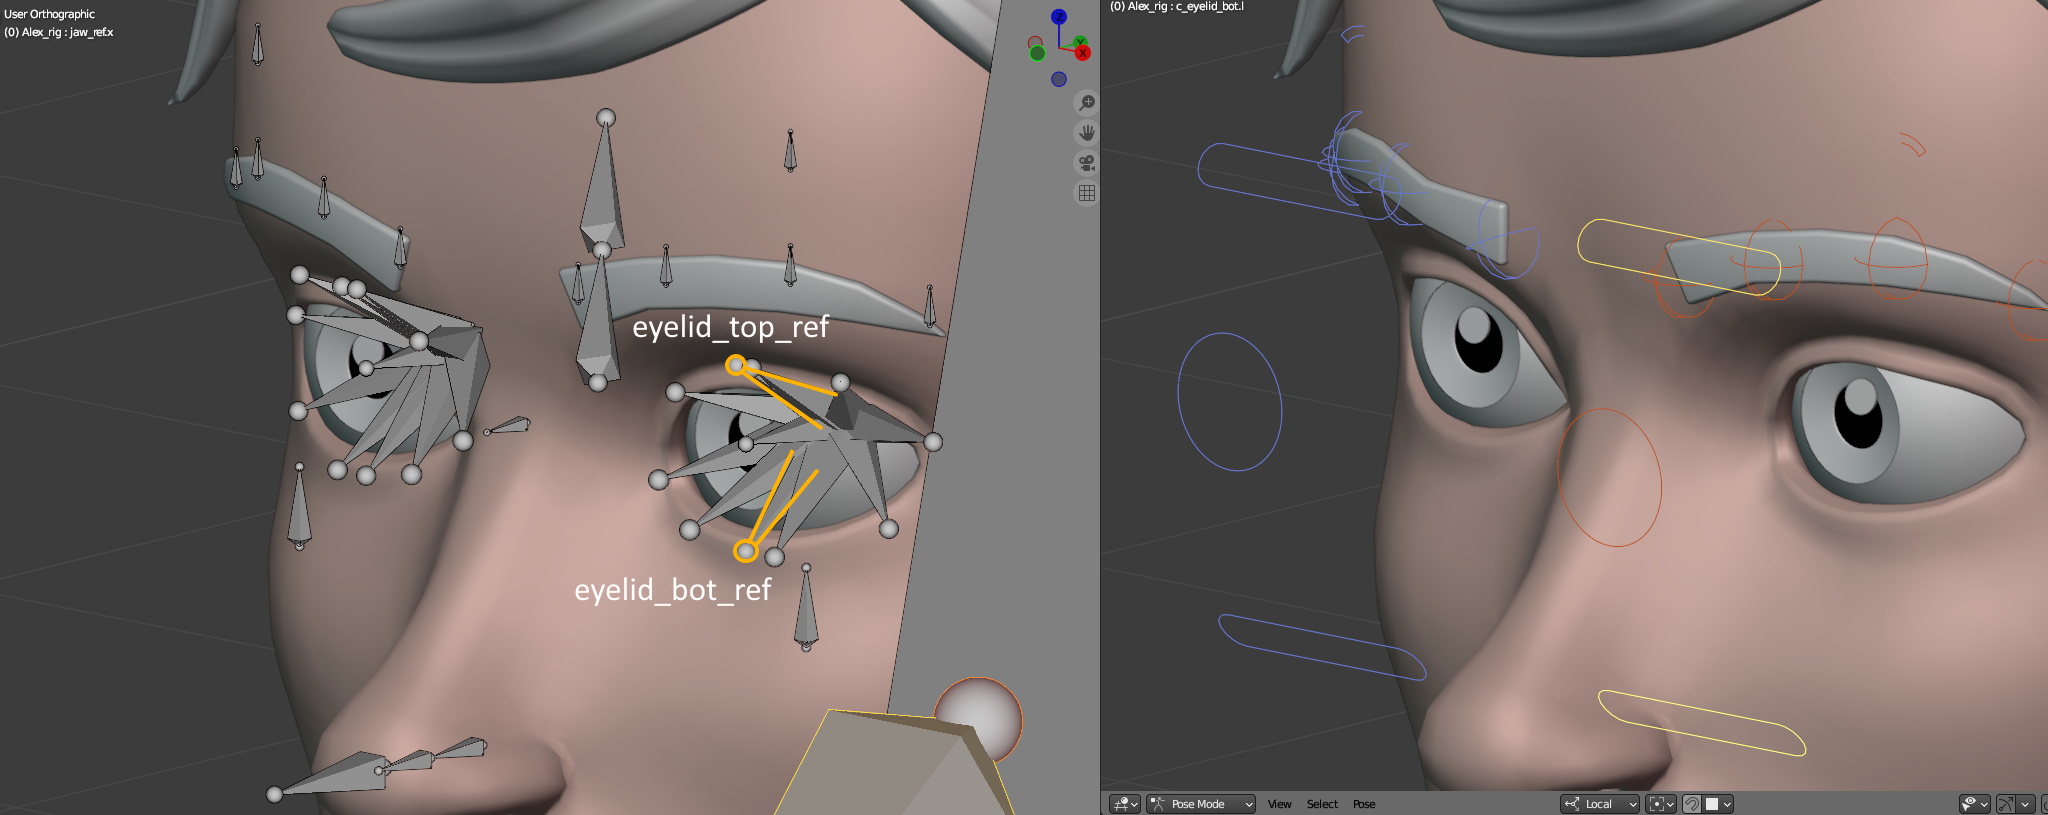
The smaller individual eyelid controllers are defined by the eyelid_top/bot_01(02, 03…)ref bones and eyelid_corner_01/02:
 The amount of these eyelids bones is defined in the Eyelids Amount menu
- The lips bones have to be very close to the geometry, positionned all around the lips.
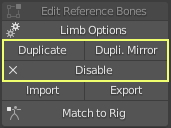
Duplicate – Disable Limbs

- To duplicate a limb, select one bone from it and click Duplicate.
- And in a similar way, to disable a limb click Disable.
Only the arms, legs, neck, head, facial, and ears can be duplicated. It may not be possible to duplicate individual bones: for example, the arms duplication will duplicate the arm, forearm, hands and fingers as a whole, the head duplication will duplicate the neck, head and linked facial if any as a whole. The fingers and spine bones cannot be duplicated yet.
Important
If disabling a limb is not precise enough to remove a specific bone, DO NOT DELETE the bone manually. It can break the rig functions when clicking Match to Rig for example. Instead, consider hiding the bone.
Parenting Reference Bones
Reference bones can be parented to each others, i.e. shoulder_ref can be parented to spine_02_ref so that the shoulders will be connected to the spine when clicking Match to Rig. However, parenting only works with predefined behaviors, i.e it’s not possible to parent leg_ref to arm_ref, it won’t work.
- Only the root bone of a limb can be parented freely
- When reference bones are parented to other reference bones, a dedicated scripted function will assign the final bone parent when clicking Match to Rig, using a default mapping.
- It’s possible to force a bone parent by parenting a reference bone to a non-reference bone directly: i.e parenting shoulder_ref to the last bone of a 4 bones IK spline: spline_04_ref, will by default parent the shoulder to the tip controller of this IK spline, c_spline_05. To parent it to the previous controller c_spline_04, parent shoulder_ref to c_spline_04 directly.
Adding Custom Bones
Adding your own new bones (custom bones) for props, clothes, hair or anything required is fairly simple and straightforward. The only requirement is to add and link them to the deforming bones or controller bones, not reference bones. Meaning, bones located in the layer 31, or bones visible after clicking Match to Rig.
Example to add a hat bone:
- Click Match to Rig
- Switch to Edit Mode (Tab key) and add a bone (Shift-A)
- Parent it to the “c_head.x” bone which is the head controller, or “head.x” bone which is the deforming bone.
It won’t interfere with the scripted instructions, unless these new bones have same names as existing ones (for example do not name a new bone “c_root.x” or “c_head.x” or “head.x”, these bones are already part of the base rig).
To export to Fbx, they must be set as custom bones in order to tell the exporter to include them in the exported skeleton,
Limitations:
New bones must not be inserted between bones of the same limb, for example the following bones hierarchy would break the rig since a custom bone is inserted between spine bones:
root.x
    L spine01.x
        L mycustom_spine_bone < incorrect!
            L spine02.x
                L neck...
But this works:
neck.x
    L head.x
        L hat
Saving Custom Bones
Custom bones can be saved as custom limbs. This is useful in order to store and retrieve easily a pre-made limb anytime later.
For example, if you rig antennas or hair for a character with your own bones mechanics, and need a similar setup for other characters, save these bones as custom limbs and load them into another rig afterwards. All bones data are saved to file, including custom shapes, constraints, drivers, properties…
The files path is defined in the addon preferences.
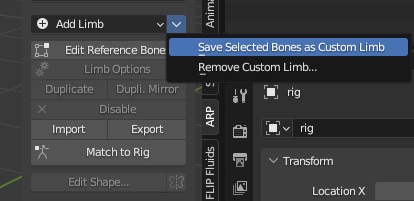
To save, click the downarrow button next to the Add Limb list:
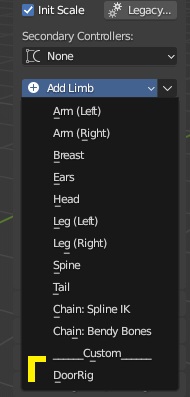
To load custom limbs, click the Add Limb list and select a limb under the __Custom__ separator:
Generate The Rig
- Click Match to Rig to generate the final rig with controllers, and all the mechanic setup.
Going back to edition mode is possible anytime by clicking Edit Reference Bones.
Tip
Check Init Scale to make sure the rig scale value is initialized to 1.0 (recommended)
New Auto-Rig Pro updates may sometimes change the rig, bones constraints behaviour, bones orientations, which may break previously made animations. To correct this, click Legacy and see if any options may help to preserve existing animations.

Rig UI
Once the rig has been generated, it’s time to ensure it looks nice enough! Controllers should be easily selectable with cool shapes, nice colors, a picker panel…
Bone Shapes
You may want to adjust the controllers shapes. Just click the Edit Shape… button and Apply Shape once you’re done. To mirror the shape to the other side, click the little button next to Edit Shape