A bar code is the small image of lines and spaces that is affixed to retail store items, identification cards, and postal mail to identify a particular product number, person, or location. The code uses a sequence of vertical bars and spaces to represent numbers and other symbols. Generally, It is used to read the code. The reader translates the reflected light into digital data that is transferred to a computer for immediate action.
In NetSuite, the bar coding and item labels feature automatically generates a bar code for each item based on the item Number / Name, SKU code on the item record. Most bar codes use a number or alphanumeric string for this field. It is also generated for a each transaction. You can track information in NetSuite by using generate bar codes for each transaction.
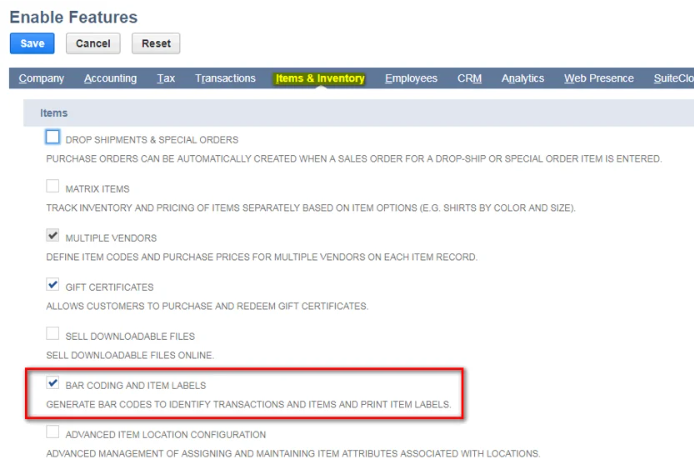
Activating the Bar Coding and Item Labels Feature:
- Go to Setup > Company > Setup Tasks > Enable Features.
- On the Items & Inventory subtab, check the Bar Coding and Item Labels box
- Click Save.

To use a UPC or EAN bar code:
- Go to item record Lists > Accounting > Items.
- In Item page enter the code in UPC code field. Enter a maximum of 999 characters in this field to identify an internal name or number to store the item’s UPC Code. You can use the text you enter here when adding the item to transactions.
- When you enter the text in this UPC field, it will displays UPC code & prints in UPC bar format.
- When this field is clear, the UPC field on item labels displays the Item Name/Number and prints in Code-128 bar code format.
- Save.
Printing Barcodes on Transactions:
- To print bar code on transaction, by going to Transactions > Management > Print Checks and Forms > Item Labels.The bar code for each transaction prints automatically when the feature is enabled.
Printing Labels from Item Records:
- You can print a label for an item directly from the item record. To do so, go to Lists > Accounting > Items. Click View next to the item name. On the item record, click the Print Label button.