Flow rate
Calibrating the flow rate involves a two-step process.
Steps
- Select the printer, filament, and process you would like to use for the test.
- Select
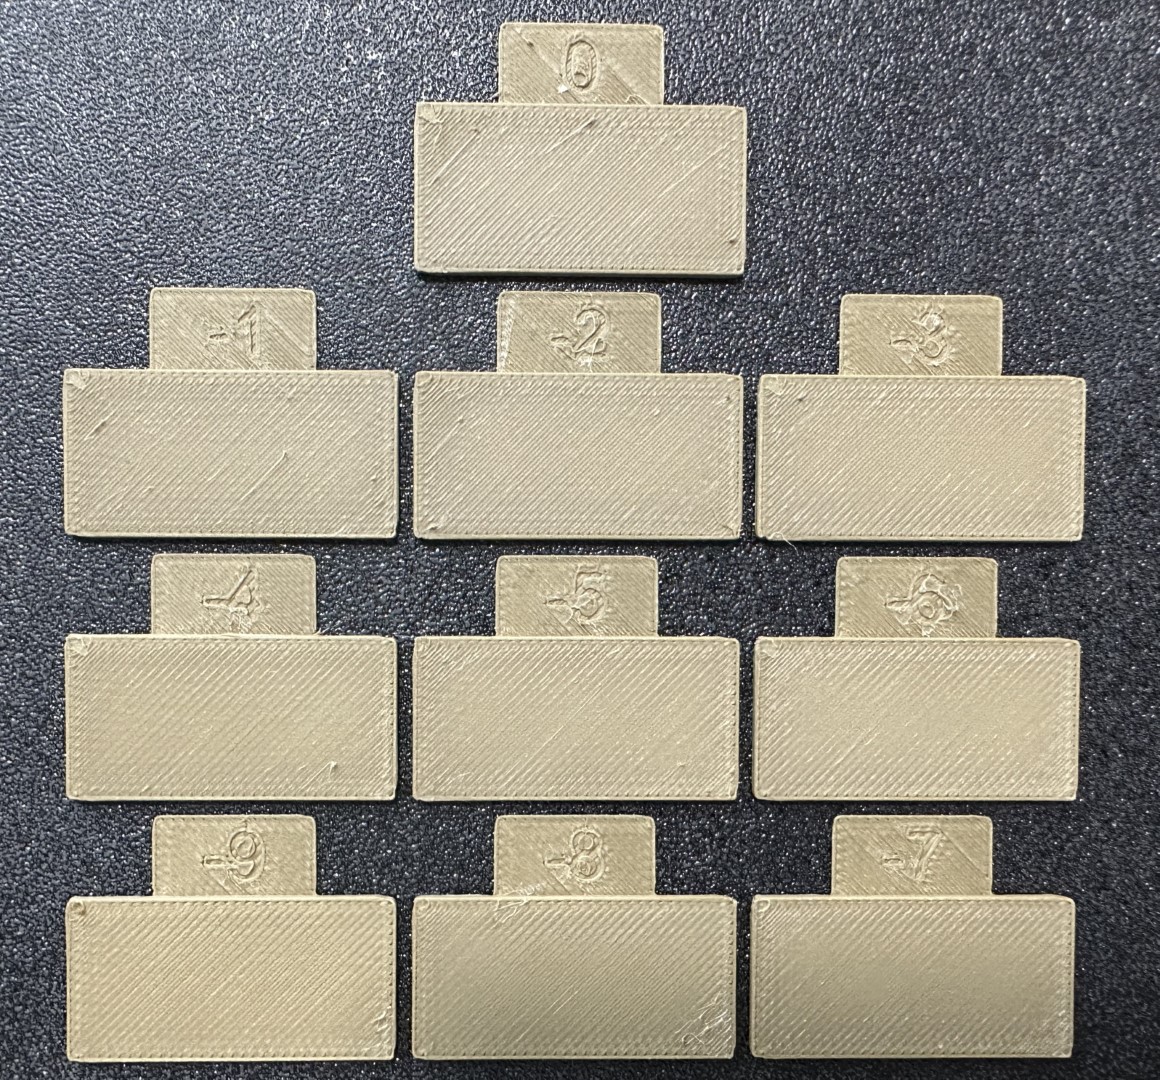
Pass 1in theCalibrationmenu - A new project consisting of nine blocks will be created, each with a different flow rate modifier. Slice and print the project.
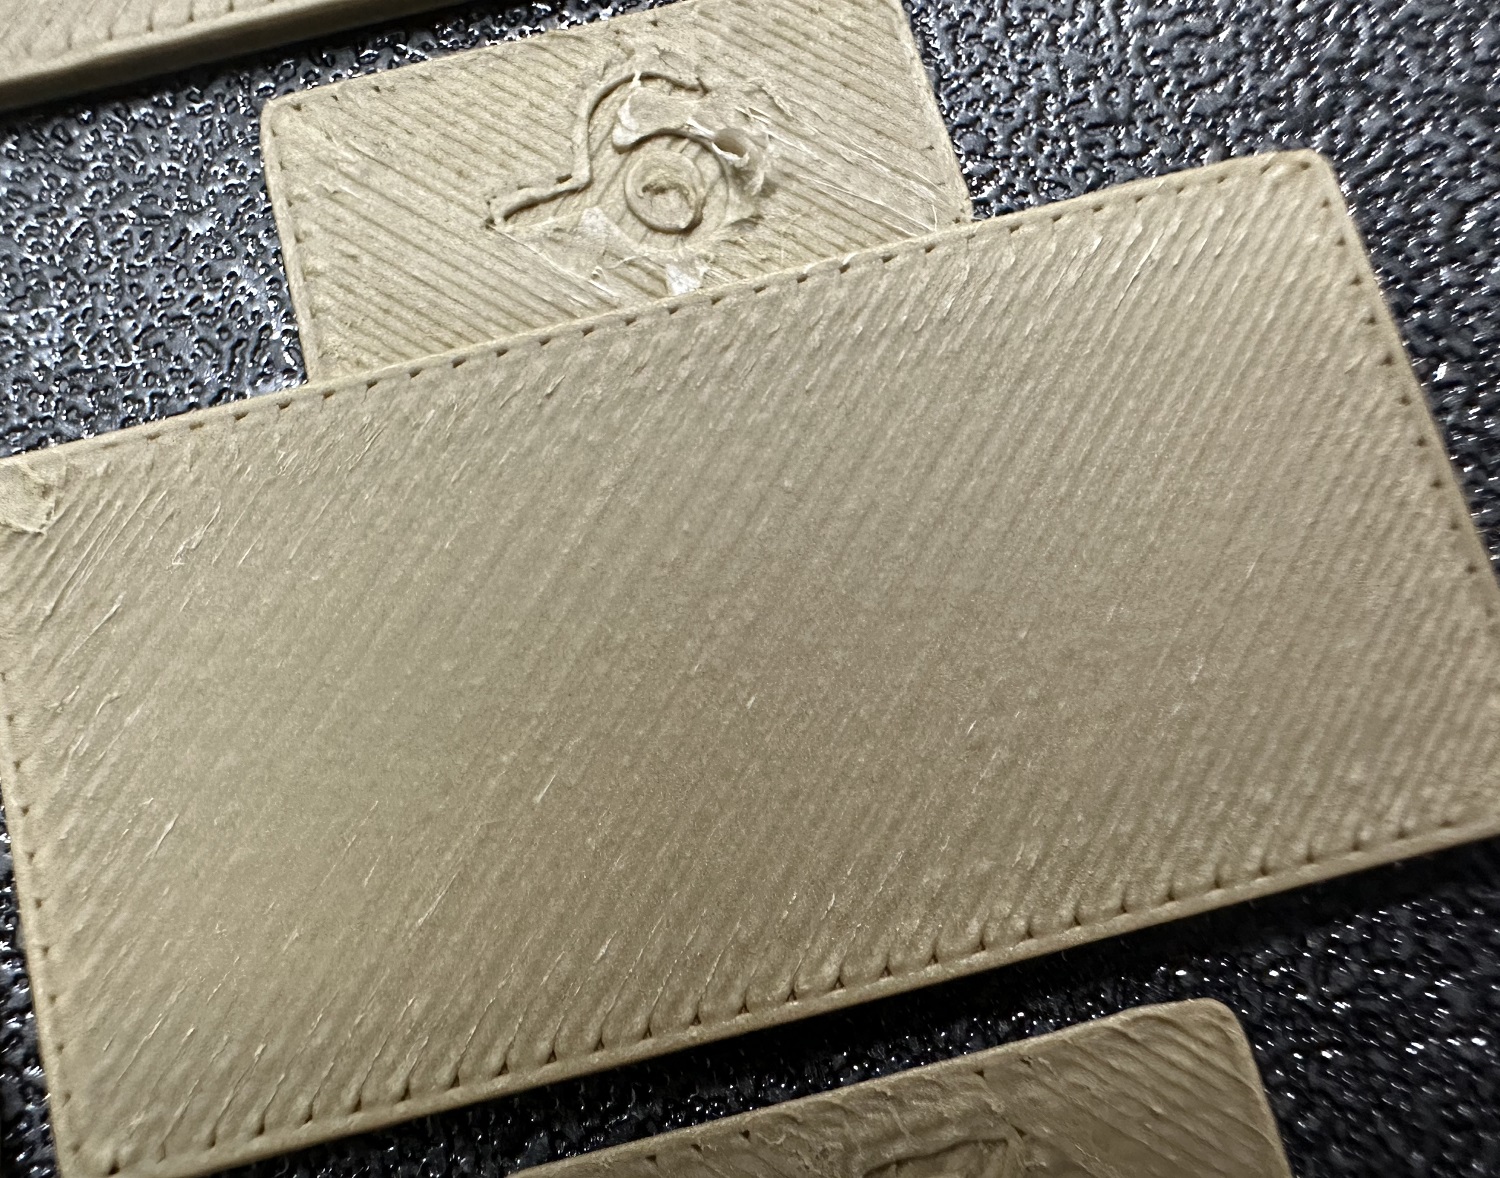
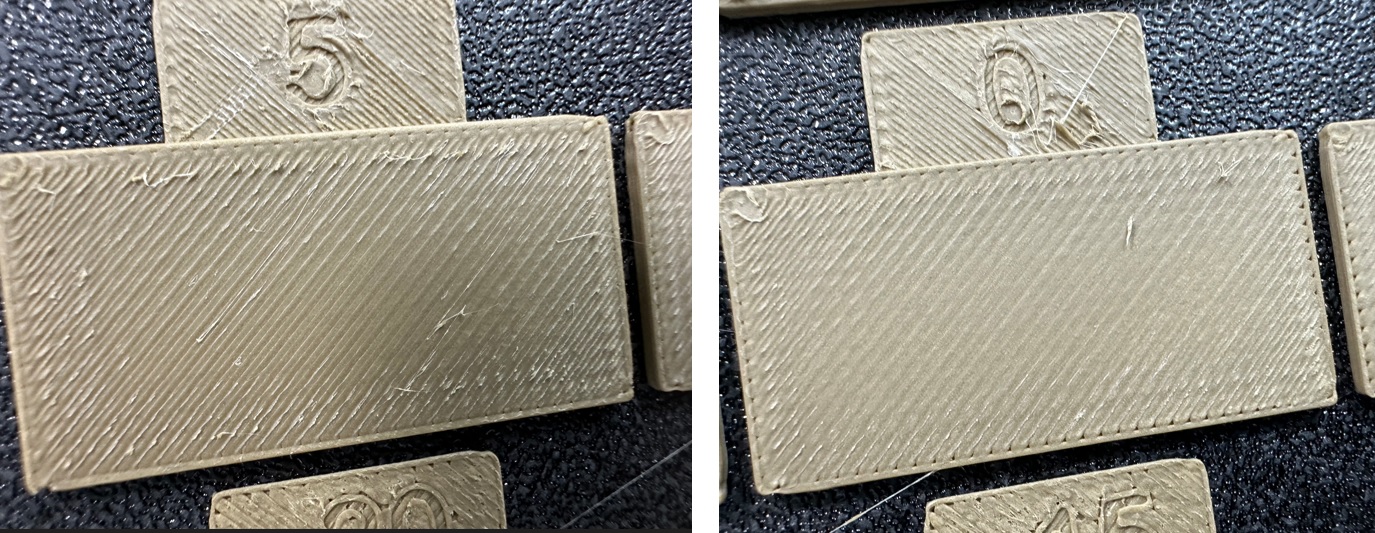
- Examine the blocks and determine which one has the smoothest top surface.
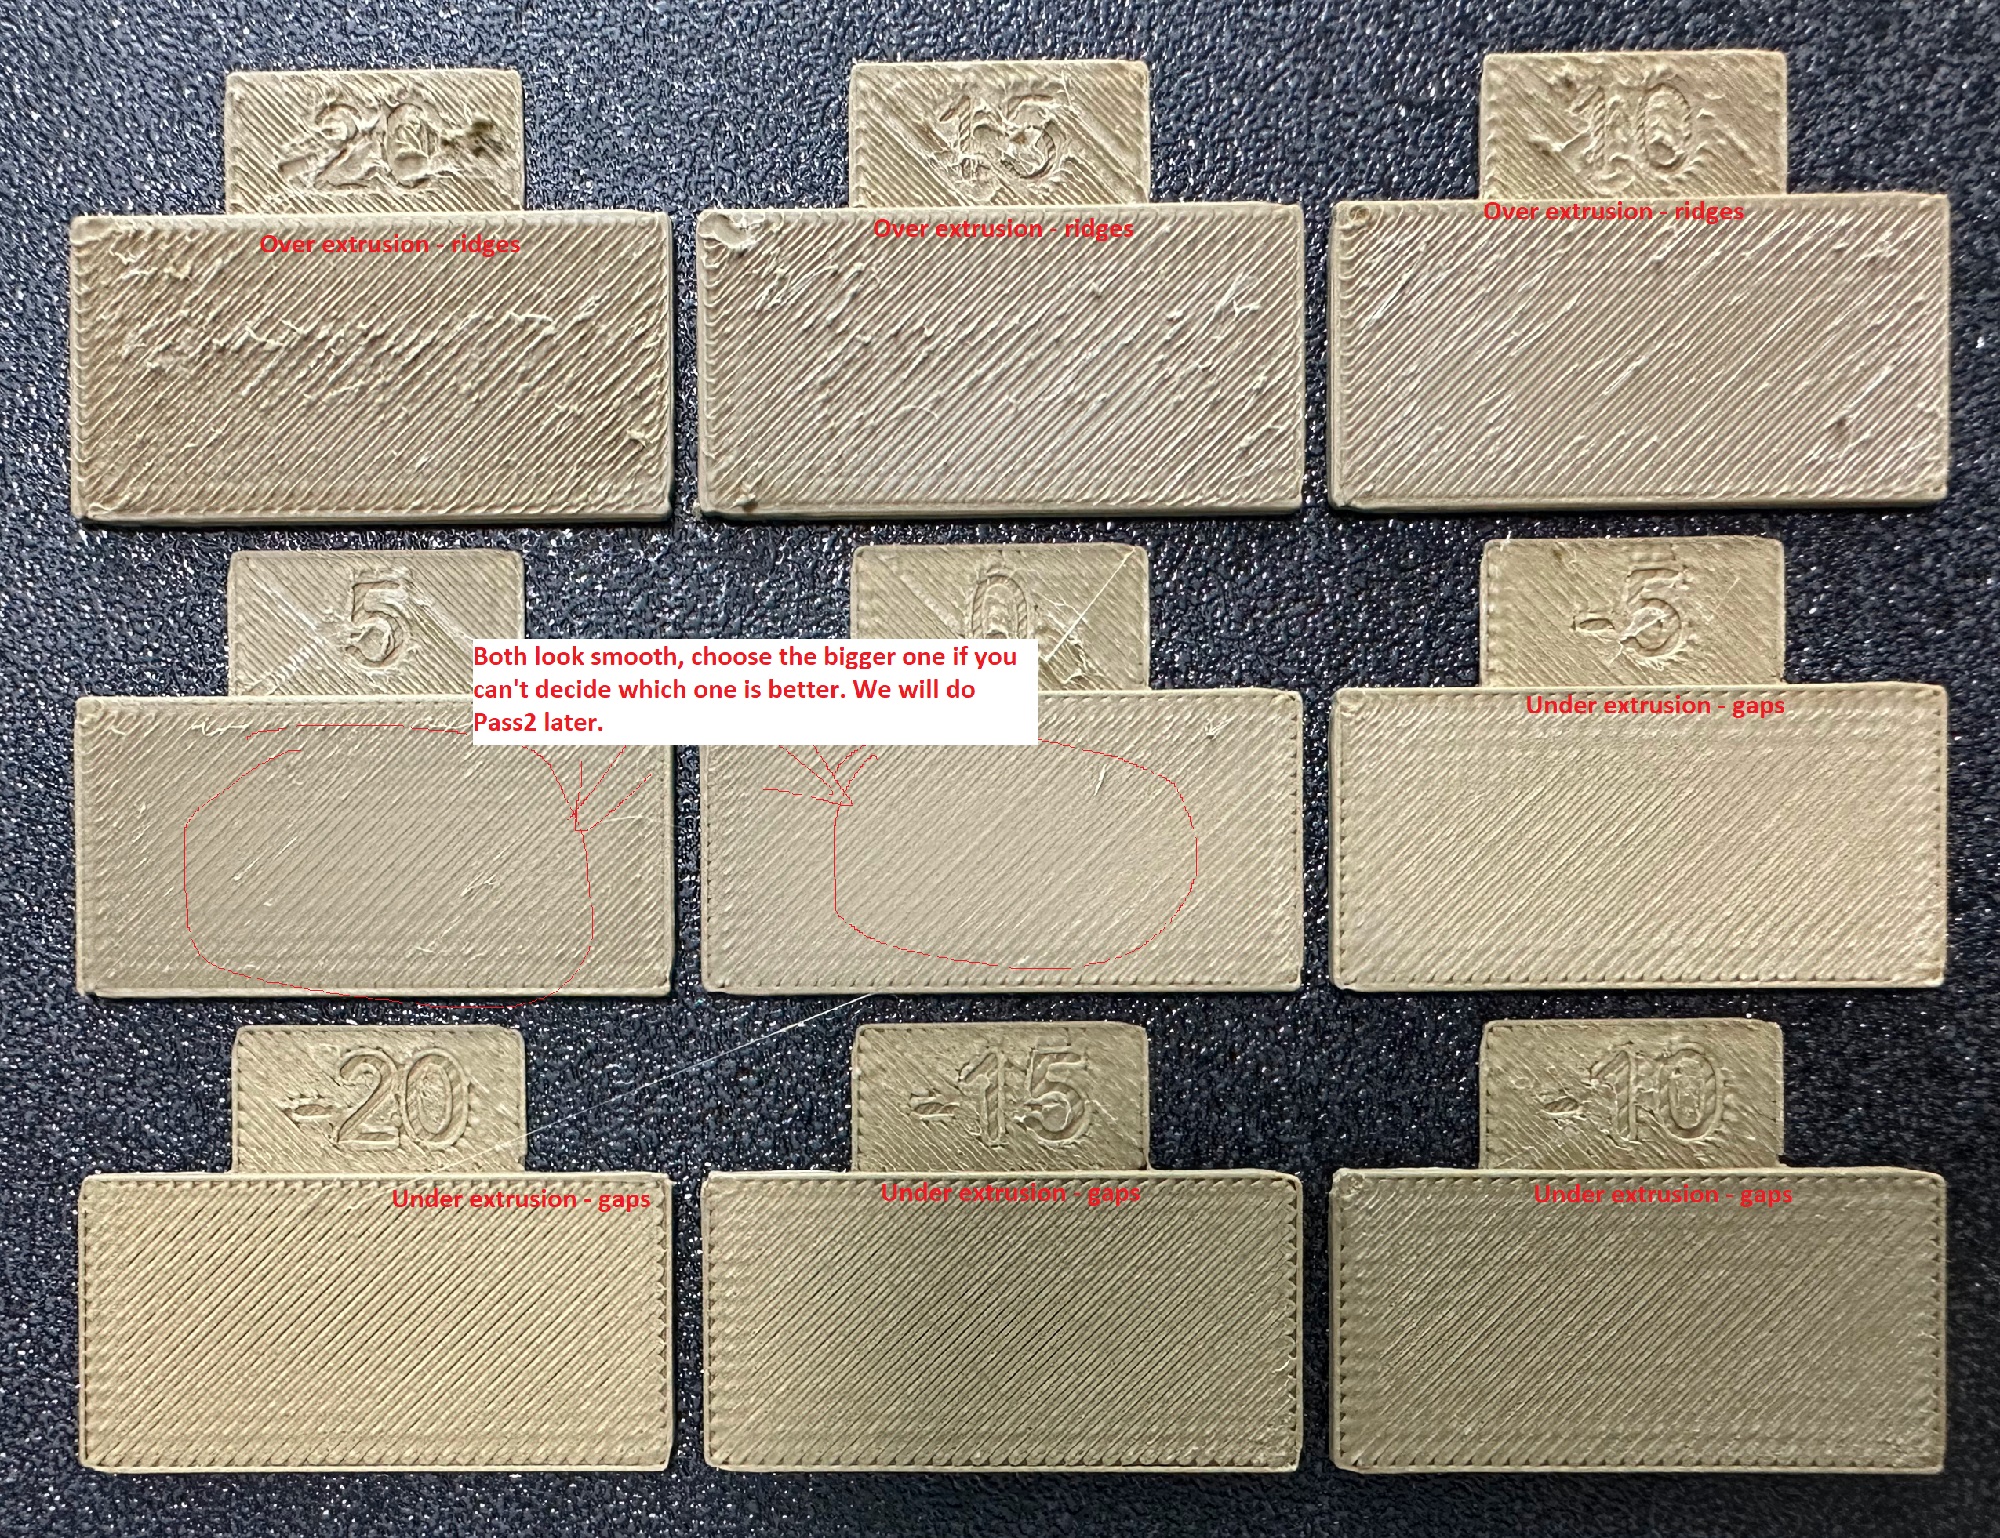
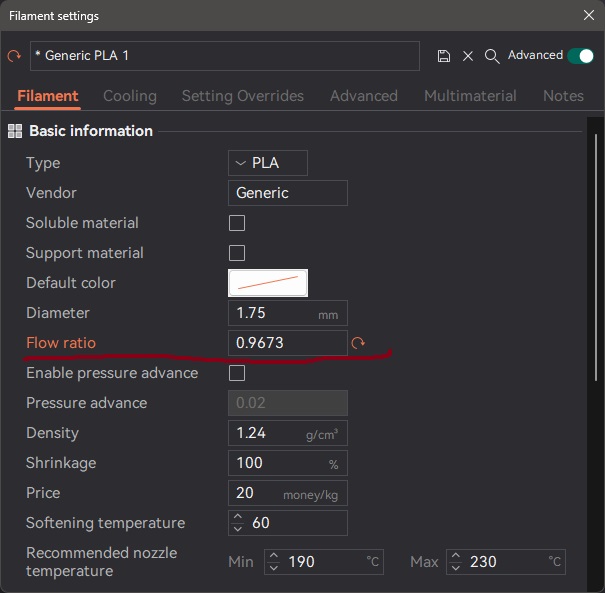
- Update the flow ratio in the filament settings using the following equation:
FlowRatio_old*(100 + modifier)/100. If your previous flow ratio was0.98and you selected the block with a flow rate modifier of+5, the new value should be calculated as follows:0.98x(100+5)/100 = 1.029.** Remember** to save the filament profile. - Perform the
Pass 2calibration. This process is similar toPass 1, but a new project with ten blocks will be generated. The flow rate modifiers for this project will range from-9 to 0. - Repeat steps 4 and 5. In this case, if your previous flow ratio was 1.029 and you selected the block with a flow rate modifier of -6, the new value should be calculated as follows:
1.029x(100-6)/100 = 0.96726. ** Remember ** to save the filament profile.