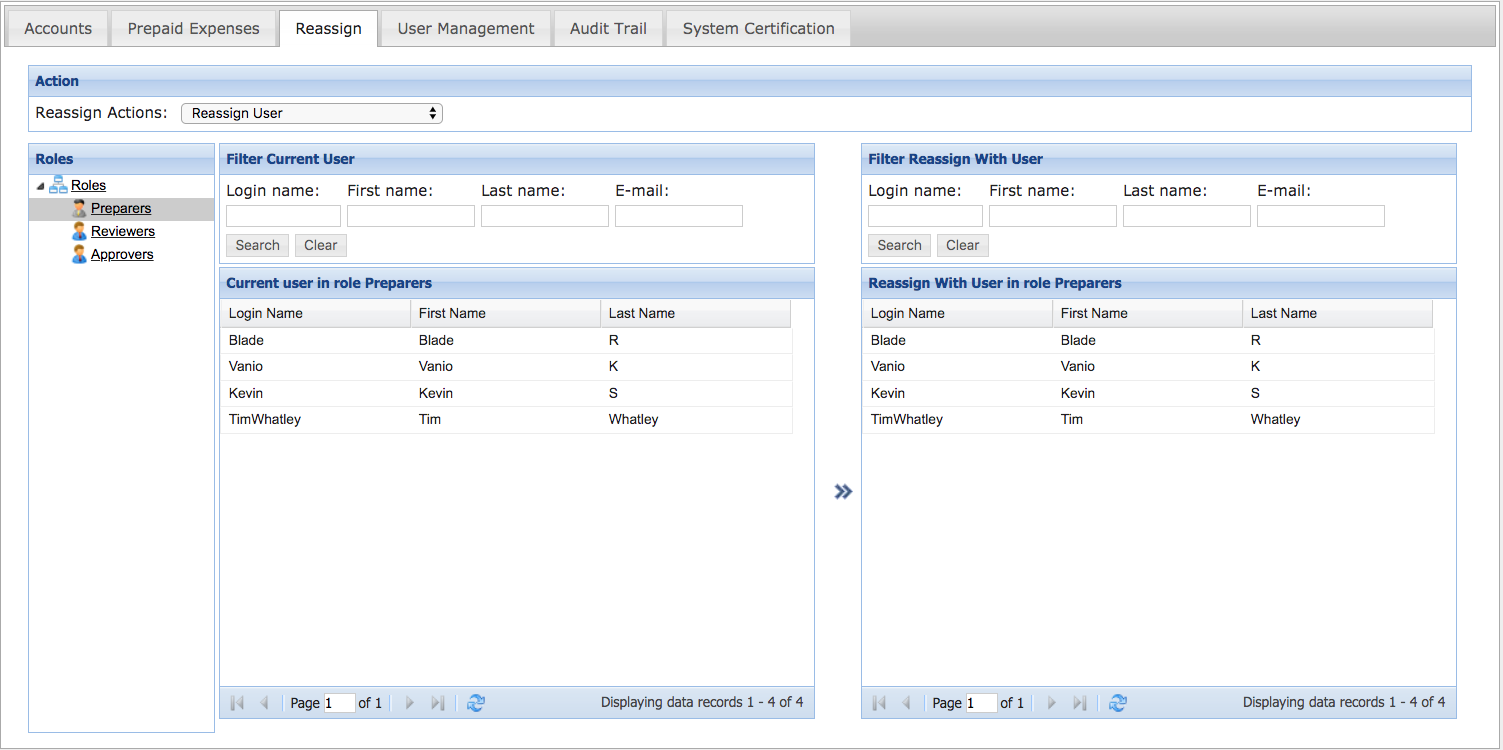
The reassign tab enables the Administrator to reassign all the accounts for which one user is assigned to another user in the same role, as well as manage the assignment of backup users. The system will prevent any role conflicts. For example: it is impossible to assign a user to be Reviewer of an account and period they are already Preparer for.
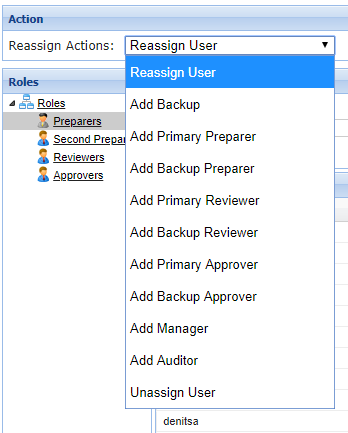
The drop-down menu at the top: 
The list of possible actions is as shown.
Reassign User: Transfers all account assignments for the selected Role from a current user to a new user.
Add Backup: After selecting a Role, assigns new users as backup to the currently selected user.
Add Primary <Role>: Allows the assignment of users into the Primary position of the role for accounts which currently belong to any user selected from the left panel. For example: If Add Primary Preparer is chosen, and the Reviewers Role is selected, the new user selected on the right panel will become Primary Preparer for any accounts that the user from the left panel is a Reviewer for. This will displace whatever user is currently Primary Preparer – they become a Backup Preparer.
Add Backup <Role>: Same as above, but instead does not displace the Primary user.
Add Manager, Add Auditor: Assigns eligible right panel user to either read-only Role for accounts belonging to the selected left panel user.
Unassign User: Unassigns the selected left panel user from the chosen Role. If the selected user is the only assigned user for a role and account, that user cannot be unassigned until a backup user is assigned.
ReconArt Note: The first two options; Reassign User and Add Backup are generally the most used.
Reassign User
Step 1. To perform a complete User Reassignment, select the Reassign User option from the Reassign Actions drop-down list.
Step 2. Select the role and then user to be reassigned from the left side of the screen. Use of the filter can aid when a large number of users are present.
Step 3. On the Right panel, select the user which will be taking the place of the original user.
Step 4. Click the 
Step 5. Select the start period that the reassignment will go into effect.
Step 6. Choose which accounts will be reassigned. In the bottom panel, accounts which cannot be reassigned due to conflict will be displayed. Clicking  will perform the reassignment for all accounts which are free from conflict. Select
 to perform the reassignment for only the selected accounts.
The process for all other reassign actions closely follows the same steps.