- STL file is most used for 3d printing and can be identified by .stl extension
- STL files consist of a series of linked triangles that describe only the surface geometry of a three-dimensional object. They don’t include color, texture, or other common CAD attributes.
- You may also hear STL files referred to as ‘mesh’ files. Mesh files are different from the “solid” files created in Fusion 360.
- We can think of these as two different languages, which means to edit the files we need to translate the data from one to the other.
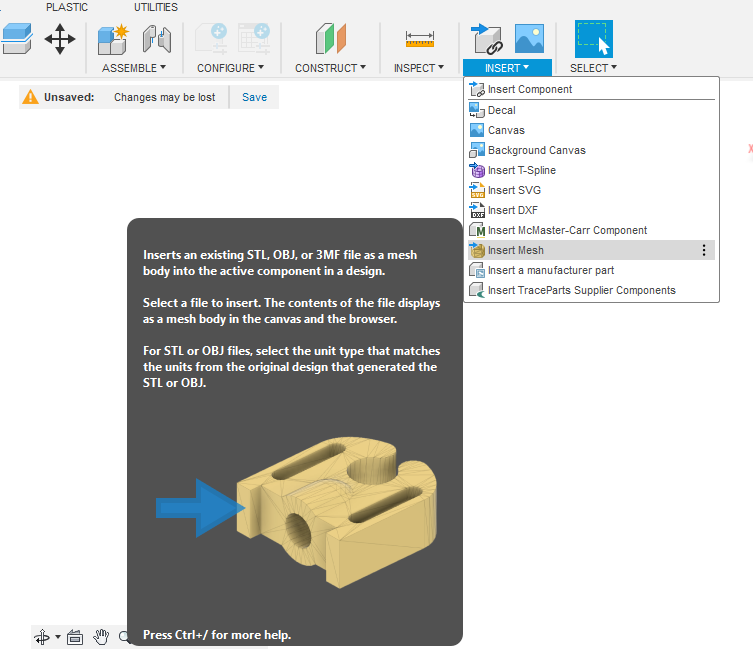
- Start by inserting your mesh file from the Insert Menu. Select “Insert Mesh”.
- Choose “Select From My Computer” and select the file from your Downloads folder.
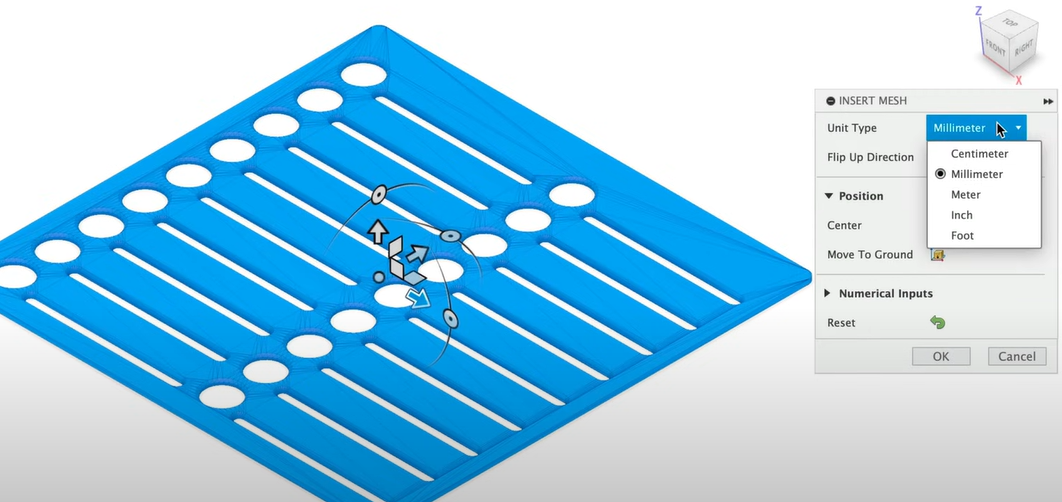
- You can choose the Unit Type in the ‘Insert Mesh’ dialog. It’s very important to note that STL files are unitless, which means they may be the incorrect scale if they were modeled in a different unit of measurement. Select Centimeters if you find your file is ten times smaller than expected.
- If needed, we can also flip the direction of the part or move the position. However, none of these are required for the conversion process.
- Select OK to insert the mesh file.
- Notice in the Fusion 360 Browser, we have a “gold” icon that represents the Mesh body. This helps you distinguish between mesh, surface, and solid bodies.
- Fusion 360 is unique in that it allows you to design and work with Solid, Surface, Mesh, and T-spline bodies in the same software package.
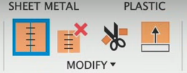
- Head to the Mesh tab in the Toolbar. It’s here you’ll find several mesh-related tools, including the Convert Mesh tool.

- Note that at times, you may find it easier to simply use the mesh tools to alter your body instead of converting the file.
- Before attempting to convert your file, always double-check that there is no warning icon next to the Mesh Body in the Fusion 360 Browser. If there is, you’ll need to first use the “Repair” tool, which is not covered in this lesson.
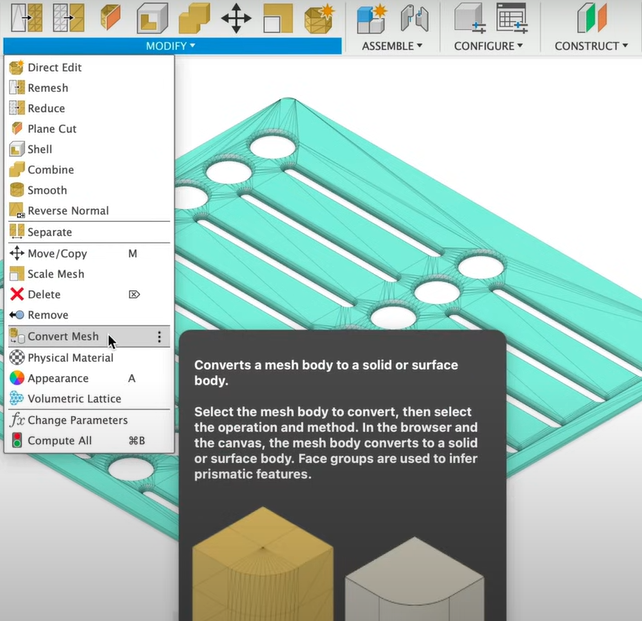
- Activate the “Convert Mesh’ feature from the Modify menu.
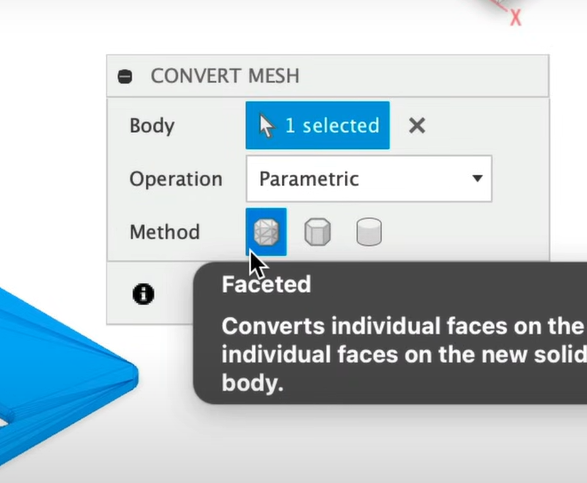
- We’ll start by selecting the desired Mesh body.
- Next, define the Operation Type.
- “Parametric” will create a feature in our parametric timeline. “Base Feature” does not maintain any parametric relationships and will not record an editable feature in our timeline.
- Lastly, you need to choose the type of conversion by the Method heading. Note that each of these methods requires different access to Fusion 360.
- Those on the free Personal Use license can only access the “Faceted” method. This is the original conversion method that Fusion 360 released.
- Those on all other license types can access the “Prismatic” option.
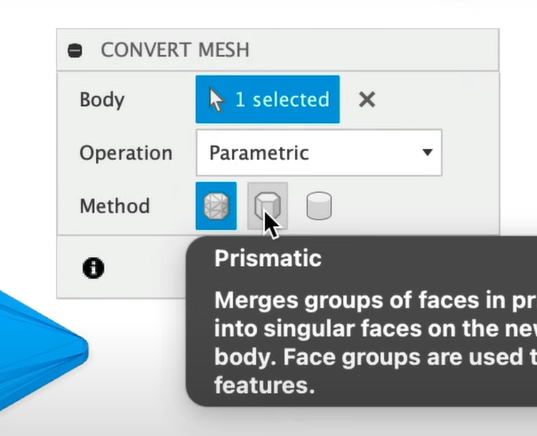
- Lastly, only those with the “Product Design Extension” can use the “Organic” option, which converts models to T-spline bodies.
- Let’s start with the Faceted method and then we’ll discuss Prismatic.
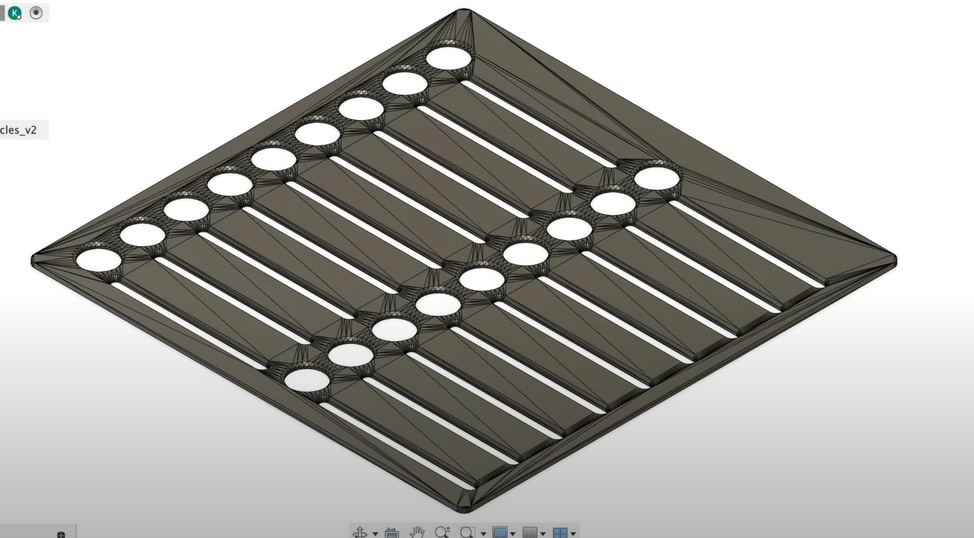
- After selecting OK, you’ll find that a Faceted conversion results in a Solid body in the Browser. However, you’ll notice this type of conversion leaves us with hundreds to thousands of triangles that had made up the original mesh file.
- Whether you can use the file will depend on several factors. In some cases, this will work just fine if you simply need to grab some measurements.
- If you need to change the size or other details, then you may or may not be able to clean up the file for the desired use case.
- In most cases, you can select a mesh triangle, followed by the Delete key. This will remove all the surrounding triangles on that same planar surface. Fusion 360 will attempt to self-heal them.
- Note that this does not work for curved surfaces.
- This is a great way to quickly clean up the file if you simply need to change the thickness or customize a planar surface with text or other design elements.
- Let’s now look at the “Prismatic” conversion. I’ll edit the ‘Convert Mesh’ feature in the timeline.
- You’ll notice this results in an error message. This is because the Prismatic conversion requires us to first generate “face groups.”
- You can think of the Prismatic option as Fusion 360 quickly rebuilding the file from scratch. The “Face groups” help the software understand where the edges or boundaries are of each face, resulting in singular faces instead of mesh triangles.
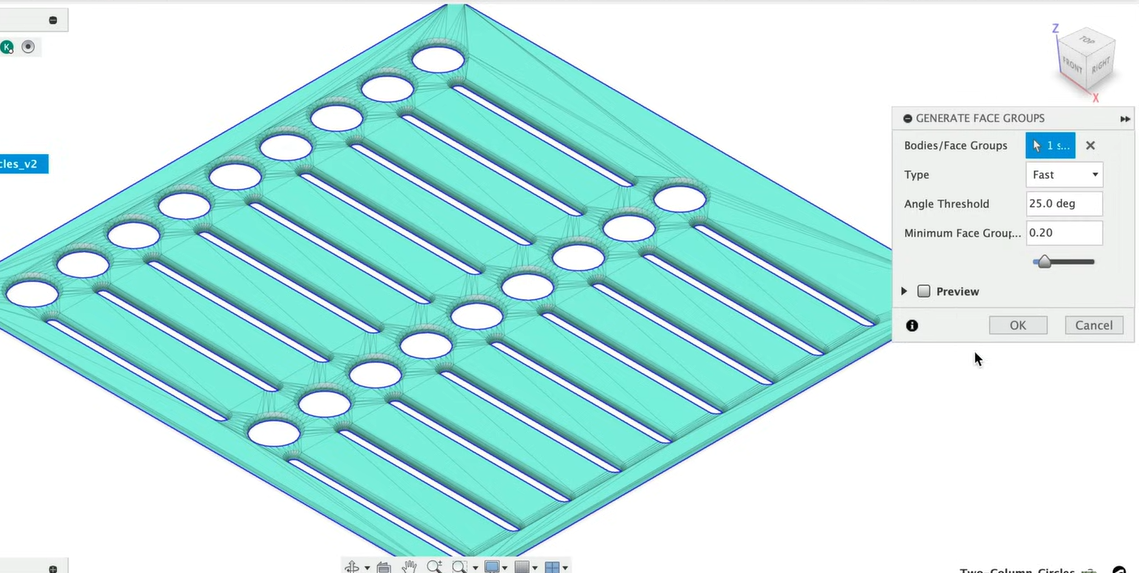
- Let’s delete the Convert Mesh feature in the timeline. Activate ‘Generate Face Groups’ and select the mesh body.
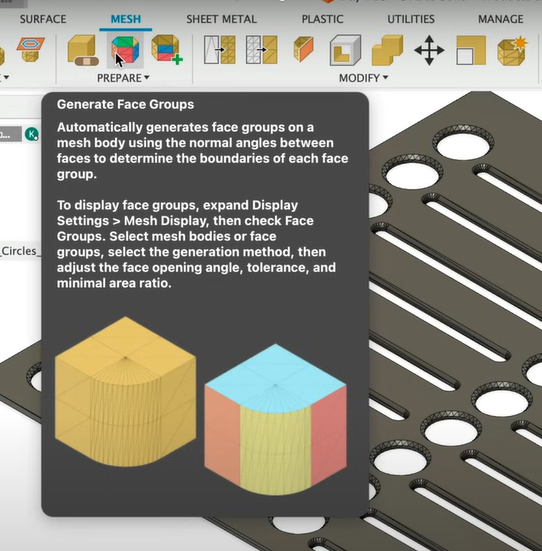
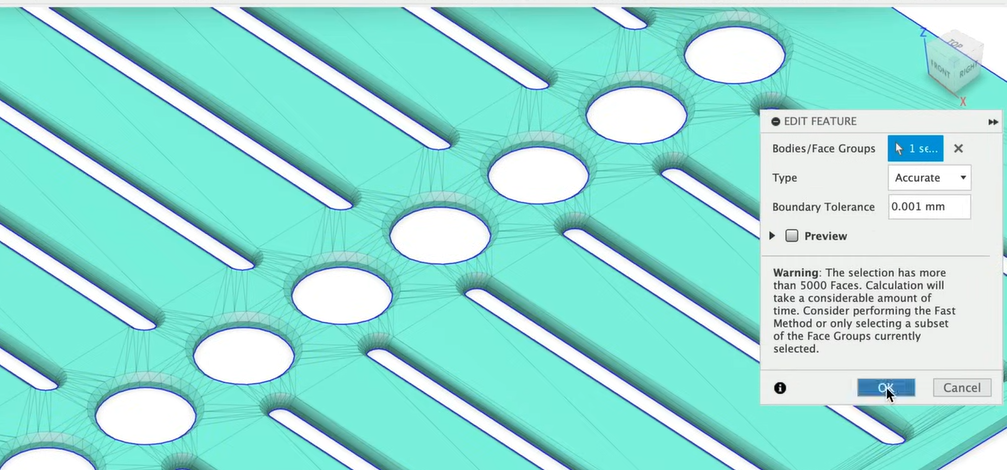
- Choose between ‘Fast’ and ‘Accurate’. This depends on the desired tolerance of your part. Using Fast is often sufficient for simple parts.
- After selecting OK, you should see colored faces on the model. If not, you’ll need to turn on “Display Mesh Face Groups” from the Inspect Menu or use “Shift + F”.
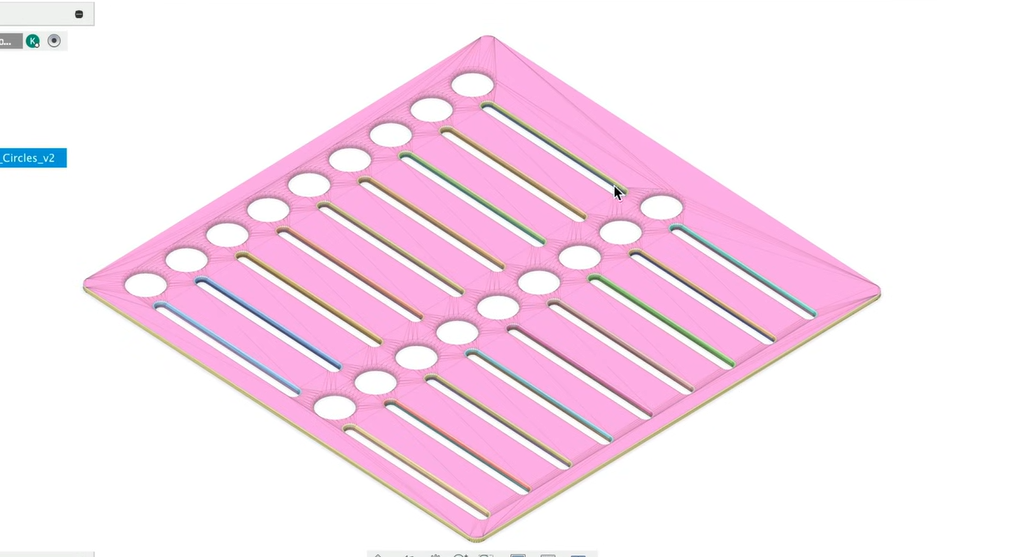
- Notice the mesh triangles on the top are now all colored the same. This is what we want as it’s telling the software that we want all of these to become a single surface
- If your conversion ends up with many different colors on the same feature or face, then you’ll want to try the “Accurate” option or adjust the Tolerance slider.
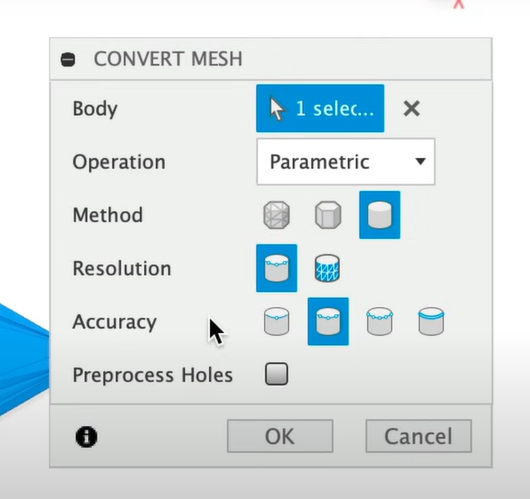
- Let’s now reactivate “Convert Mesh,” this time using the Prismatic option.
- Remember that this type of conversion is attempting to rebuild your file from scratch, so it may take a while. It depends heavily on your file’s design and the number of face groups.
- Notice this conversion was not successful, as it resulted in Surface bodies.
- Let’s undo and take a closer look at our “Face groups.”
- The only thing that doesn’t look correct is the inner holes. These should be a different color as the inner cavities are different from the top surface.
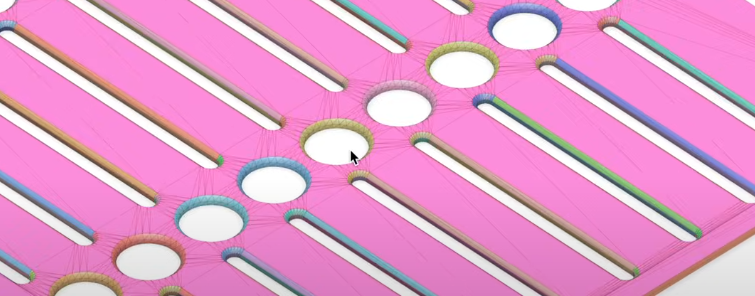
- We’ll want to edit our “Face Group” command and use the “Accurate” option instead of “Fast.”
- This appears to have fixed it, so let’s convert the file again.
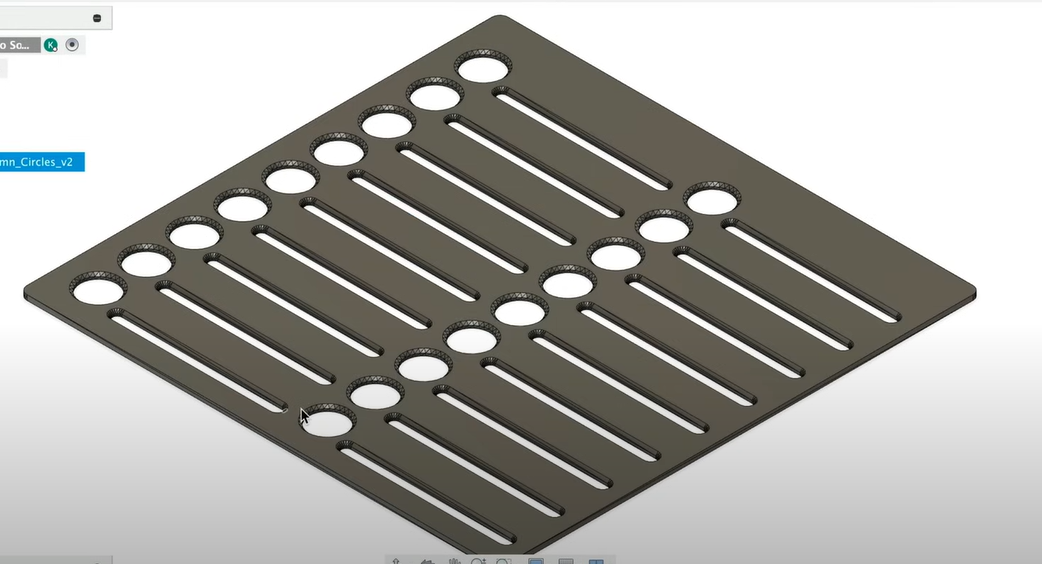
- You’ll find the file successfully converted! We now have a solid body and can edit or remove features, use Extrude to change the thickness, add text with the Emboss tool, and so on.
- Keep in mind that converting mesh files, even with the Prismatic option, will not leave you with a truly parametric file. We still don’t have sketches and constraints driving the file.
- With that in mind, you’ll want to consider whether your project makes sense to model from scratch or when you’re okay with converted bodies. There’s no right or wrong answer, it really depends on the project timeline and desired outcome.
- If the file was likely to be created with a mesh modeling program, such as Blender, then it will not convert using the Prismatic option. Faceted may convert if less than 100,000 triangles. Anything with lots of detail, repetitive texture, or anything organic like characters, is less likely to convert.
- At times, you may have to use the “Combine Face Groups” feature to manually combine faces of different colors.
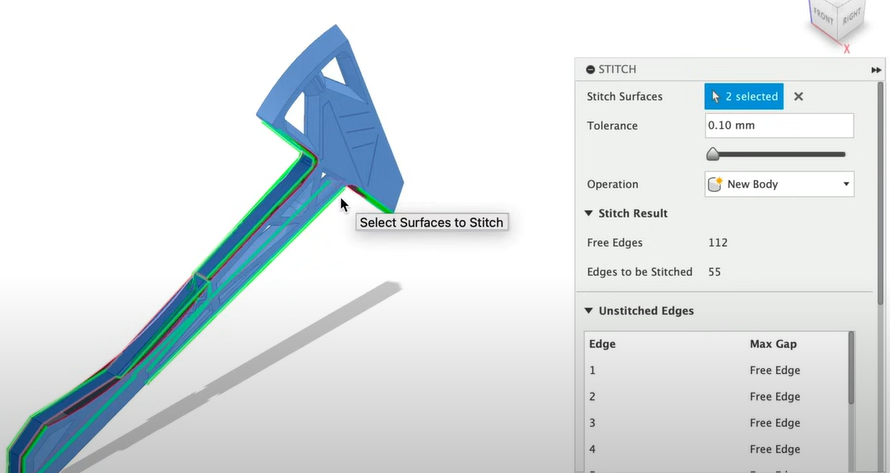
- Here’s a trick that I like to use when more complex files result in a surface body.
- Head to the Surface tab and activate the Stitch command. Once the body is selected, it will highlight all the issues in red. You can use the Patch tool or rebuild some of these specific surfaces using more advanced techniques.
- Lastly, keep in mind that the more complex the file is, the more triangles it has making up its shape, which ultimately means it will take longer to convert.
- At times, you may find that you can split the model into half or additional sections, followed by converting each section one at a time