🧭 What Is Boomi Flow?
Boomi Flow is a cloud-native workflow automation tool that allows users to:
- Design interactive applications using a drag-and-drop interface
- Connect to external systems via Boomi Integration
- Build workflows that span multiple steps, users, and system
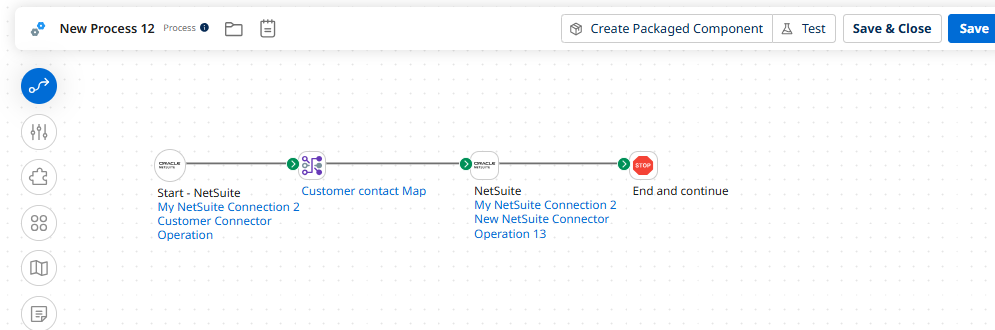
1. Create a New Process
- Log in to Boomi AtomSphere.
- Go to Build → Click Create Component → Choose Process.
- Name your process and click Create.
2. Add Source Connection
- Drag a Start Shape onto the canvas.
- Choose the Connector type (e.g., Database, FTP, HTTP).
- Configure the Connection:
- Select or create a new connection.
- Provide credentials, host, port, etc.
- Choose the Operation:
- Define what data to retrieve (e.g., SQL query, file path).
3. Add Destination Connection
- Drag a Connector Shape after the Start.
- Choose the destination connector (e.g., Salesforce, another DB).
- Configure the Connection and Operation just like the source.
4. Add a Map Component
- Drag a Map Shape between source and destination.
- Create a new Map Component.
- Select Source Profile (e.g., XML, JSON, DB schema).
- Select Destination Profile.
- Drag and drop fields from source to destination to define mappings.
- You can also use Boomi Suggest to auto-map fields.
5. Add Stop Shape
- Drag a Stop Shape at the end of the flow.
- This marks the end of the process.
6. Test and Deploy
- Save your process.
- Use the Test Mode to run the flow and check for errors.
- Once verified, deploy it to your Atom.