When using Custom Fields for your transactions or records, you may encounter situations where it’s useful to visually differentiate the field based on its values. For example, you might want to change the color of the field depending on whether the value meets certain criteria.
In this article, we’ll guide you through the process of accomplishing this by using a CASE statement formula combined with HTML tags. This approach will enable you to customize the appearance of your Custom Fields dynamically based on their values.
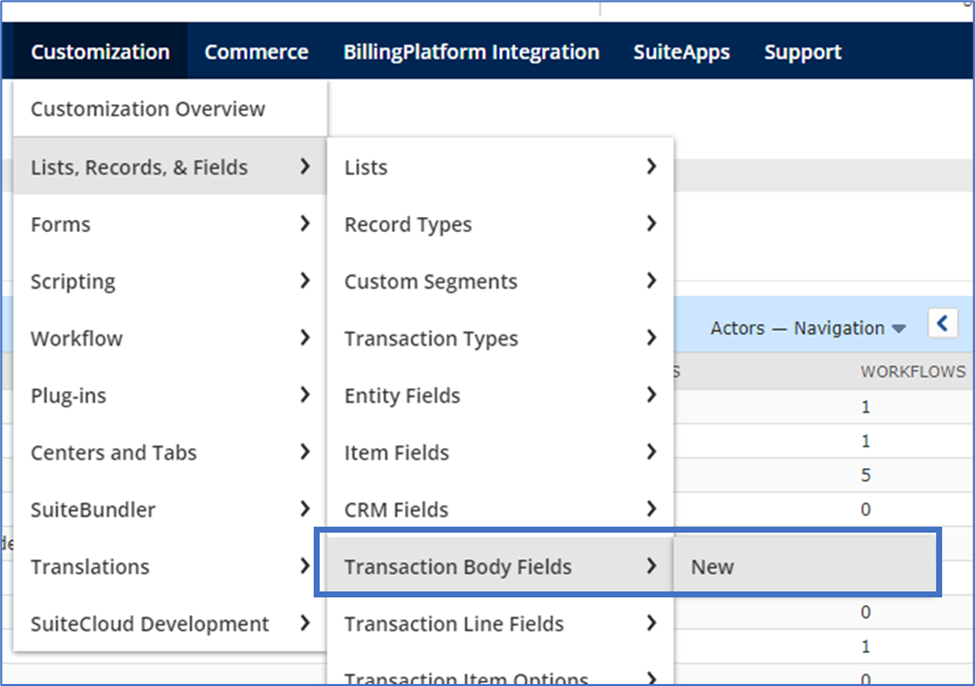
Create your Custom Field:
Navigate to Customization > Lists, Records, & Fields > Transaction Body Fields > New
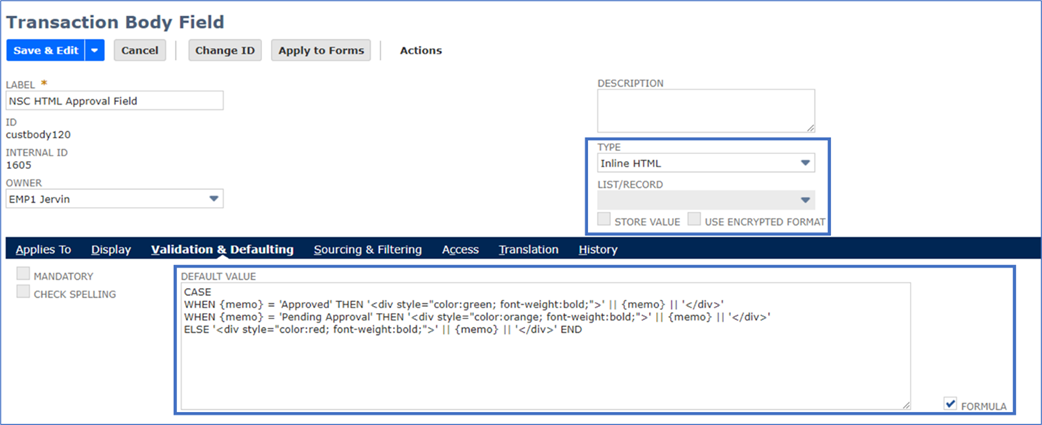
Set the fields below:
- Label: <Enter your field label here>
- Type: Inline HTML
Validation & Defaulting subtab:
- Default Value:
CASE
WHEN {memo} = ‘Approved’ THEN ‘<div style=”color:green; font-weight:bold;”>’ || {memo} || ‘</div>’
WHEN {memo} = ‘Pending Approval’ THEN ‘<div style=”color:orange; font-weight:bold;”>’ || {memo} || ‘</div>’
ELSE ‘<div style=”color:red; font-weight:bold;”>’ || {memo} || ‘</div>’ END
- Formula: Checked
Note: In this example, we’ll be using the Memo field found on the transactions.
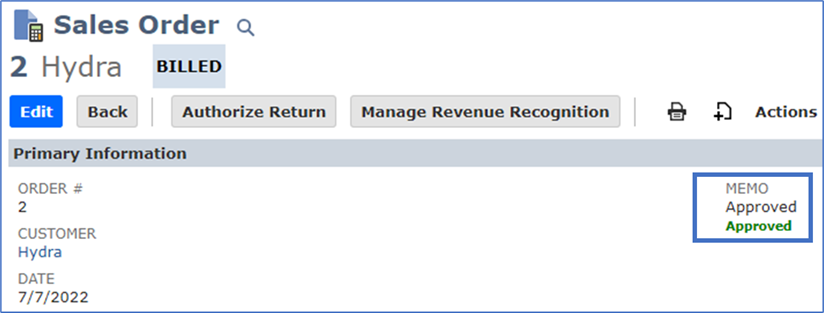
Results:
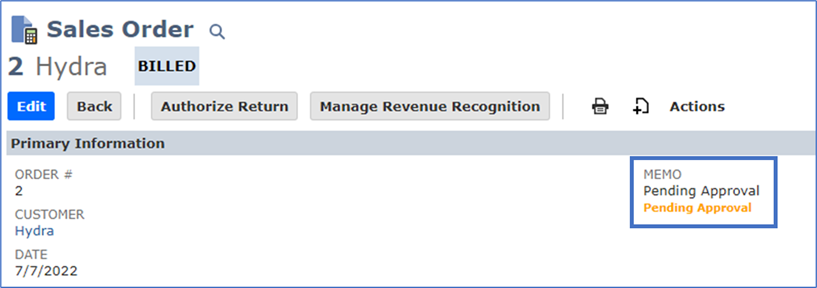
Pending Approval:
Approved:
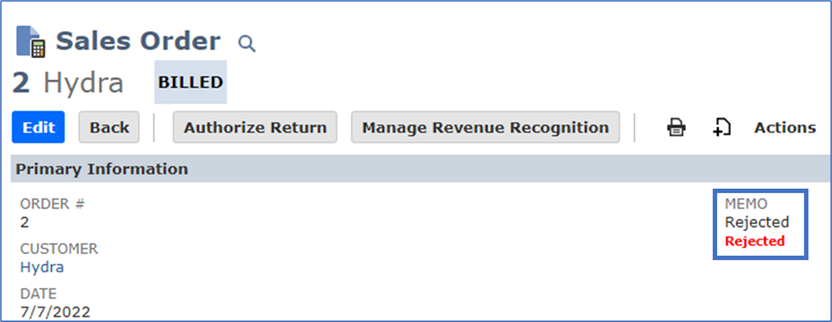
Rejected (or any other value):