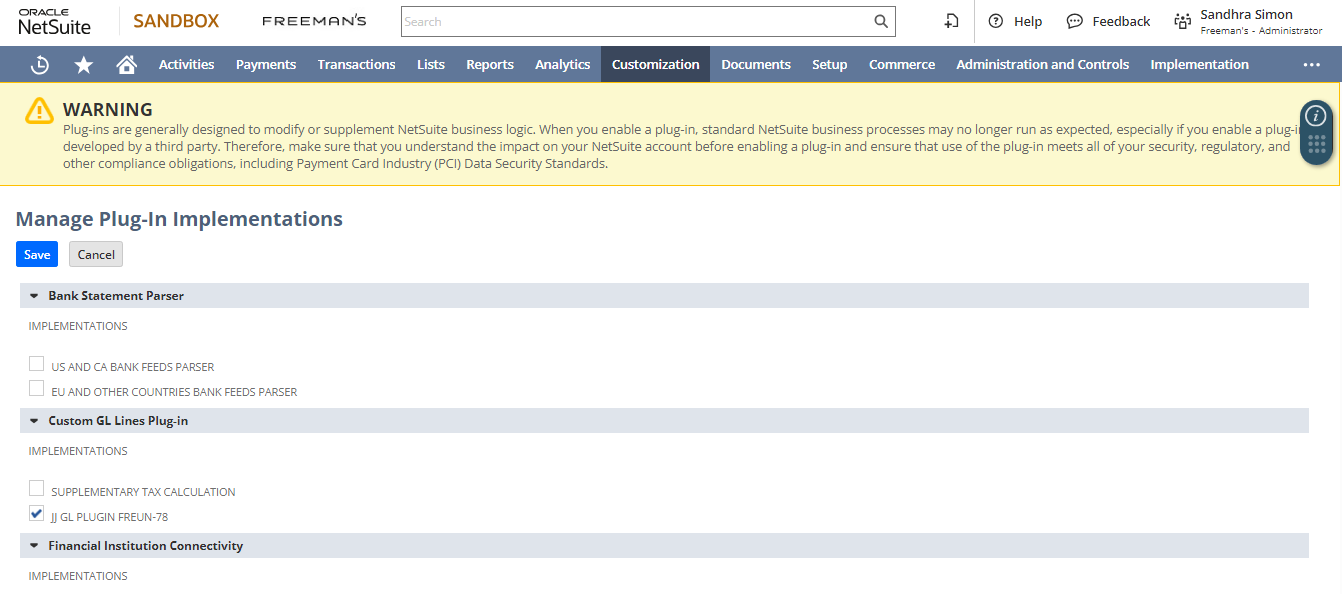
Enabling the Custom GL Lines Plug-in
- Navigate to Customization > Plug-ins > Manage Plug-ins.
- Under Custom GL Lines Plug-in, check the box next to the desired implementation.
- Click Save.
Note: If you enable multiple plug-ins for a transaction, save times might increase. Consider running some plug-ins asynchronously to resolve this issue.
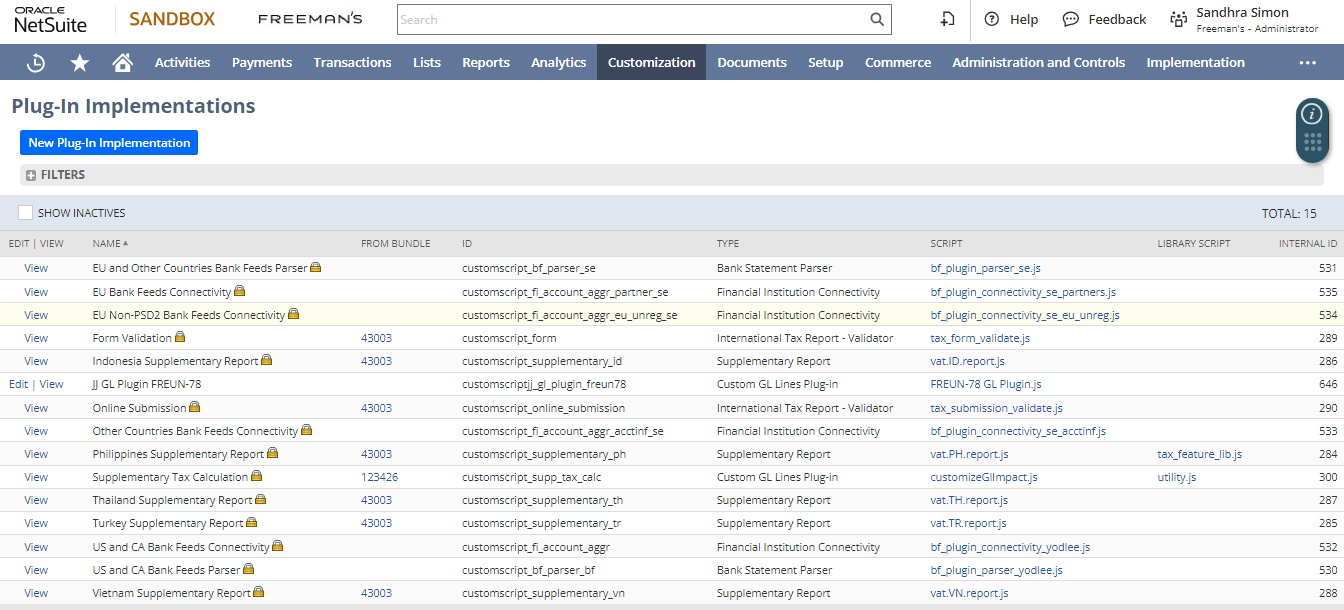
Configuring the Custom GL Lines Plug-in
- Go to Customization > Plug-ins > Plug-in Implementations.
- Click Edit next to the relevant plug-in and click Configure.
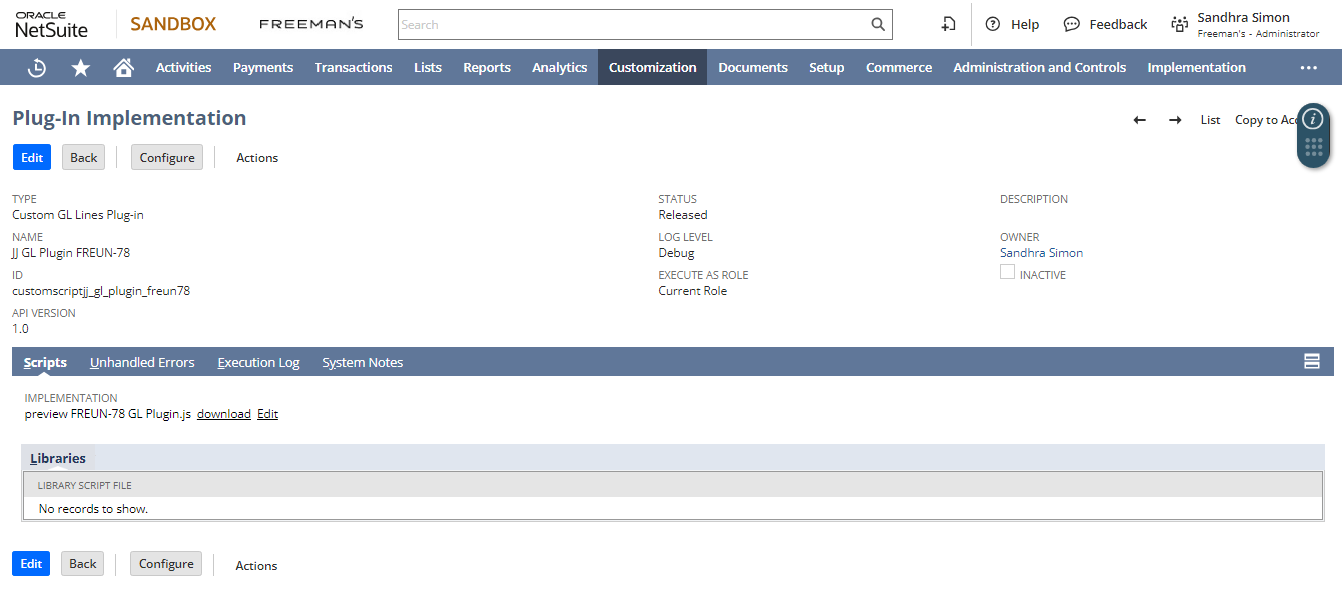
- Select transaction types, subsidiaries, and accounting books.
- If necessary, set Effective Date and End Date to manage updates or script changes.
- Check the Run in Closed Periods box if you want the plug-in to run on transactions with closed periods.
- Click Save.
For longer save times, configure one or more implementations to run asynchronously to improve performance.
Reference:
- NetSuite Applications Suite – Enabling the Custom GL Lines Plug-in Implementation (oracle.com)
- NetSuite Applications Suite – Configuring the Custom GL Lines Plug-in Implementation (oracle.com)