Steps
1. Navigate to Reports > Saved Searches > All Saved Searches > New or Lists >> Search >> Saved Searches >> New

2. Choose the ‘System Note’ search type
3. Fill out your Criteria

4. Fill out your Result columns

5. Add Highlighting and Filters as desired

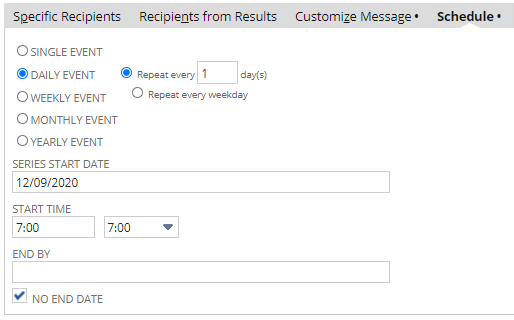
6. Set up Email Schedule as desired
Important: For optimal results, make sure your criteria in Step 3 include a date filter, e.g. changes within the past week; otherwise, your scheduled emails will keep coming with the full list of results.


7. Save & Run to view the changes to your Enabled Features!

Considerations
Here are a few things to bear in mind:
- System notes are not copied over during a Sandbox refresh. Therefore, in the Sandbox, your search will only show changes that were made since the last refresh. That should not be an issue as you most likely care more about what has changed in Production.
- Only the Administrator role has access to the System Notes of all users and record types. So, when setting up your search, be sure to do so via the Administrator role. When run from non-admin roles, your search will yield zero or incomplete results.
- There are other record types that a NetSuite Admin can monitor in this way, for example,
Company Information,Company Preferences, orTimezonechanges. Review the “Record Type” values in the system notes search criteria for a full list of supported record types.