A Step-by-Step Guide To Install and Use Vite on Your System
Before moving to the installation procedure, you must ensure that the latest version of Node.js is installed on your system.
Step 1: Checking Requirements and Initiating Installation
Once the Node.js is present and running on your computer, the next step is to run the ‘npm init @vitejs/app.’ Further, a similar list as below provided will be available, and you have to select a project name from it.
Project Name List:
- vanilla
- vue
- vue-ts
- react
- react-ts
- svelte
- svelte-ts
- preact
- preact-ts
- lit-element
- lit-element-ts
In this installation, we have selected vanilla as the project name.
When you select an option from the project name list, it creates a directory containing essential files required for software development. ‘index.html’, ‘main.js’, ‘style.css’, ‘favicon.svg’, and some additional files for performing npm and Git operations.
Moreover, the ‘package.json’ file is also present, which includes ‘vite’ as a dependency and some basic scripts to initiate the dev ecosystem for starting the build. We have all the required knowledge to move on with the installation process.
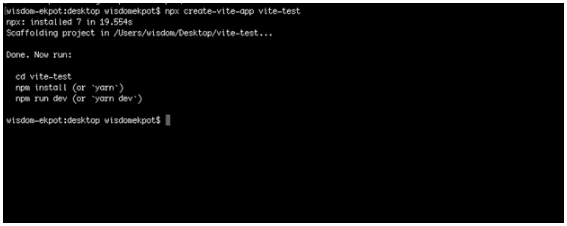
Step 2: Creating a Project Directory
Further, open the terminal on your system and navigate to any directory path to run the command as provided: npx create-vite-app vite-test, where ‘vite-test’ is the name of the project directory.
Step 3: Installation command execution
Move to the project directory using the ‘cd’ command and install the application dependency by executing the ‘npm install’ command.
Command execution structure:
- cd vite-project
- npm install
After this, you will see the application running in the VS Code.
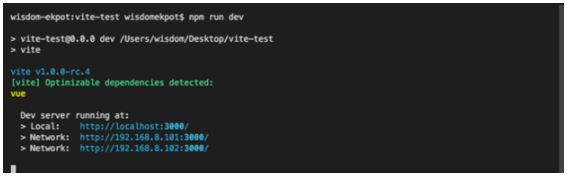
Step 4: Running the Dev Server
At this step, we will start the dev server by running the ‘npm run dev’ command, and after its successful execution, you will be able to view your application on http://localhost:3000/.
Also, if you perform any modification in the project files, all the changes will be immediately reflected on the screen.
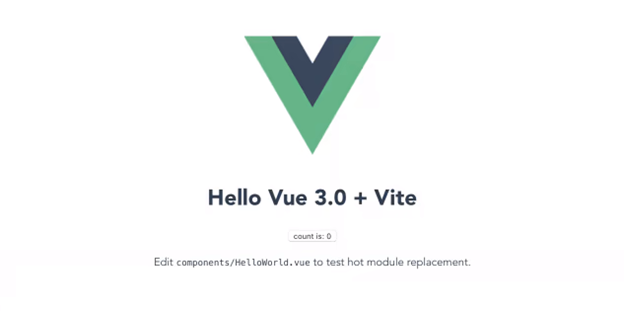
Step 5: Vite Test
This screen will be displayed to you once you navigate to the localhost page to view your application.
Now, you are ready to use Vite.js for your software development projects.