Inventory adjustments in NetSuite allow businesses to correct stock levels, account for lost or damaged goods, and reconcile discrepancies. This ensures accurate inventory tracking and financial reporting.
Steps to Reduce Inventory Using Inventory Adjustment
Navigate to Inventory Adjustment
- Go to Transactions > Inventory > Adjust Inventory.
Select Adjustment Account
- Choose the appropriate account to reflect the inventory reduction (e.g., shrinkage, damage, or write-offs).
Enter Location and Date
- Specify the inventory location and transaction date.
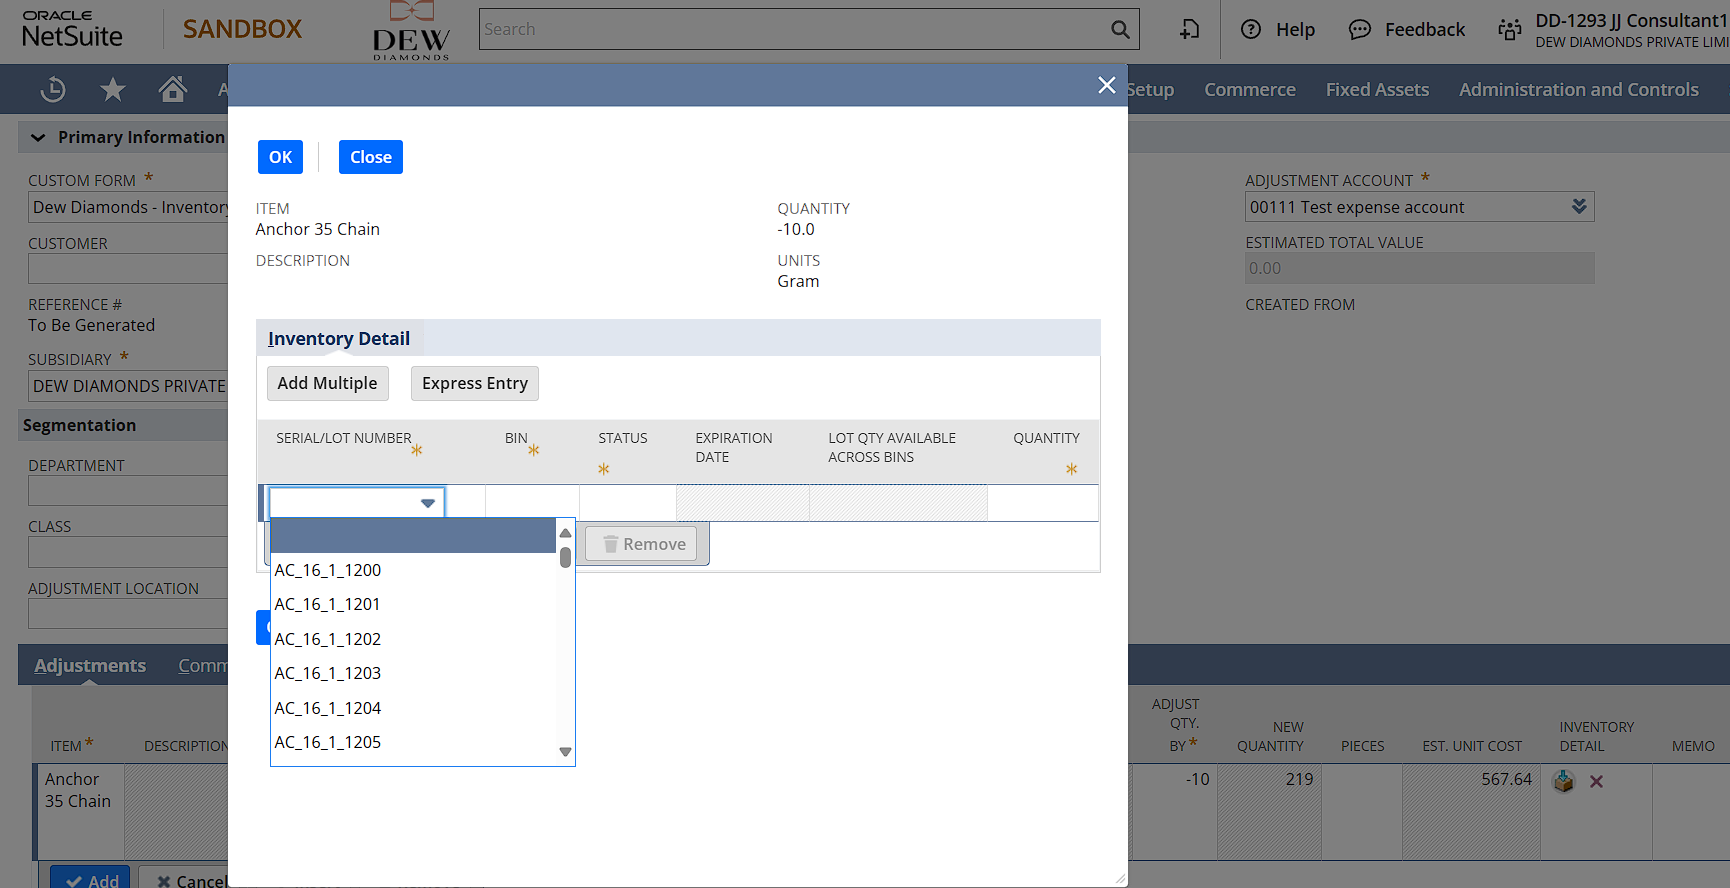
Add Items for Adjustment
- Select the items to adjust.
- Enter the quantity to reduce (use a negative value for reduction).
- If the item is lot-numbered, select the appropriate lot number(s).
- If the item is serialized, select the specific serial number(s) being adjusted.
- Provide a reason for the adjustment in the memo field.
Review and Submit
- Double-check all details to ensure accuracy.
- Click Save to apply the inventory adjustment.