Step 1: Navigate to Record Types
- Log in to your NetSuite account with appropriate credentials.
- From the Home dashboard, navigate to Setup > Customization > Lists, Records, & Fields > Record Types.
Step 2: Select the Custom Record
- In the Record Types section, select the custom record for which you want to apply the restriction.
Step 3: Access Permissions
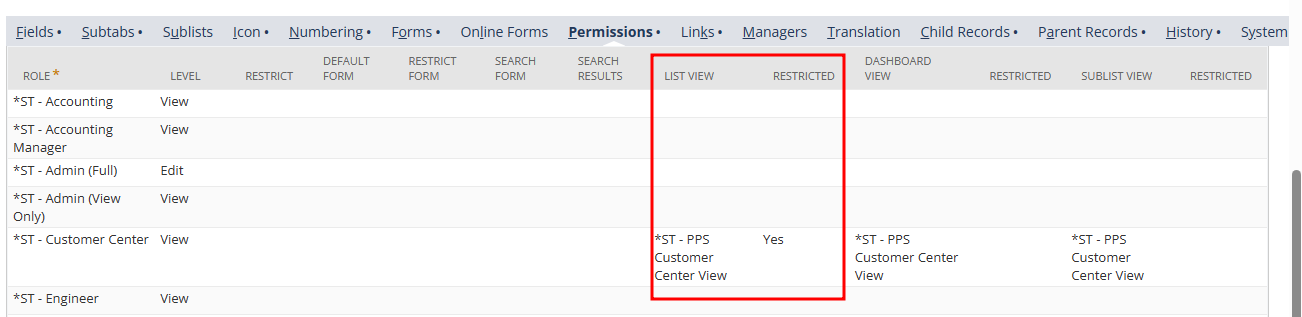
- Within the custom record setup, locate and click on the “Permissions” sub-tab. This tab controls the access permissions for different roles.
Step 4: Choose the Role
- Under Permissions, find the role you want to restrict the list view for. Click on the role name to access its permissions settings.
Step 5: Define the List View Restriction
- Within the role’s permissions settings, you should see a field labeled “List View”. This field allows you to specify the search result that will be displayed in the list view for users assigned to this role.
- Choose the desired search result from the dropdown menu provided.
Step 6: Enable the Restriction
- Next to the List View field, there should be a checkbox labeled “Restricted”. Check this box to enforce the restriction for the selected role.
Step 7: Save Changes
- Once you’ve selected the search result and enabled the restriction, don’t forget to save your changes. Look for a “Save” or “Save & Close” button usually located at the bottom or top of the permissions page.
Step 8: Testing
- After saving the changes, it’s important to test the setup to ensure it’s working as intended. Log in to NetSuite with a user account assigned to the role for which you applied the restriction.
- Navigate to the custom record’s list view and verify that only the specified search result is visible. Users assigned to other roles should not be affected by this restriction.