Setting Up an Item Group
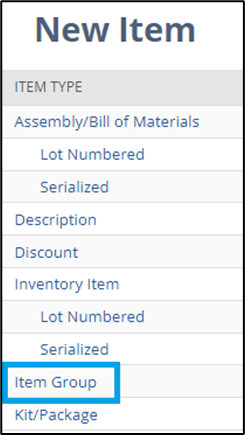
- Navigate to the New Item Record List: Go to the Lists > Accounting > Items > New
- Select Item Group from the list of item types.
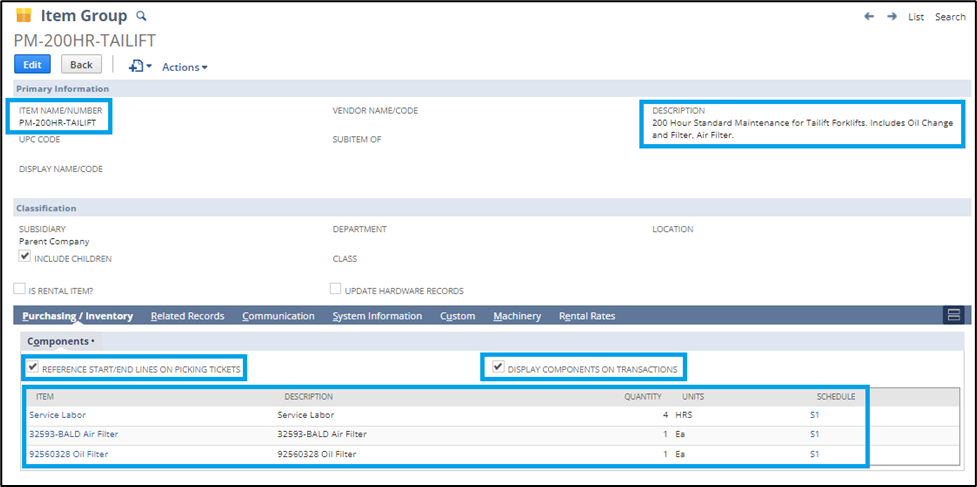
- Give the Item Group a Name. In our example, we are creating an item that supports preventive maintenance for a forklift.
- Add a Description for the item group that will be displayed in the line description of transactions when adding the item group to orders.
- Add Components: In the new group, add the items you want to group for sales on transactions when the item group is added to transactions. You can also specify a quantity for each component item. By default, the quantity is 1 for each item added.
- Select whether or not you wish to include Start and End lines on Picking Tickets for the sales order fulfillment. To include these start and end lines on the picking ticket, check the box labeled, Reference Start/End Lines on Picking Tickets.
- Select whether or not you wish to have the individual components within the Item group displayed on transactions when the item group is added to them. To display the components individually, check the box labeled, Display Components on Transactions.
- Save the Item Group.
NOTES:
- You will not be required to select Income, Asset, or Expense accounts for an item group. Since the group is a container of other items and quantities that already exist in the system, transactions will use the accounts associated with the item components on transactions.
- With Item Groups, you do not assign cost and pricing values to the item. The sales price and costs are automatically derived from the component items assigned to the group.