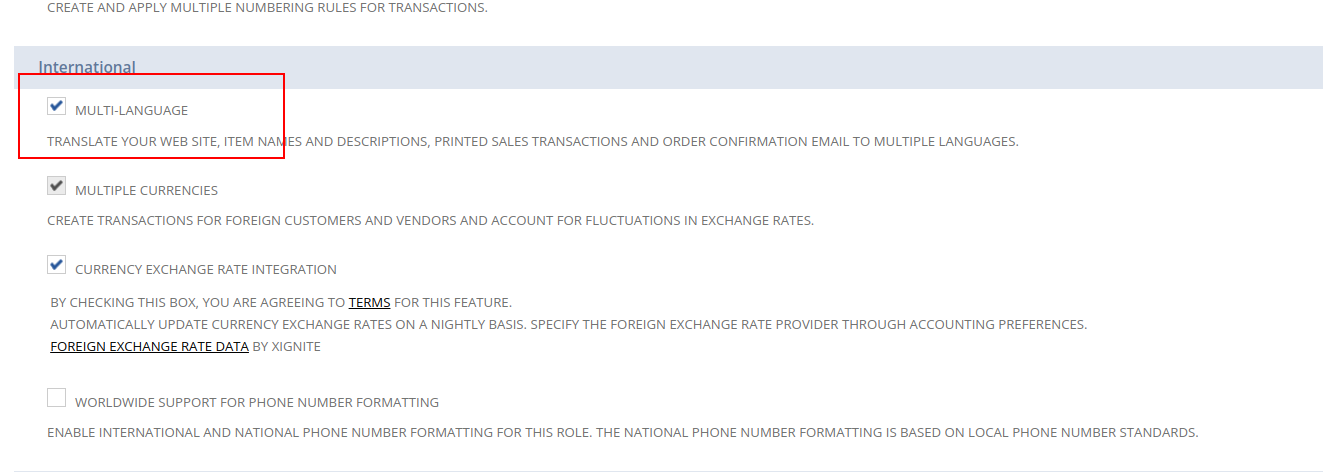
First we need to enable the multi-language feature
To enable the multi-language feature
Goto Setup > Company > Enable Feature
Enable the check box multi-language from internation sub tab
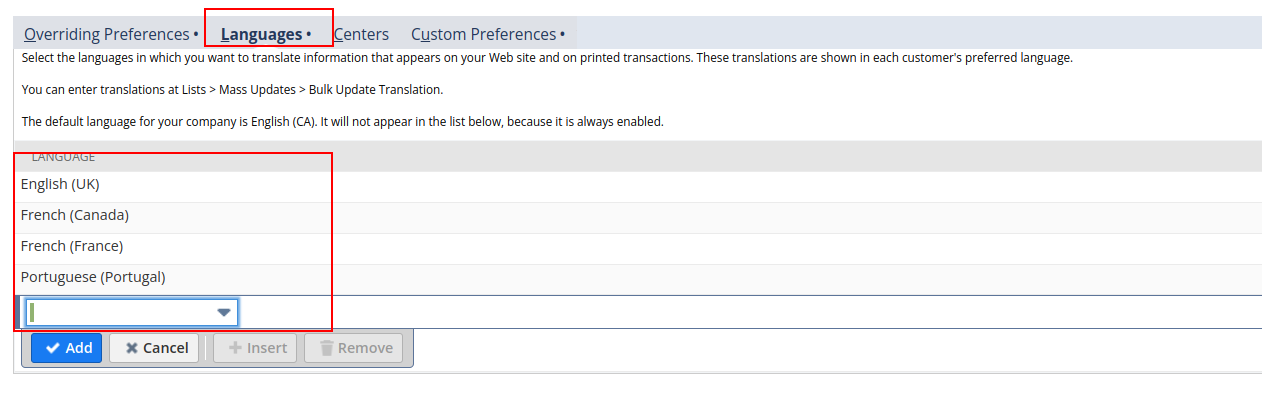
Configuring Multiple Languages
To configure the languages for your website:
- Go to Setup > Company > General Preferences.
- On the Languages subtab, from the dropdown list, select and add all the preferred languages for our NetSuite account and website.
- Click Save.
Updating Your Website Settings
This task lets you choose which of your configured languages are available to your customers.
To update your website settings:
- Go to Commerce > Websites > Web Site List.
- Click Edit beside the website you want to update.
- Click the Shopping subtab.
- Click the Languages subtab.
- Check the Online box next to each language you want to display on your site. This automatically begins a reindex of your site.
- Click Save.
Creating the Language Specific Domain
To create your new language specific domain:
- Go to Commerce > Hosting > Domains > New.
- Enter a name in Domain Name. Ensure the new domain name indicates the specific language.
- Ensure the information and settings match your website.
- Click Save.
Setting Up the Locale for the New Domain
To setup the locale for the new domain:
- Go to Commerce > Web Sites > Configuration.
- Select the website and domain, and click Configure.
- Click Multi-Domain.
- Click Hosts.
- Complete the empty fields and click Add.
- Click Save.
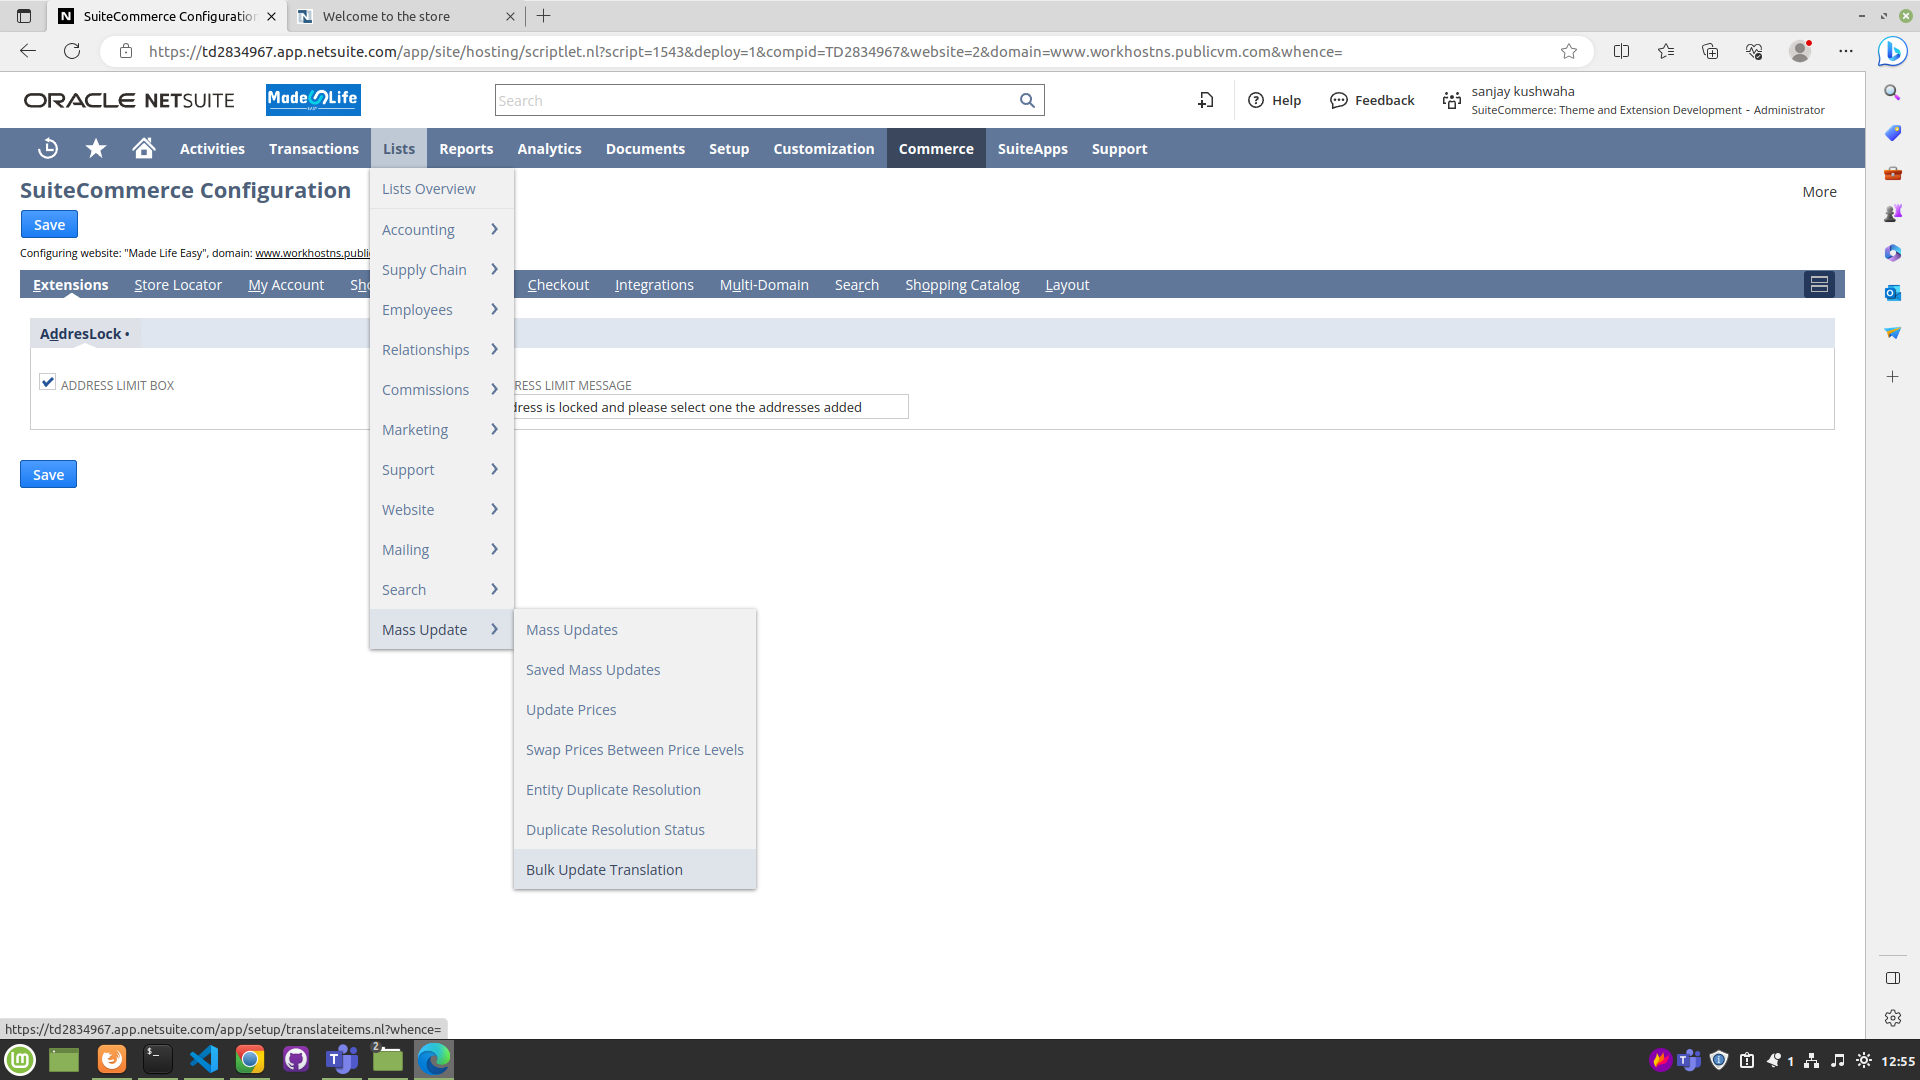
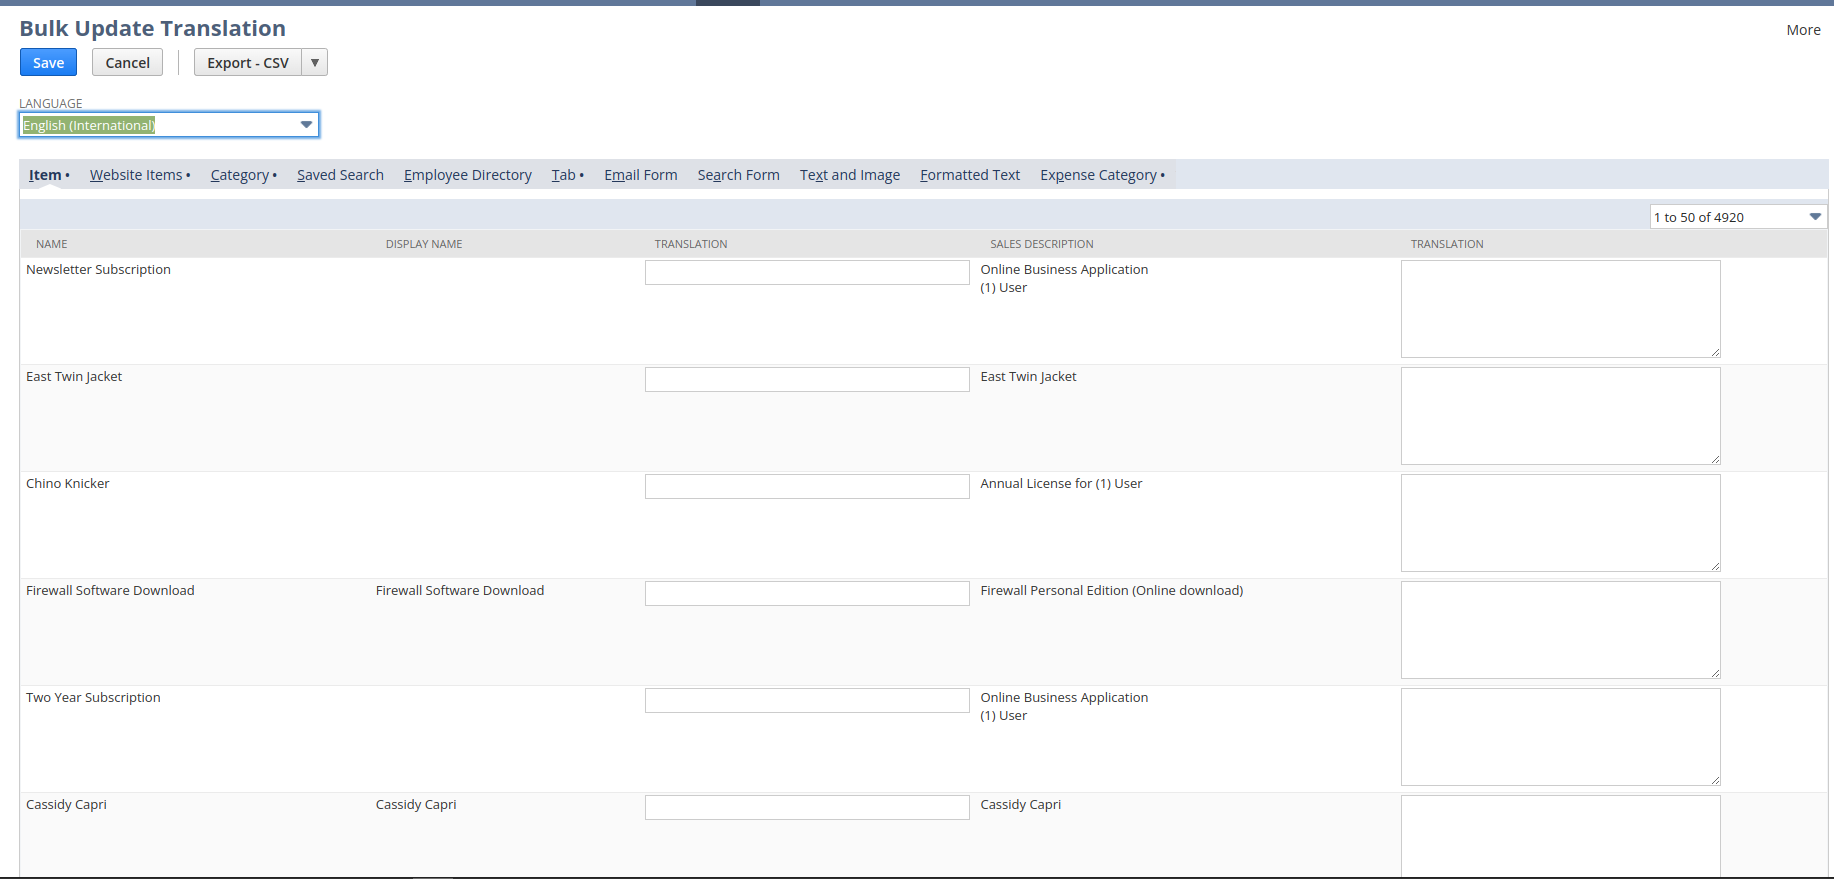
For Translation of Landing page we need to update each landing Page using SMT
For Item Name, Description and category name also we need to update manually by doing mass update.
Mass update
Nevigate to List> mass update > Bulk update translation
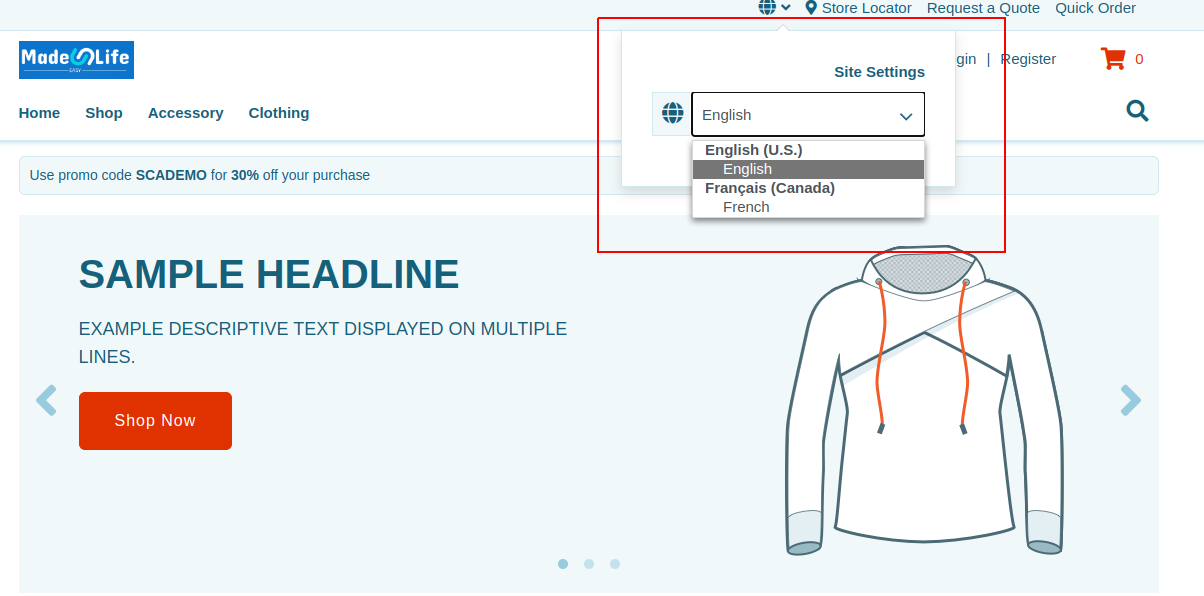
After setting up everything Correctly a drop-down for language change will show in header as shown below.