Newer versions
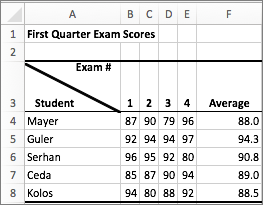
You can use an angled border to create a dual-label corner cell such as the one shown here.
- To put text in the upper-right part of the cell, select the cell that you want to format, and then type 10 space characters. You can adjust this later, as needed.
- Type the first label, which corresponds to the column labels.
- To create two line breaks in the cell, hold down CONTROL + OPTION and press RETURN two times.
- Type the second label, which corresponds to the row labels down the left side of the table, and then press RETURN . You can adjust this later, as needed.
- Again, select the cell that you want to format.
- On the Home tab, click Format, and then click Format Cells.
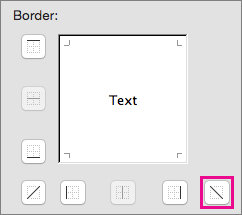
- Under Border, click the upper-left-to-lower-right angled border regulator.
Office 2011
You can use an angled border to create a dual-label corner cell such as the one shown here.

- To put text in the upper-right part of the cell, select the cell that you want to format, and then type 10 space characters. You can adjust this later, as needed.
- Type the first label, which corresponds to the column labels.
- To create two line breaks in the cell, hold down CONTROL + OPTION and press RETURN two times.
- Type the second label, which corresponds to the row labels down the left side of the table, and then press RETURN. You can adjust this later, as needed.
- Again, select the cell that you want to format.
- On the Format menu, click Cells.
- Under Border, click the upper-left-to-lower-right angled border button.