Static Groups offer a powerful solution to streamline administrative tasks, enhance security, and improve team collaboration in NetSuite.
By organizing business operations through these groups, you can save valuable time and boost efficiency with a centralized view of critical information. In this blog post, you’ll learn how to define a static group in NetSuite and use it to schedule emails that automatically send the results of saved searches to the designated group members.
Static Groups vs. Dynamic Groups
Static Groups
- Members are manually added (via UI or CSV import) and remain fixed.
- The list only changes when modified by authorized users.
- Ideal for scenarios where group membership rarely changes and needs careful management.
Dynamic Groups
- Members are dynamically updated based on the results of a saved search.
- The group updates in real-time as the saved search results change.
- Perfect for situations requiring automatic updates to group membership based on specific criteria.
Currently, Saved Searches can’t be emailed to a Dynamic Group, but a Static Group serves as a good alternative. You can create Static Groups by choosing members from list records or utilizing a saved search. These groups are fixed and require manual updates to add or remove members. Keep in mind, Static Groups have a member limit of 10,000, so if your group exceeds this number, you’ll need to use a Dynamic Group instead.
How to Create a Static Group:
1. Navigate to Lists > Relationships > Groups > New
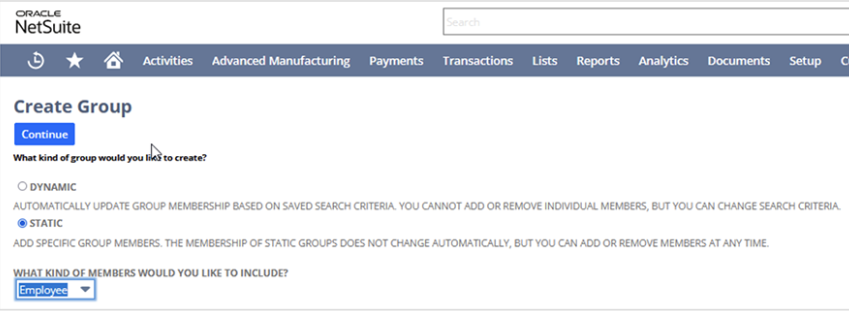
What kind of group would you like to create? > Select Static
3. What kind of members would you like to include? > Select Entity Type (Example: Employee)
MAKE SURE TO NOTE: If you’re using a password manager application, be aware that it may automatically populate the “Email” field when creating or editing the Group. Remove the email address in this field if you would like all members of the group to receive the message containing the results of the saved search.

Edit or create the Saved Search to insert the Static Group
1. Navigate to Lists > Search > Saved Searches
2. Click Edit for the desired Search
3. Click Email
4. Click Specific Recipients
5. Recipient:
– Type the Name of the Static Group
– Click Add
Note: To send Email by Schedule, you will need to mark the box for Send Emails According to Schedule and set the frequency within the Schedule subtab.
Note: You can also add several Groups as Recipients of the Email.