Custom fields play a vital role in streamlining processes within any company by allowing users to capture and organize specific data tailored to their unique business needs. Whether tracking product specifications, production stages, or client preferences, custom fields provide the flexibility to adapt systems and workflows efficiently, enhancing overall productivity and decision-making capabilities.
In NetSuite, when creating custom fields, it’s important to keep a few key tips in mind:
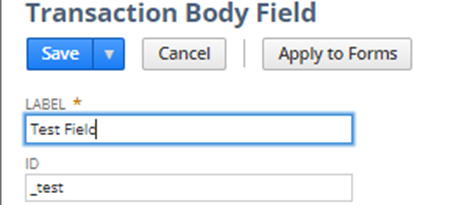
1.Field ID: It is better to start with an underscore, use lowercase only (eg:_idname) every custom field will have the word “cust” (eg: custody, custcol, custentity) to identify that it is a custom field.

2. Data will be deleted when:
a. Changing Custom Field Type. A possible workaround is to invalidate the previous Custom Field and create a new one.
b. Unchecking the “Store Value.” checkbox. This will delete the data that is stored in the custom field.
![]()
3. To create a Formula in Default Value:
- Check the “Formula” checkbox under the Validation and Defaulting subtab and uncheck Store Value.

- Examples of what you can put in the Default value textbox:Display Concatenated fields: {title}||{assigned}
- Display Related Records: {company.email}
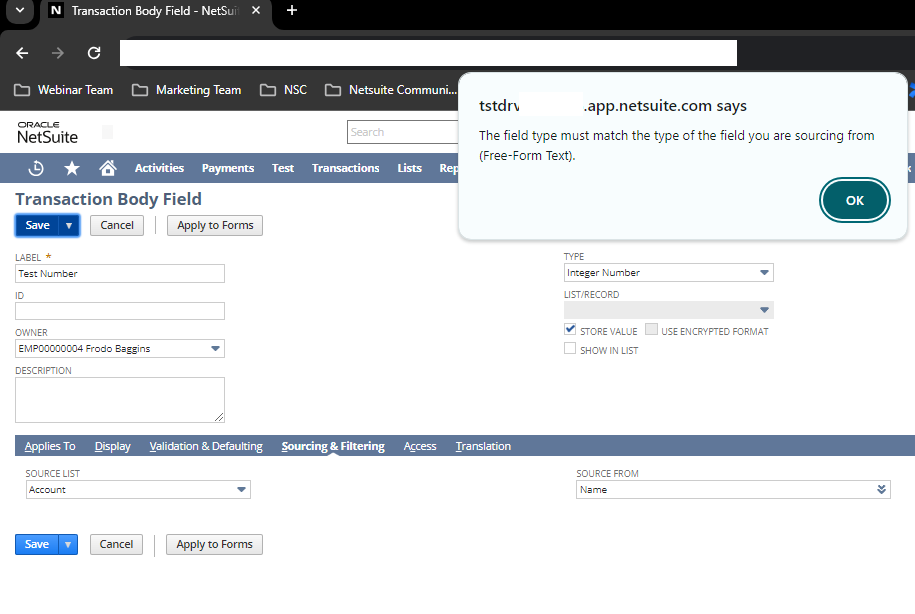
4. Sourcing & Filtering strictly adheres to custom field types.
The information or data you gather or filter through these custom fields must match the specific type of data that the custom field is designed to handle.
For instance, if you have a custom field where you’re supposed to input numbers, the sourcing and filtering process will only work properly if you input numbers into that field. If you try to input text or any other kind of data that doesn’t match the expected type (in this case, numbers), it might not work correctly or could cause errors.
Example: Created an Integer Number type Custom Body Field and then used a source that is using Name (String type) in the Sourcing and Filtering tab.
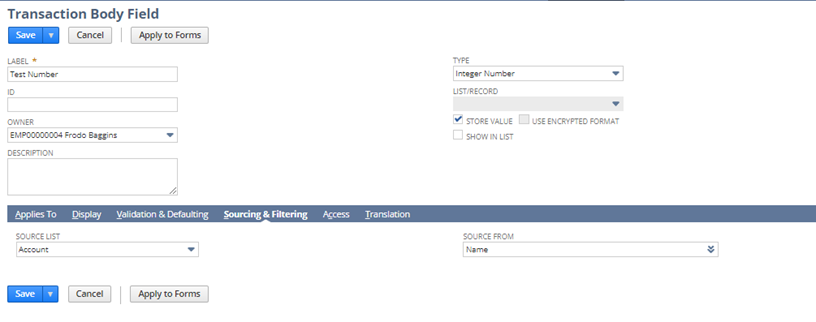
Result:
An error popped up because the type of field we were using for the source didn’t match the type of field it was expecting.
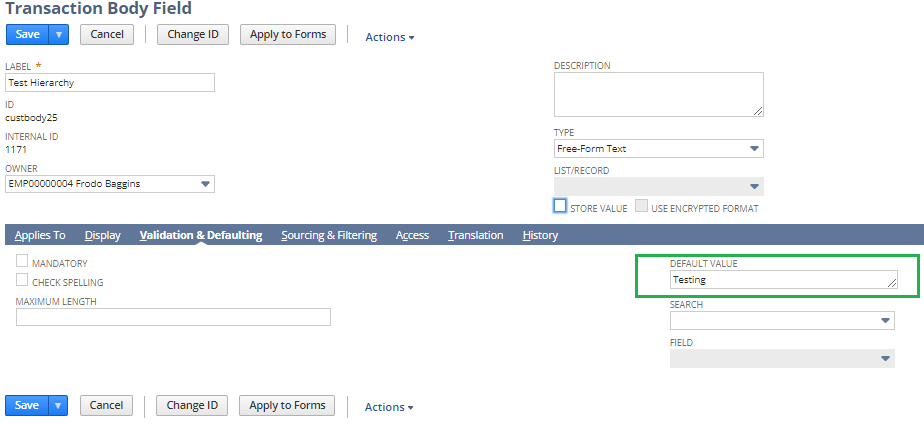
5. Sourcing & Filtering vs Default Value Hierarchy
If Sourcing & Filtering and the Default Value under Validation & Defaulting subtabs are both populated, testing shows that Sourcing & Filtering is prioritized over Validation & Defaulting
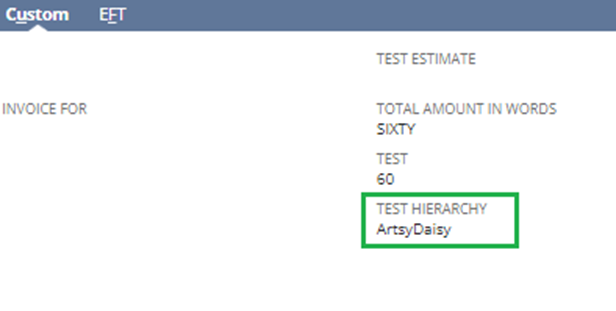
Example: Created a Custom Body Field with populated values for both Sourcing & Filtering and Default Value within the Validation & Defaulting subtabs
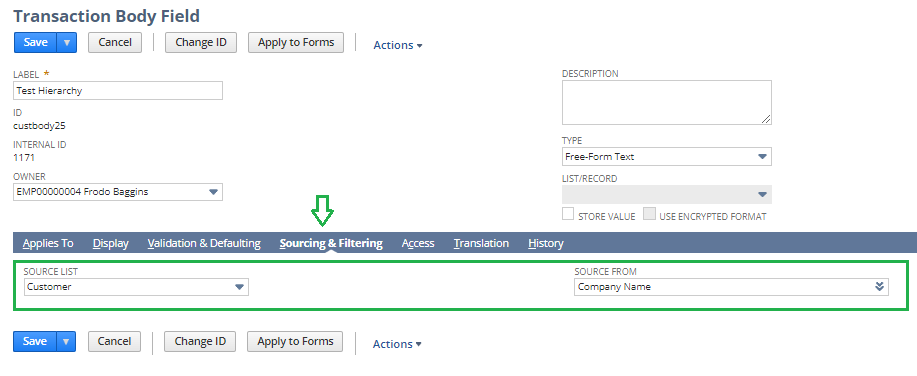
Results:
The customer’s company name appears in the result because the system prioritizes Sourcing & Filtering over Validation & Defaulting.
6. Store Value: If you want to store data in the custom field, make sure to check the “Store Value” checkbox.
![]()
Different Ways to Create Custom Fields
When it comes to creating custom fields, there are several approaches you can take:
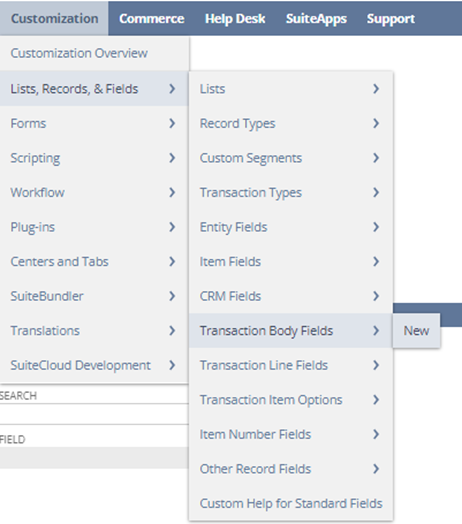
- To create new fields via List, Records and Fields:
Navigate to Customization > List, Records, & Fields > Transaction Body Fields > New.
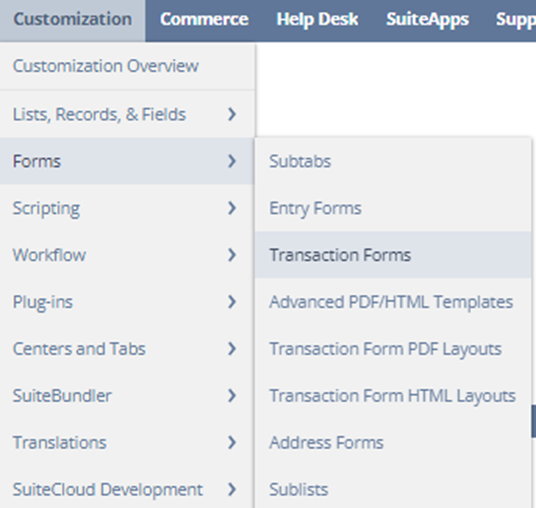
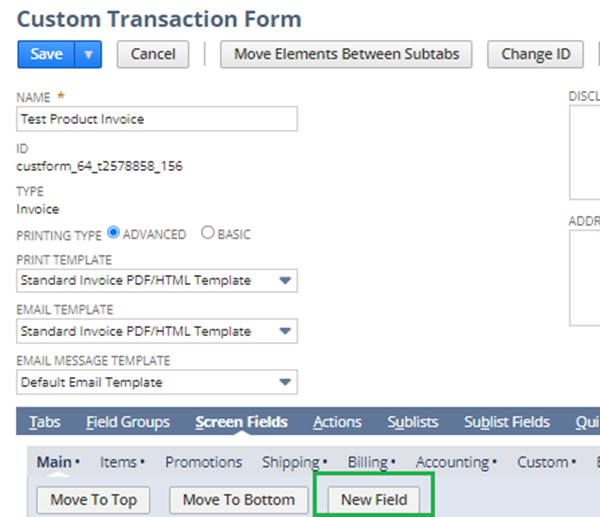
2. To create new fields while customizing forms:
Customization > Forms > Transaction Forms > Edit/Customize a Transaction form (e.g., invoice form) > Screen Fields tab > New Field.

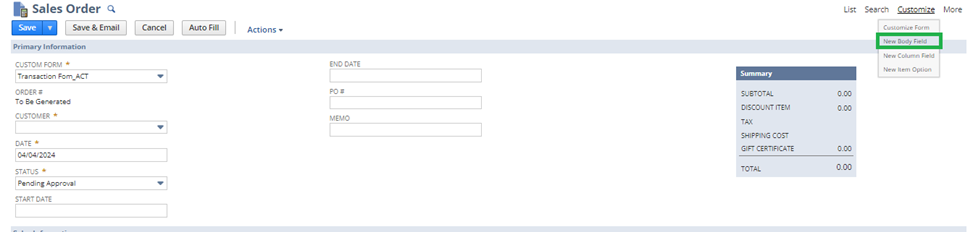
3. To create a new field within a Transaction (e.g., Sales > Enter Sales Order), customize by selecting the “Customize” link > New Body Field.