The starting point is to find the target email in the Sent Email List. If necessary, you can create a custom view of the Sent Email List and add filters to help with that. In my case, my detective control saved search includes the unique message ID which I used to filter the list:


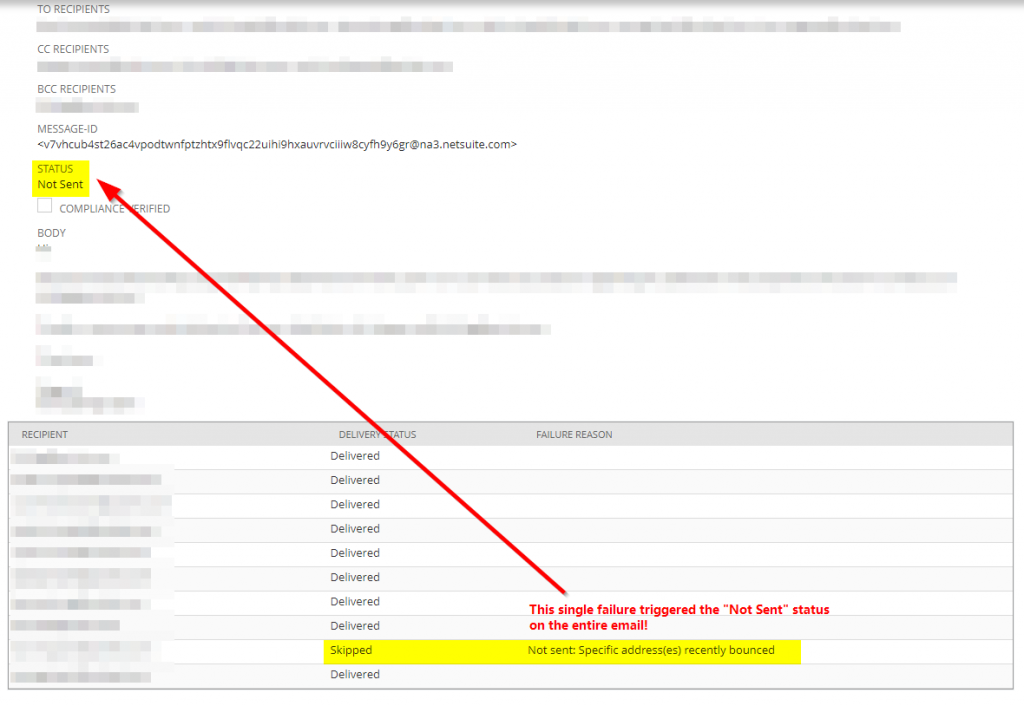
Once you find the email, click on the row number (“#”) to open a detail view. This view contains a list of all the recipients, their individual delivery statuses, and a failure reason.
Isolating Failed Recipients via the Sent Email Workbook
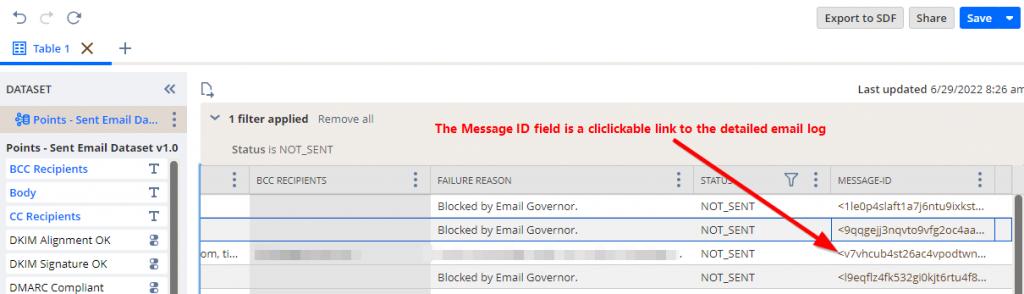
By exposing the Message ID field in the Sent Email SuiteAnalytics workbook, can simply click through to open the detailed email view:
The fact that an email entry shows up under the Communications tab of a record does not guarantee that the email was successfully sent. Always refer to the status information from the Sent Email List.
it is best practice to set up a detective control saved search that flags any unsent emails based on the “Status” field and to periodically review them. As a best practice, I recommend scheduling the search to run at least daily and report issues from the past day so that you are on top of your game.
While the above search will notify us of failures, it does not tell us why the failure occurred. The Sent Email SuiteAnalytics workbook provides more information like the message headers, signatures, and a failure reason field. This additional data often helps us to determine the cause of the delivery failure.

Ideally, we would expect a status that indicates partial delivery in such cases. However, NetSuite only classifies emails as “Sent” or “Unsent”.
